An energy audit can help determine the energy efficiency of your electrical system and make sure it’s sized appropriately
When exploring wild spaces in an RV, van, travel trailer, or boat, it’s important for your vehicle to have an electrical system that will keep your systems running for the duration of your trip. If your vehicle’s electrical system isn’t up to the task or if you want to upgrade your power capabilities, it’s vital to start with an energy audit. A complete energy audit will provide important information about your electrical system to help you make the right choices for your vehicle, usage, and budget.
What is an Energy Audit?
An energy audit is a comprehensive inspection of your energy typically usage used to determine ways to conserve energy or to properly size power systems. In your home, you may hire a professional to conduct an energy audit to look for opportunities to save energy or to size a solar system. For an RV, van, travel trailer, or other off-grid outdoor vehicles, an energy audit can help you determine the size of batteries or the number of solar panels you need.
Conducting an energy audit looks at all of your electronic devices, how much you use them, and helps establish a target amount of power you’ll need to power your devices. For recreational vehicles, this target power number is usually calculated in amp hours per day. For example, you might conduct an energy audit and determine that when you’re boondocking, or camping off-grid, your RV typically uses 50 Ah of power per day.
Benefits of Conducting an Energy Audit on your RV, Van, or Travel Trailer
1. An Energy Audit Determines Your Power Storage and Power Generation Needs
Each of us uses power differently. Some vigilantly turn off lights and other devices when they aren’t in use. Others prefer to have every electronic luxury all going at the same time. Conducting an energy audit on your RV, van, travel trailer, or boat based on how you use it will calculate your unique power needs. Once you know how much power you use, you can ensure your batteries, solar panels, or generator are sized appropriately.
2. An Energy Audit helps you Better Understand your Electrical System
Whether you purchase an RV or build your own electrical system for your van, it’s important to know how your electrical system is designed and how much each device uses. An energy audit provides you with this information per device.
3. An Energy Audit Identifies What Devices Should be Upgraded to be More Energy Efficient
Knowing what each device in your electrical system consumes lets you make better decisions about your system. Discovering which devices consume a large percentage of your power will help identify which device upgrades will save the most power and allow you to extend your trips.
How to Conduct an Energy Audit
Step 1: Measure the Current Draw of Each of your Devices
Most RV, van, travel trailer, or boat electrical systems have a battery monitor. Some smaller or older systems have only a voltage meter (voltmeter) – allowing you to “guess” your battery capacity percentage based on the voltage of your batteries. To conduct an energy audit, a voltmeter won’t do the trick. You’ll need a device that can measure the current (in amps) of each device.
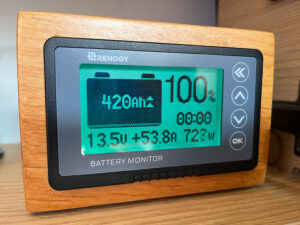
The Renogy Battery Monitor measures your current draw (in amperage) of your electrical system
If you don’t have a system monitor that can measure amperage draw, we recommend picking up Renogy’s 500A Battery Monitor (Read our full review of the Renogy Battery Monitor). At under $100, Renogy’s battery monitor includes a shunt that you install between all of your devices and your battery. This shunt measures the amount of current draw coming out of your battery in real time and displays the result on the battery monitor screen.
Turn off all devices in your system
To measure the current draw of each device, start by turning off all devices in your system. Once all devices have been turned off, your battery monitor should be reading at or near 0 Amps. If your monitor doesn’t read 0 Amps with all devices turned off, check to make sure you haven’t forgotten any. If after double-checking, you still have some current draw in your system, don’t worry. This small amount of power may simply be “parasitic loss” – a small amount of power that your system draws even when off. If your number is more than zero, simply make note of the amount and subtract it from your measurements of each device.
Measure each device
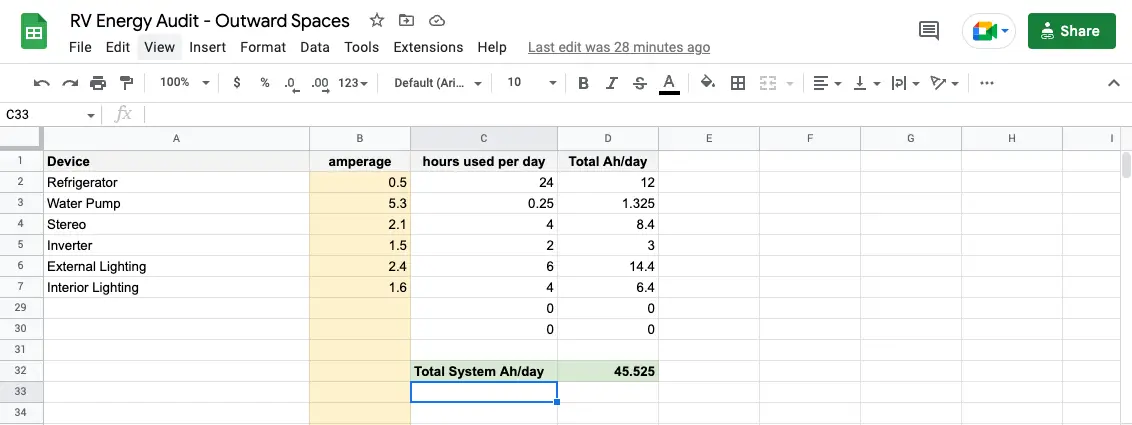
Once you have all devices off, turn one device on and measure its current draw in amps. It’s helpful to have a spreadsheet handy for this step to record your measurements. Make a list of each device in your system and record its current draw in amps next to it. We’ve created a simple spreadsheet to get you started –download it here. You can add and level each device in the first column and record its current draw in the ‘amperage” column.
Download our Energy Audit Spreadsheet to record your device readings and to calculate your total system usage.
Step 2: Determine How Much You Use Each Device Per Day
Now that you’ve identified how much power each device in your system uses when it’s on, you’ll need to note how much time you use each device for.
Add your daily usage (in hours) to the spreadsheet under the “hours used per day” column. For devices that are on all the time, like a refrigerator, coming up with these numbers is easy. For intermittent devices, like a water pump, try to project how many minutes you’re water pump is on per day. If you typically use your water pump 10 times per day for an average of 1 minute, then you use your water pump for 10 minutes per day or .167 hours per day.
Imagine an average day
When determining how many hours per day you use each device, we recommend thinking about an average day. – not a day of heavy use for a particular device. For example, use usage numbers from a typical sunny day where you don’t use your lights during the day as opposed to a dark, stormy day where you might use interior lighting during the day.
Error on the high side
To determine your power needs, don’t cheat these numbers. The end result of your energy audit is the projected daily usage total of your system. If you typically use lights for 4hrs/day but want to cut back to 2/hrs per day to save power, enter the higher number for this exercise.
An electrical system that is bigger than you need is better than one that is less than you need – provided you have the budget. If you are going to guess on your usage, guess on the higher side.
Step 3: Establish your daily usage numbers
To establish how much power each device in your system uses per day, multiply the amperage of the device by the number of hours it will be used each day.
Amperage X Hours/Day = Total Amp Hours per Day
If you’re using our spreadsheet, it will do the math for you for each device. In the “Total Ah/day” column, you’ll discover the amount of power each device listed uses in your system. Because batteries are usually labeled in amp hours (Ah), keeping your energy audit recording in Ah will help more easily determine how your usage stacks up against your storage capacity.
Once you have your daily Ah totals for each device, add them all together to discover your total system needs per day in Ah. If you are using our spreadsheet, you’ll find this number at the bottom in green and labeled “Total System Ah/day”.
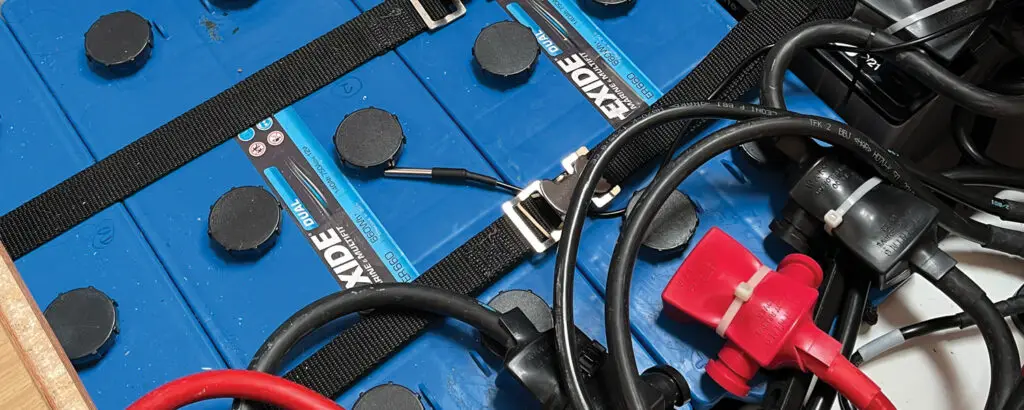
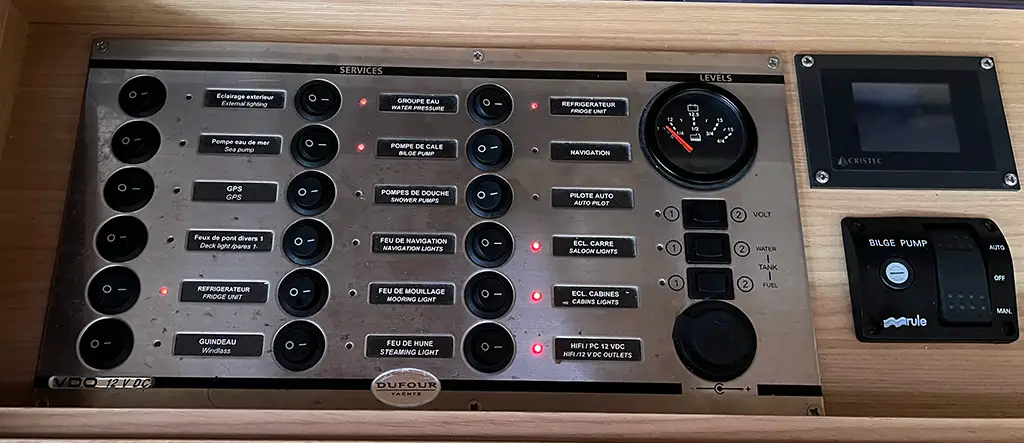
Using your vehicle’s 12V switch panel, turn on each device individually to measure its current draw
Now That You Know Your Daily Power Needs, You Can Make Better Decisions About the Future of Your System
Now that you know your usage, you can compare that number to your battery capacity. If you have a 200Ah battery bank, 200Ah of storage divided by 50Ah of daily usage will give you 4 days of power before needing to recharge. If you want to extend the time you can camp off-grid, you may look at adding a solar system. Let’s say you want to target a camping duration of 7 days with your system. For the 3 additional days, you’ll need to generate an additional 150Ah of power. Having 7 days to generate 150Ah of power means you’ll need a solar system that can generate around 21.5 Ah per day.
Knowing your daily power usage may indicate that you need to add to your battery bank or, if that’s not possible, reduce your power usage by using higher-power devices less each day. If your current electrical system doesn’t fit your power needs, you only have 2 options:
add more power (storage capacity with batteries, charging capacity with solar, generator, etc)
decrease your power usage (limit your usage, shorten your trip durations, etc)
There are a lot of ways to accomplish either (or both) items above. In the end, you’ll need to decide what alterations your electrical system needs based on your needs and your budget. By conducting an energy audit, you’ll now know exactly how much power each device in your system draws, your daily system usage, and how you’re system should be sized. You’ll have a lot more useful information to make informed decisions to improve your electrical system and to save money in the process.
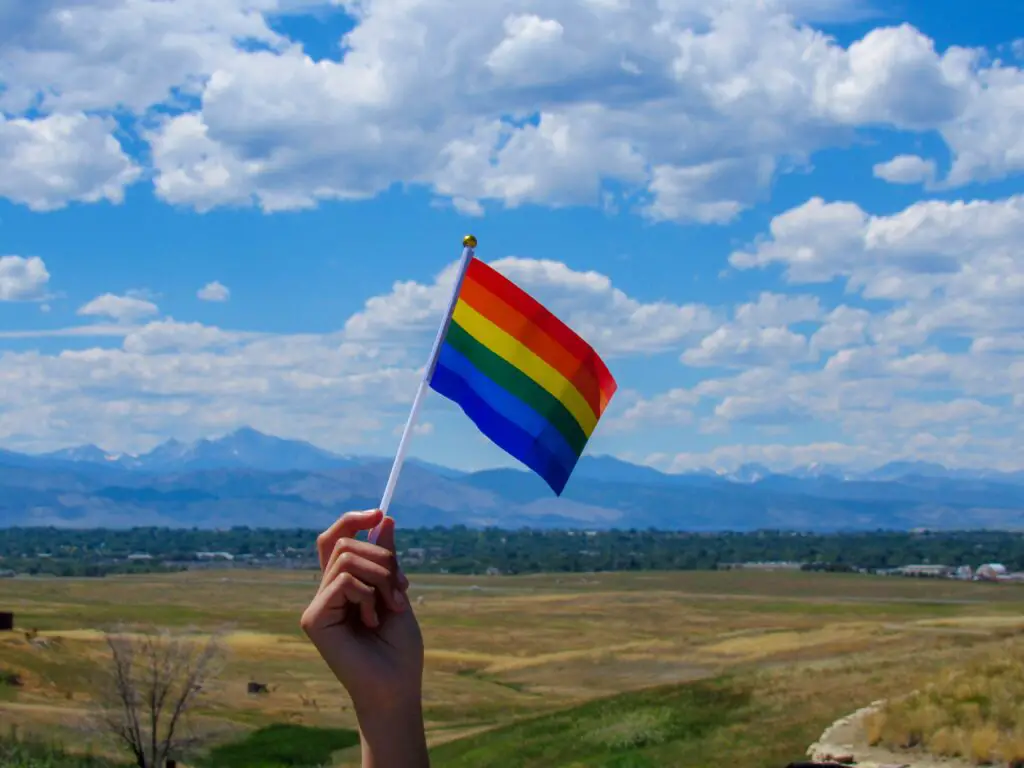
This article is a part of our Outdoor Inclusivity Series – an exploration into the issues that keep some from more fully experiencing and enjoying the outdoors. Read part 1 of this series, “Why the Outdoors Should Be for Everyone”.
We recently ran across this article on Yahoo News about a couple who decided to sell everything, move into an RV, and hit the road. Their story is like so many currently found across blogs and social media – with one big difference – the article describes how, as a lesbian couple, they face judgment and often feel unsafe as they travel. While the article ends on an encouraging note as the couple found unexpected acceptance and community in a Texas bar, their experiences should be concerning to all who love and enjoy the outdoors.
As highlighted in part 1 of this series, the truth about the outdoor community is that it’s not nearly as accessible as it should be for some communities. No one should worry about facing judgment, feeling unsafe, or having to hide their true self when enjoying the outdoors.
Unfortunately, those in the LGBTQ+ community far too often face these challenges.
The Outdoors Stereotype
Breaking the “white, cisgender, and straight” stereotype to be inclusive of those in the LGBTQ+ community is important.
In her article about LGBT people taking on the great outdoors, writer Heather Dockray describes, “an enduring stereotype of ‘outdoorsy’ people: They’re white, cis, straight, and love granola and/or semi-automatic rifles.” If we’re honest, most of us would agree that when we think about outdoor activities like camping, we primarily imagine straight, white people gathered around the campfire.
For LGBTQ+ people, this stereotype creates barriers to enjoying all the outdoors have to offer. Outdoor stereotypes like the one above, serve as a subtle whisper of “this isn’t for you” and “you’re not welcome”.
According to the Momentus Institute, “Stereotypes are the idea that everyone within a certain group shares the same characteristics.” Stereotypes are ways in which we try to categorize others. But stereotypes fail in their oversimplification. While they may hold some elements of truth within them, they ignore the individuality and diversity of interests within a group. Stereotypes also ignore the outliers – those who defy traditional stereotypes. In ignoring these outliers, stereotypes miss out on the full picture and exclude new and diverse voices and contributions.
Because stereotypes don’t include the whole story, they are often harmful to those who don’t neatly fit into them. In his article, “What the outdoor rec industry doesn’t get about the LGBTQ community”, adventurer Mikah Meyer, writes, “Nature doesn’t care who you are, but people do.” Nature doesn’t care about the sexual orientation or the gender identity of those who trek through its lands. So why do we?
Regardless of who we are, we all need to challenge the traditional outdoors stereotype. The outdoors aren’t reserved only for certain types of people. All people deserve to experience the beauty and benefits of outdoor spaces. Breaking the “white, cisgender, and straight” stereotype to be inclusive of those in the LGBTQ+ community is important.
Feeling Safe While Outdoors
Outdoor spaces inherently possess a certain amount of danger. When we venture into nature, we leave the safety net of paved roads, permanent shelters, and emergency services. Nature can be ruthless. Severe weather can surprise us. Rugged terrain can punish us. At some level, the risk of the outdoors is what draws us to it. It forces us to be more self-aware, self-reliant, and thoughtful of our surroundings. A healthy amount of fear of nature helps to keep us safe while we’re outdoors. But when outdoors, no one should have to fear other people.
Kim Kelley Stamp and her wife fear stirring up “an angry reaction from people who disagree with their ‘lifestyle'” while RVing across the United States. Mikah Meyer faced discriminatory comments upon return from his world-record journey to all 419 National Park Service sites. Elyse Rylander, the Executive Director of Out There Adventures, explains some of the questions the LGBTQ+ community has about going outdoors, “What am I going to experience out there in the backcountry?.. I’d much rather encounter a black or brown bear than somebody whose motives I don’t know.”
Members of the LGBTQ+ community often feel weary of their safety when in outdoor spaces. While tragic, this truth isn’t surprising when you consider that 15 US states still don’t have laws against hate crimes that expressly address either sexual orientation or gender identity. Many of these states, including Alaska, Idaho, & Montana, are known for their outdoor offerings. In addition, many RV parks, campgrounds, and managed parks are in rural areas – which can be less accepting of those in the LGBTQ+ community.
No one should have to be fearful when venturing into outdoor spaces. LGBTQ+ people deserve to feel welcome while out on the trail or at RV parks. We all need to be aware of discrimination outdoors – confronting it when we witness it and working hard to ensure we are welcoming to all.
Members of the LGBTQ+ community often feel weary of their safety when in outdoor spaces.
The Lack of LGBTQ+ Representation in the Outdoor Industry
Browse through the websites of most outdoor-oriented companies and you’ll discover a lot of male-centric images of predominantly white, cisgender, heterosexual people. What you won’t see are members of the LGBTQ+ community being represented.
When adventurer Mikah Meyer began to plan his epic journey to visit all 419 U.S. National Park Service sites he struggled to find sponsors. Meyer recognized that potential sponsors would back out at the critical moment they found out he is gay. One sponsor terminated his contract after working with him for 11 months because he was “doing too much LGBT outreach”. REI eventually partnered with Meyer to market its OPT outside campaign marking. According to Meyer, “It was the first time in the history of the industry that an openly gay man was ever featured in any outdoor recreation campaign.”
Civil rights activist Marian Wright Edelman once said, “You can’t be what you can’t see.” For members of the LGBTQ+ community, the lack of representation in the outdoor industry can leave them struggling to find their place in the outdoors. Thankfully, through social media LGBTQ people are beginning to change the narrative.
“We’re creating our own outdoor narrative,” author and podcaster Jenny Bruso told The Advocate. “One that fits all of us. Through social media communities and hashtags, we’re able to find each other and have our social media feeds represent the broad spectrum of who’s truly recreating outdoors while the traditional platforms and brands represent the same narrow image we’ve grown accustomed to.”
LGBTQ+ Organizations Are Working to Make the Outdoors More Inclusive
LGBT Outdoors is building a network of LGBTQ+ outdoors enthusiasts to encourage in-person connections Photo credit: LGBT Outdoors
Over the past few years, some great LGBTQ+ organizations have taken the lead in breaking stereotypes, creating safe spaces for LGBTQ+ people, and increasing LGBTQ+ representation in the outdoor industry. Here’s a list of some of the organizations, websites, and social media accounts we love:
People of color often feel uncomfortable and “out-of-place” in outdoor spaces.
Take a walk through a forest and you’ll find yourself in awe of the sheer beauty of the green trees whistling gently in the wind. Camp among hundred-foot-tall red rock faces and you’ll be overwhelmed with the awareness of the smallness of your existence. Listen to the waves crash on a rocky cliff leaving behind a foamy aftermath and you’ll become keenly aware of the power of nature.
Time spent outdoors is full of exhilarating and spiritual experiences that often leave us changed somehow. They are special encounters that can’t seem to be duplicated in the city or in our everyday lives. The outdoors are life-giving – providing both rest and inspiration in a single moment. As I reflect on the love I feel for the outdoors, I consistently return to a single question, “Why don’t more people regularly venture into the outdoors?”.
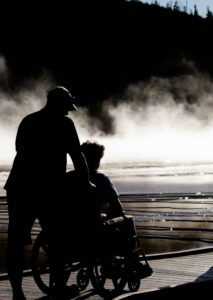
For many people, the answer to this question is about access. For various reasons, not everyone has access to nature. For those with disabilities, pathways and trails aren’t often designed with them in mind. Members of the LBGTQ+ community have expressed feeling fearful and unwelcome by others in outdoor spaces. People of color often feel uncomfortable and “out-of-place” in outdoor spaces. Those with limited finances can struggle to find reliable transportation and the ability to purchase outdoor gear.
National Parks are making changes to help make trails and pathways more accessible to disabled visitors
Outdoor spaces are available to all, but are not always accessible to all.
The reality of the outdoors and of the outdoor recreation industry is that it’s typically been dominated by wealthy, able, straight, white people. For those defined in other terms, accessibility to the outdoors is a major barrier that will only be conquered by all of us thinking differently about outdoor spaces. All people deserve the privilege of access to nature. They deserve the therapeutic benefits of feeling a fresh mountain breeze across their face, observing the rhythmic crashing of waves against the shore, and taking in a dark sky filled with stars. The outdoors deserve all people as well. As the threat of urban growth and global warming threaten public lands and wild spaces, outdoors spaces depend on a diversity of voices to defend and protect them.
We need to do better. Here’s why:
Public lands are “owned” by us all
The federal government oversees 640 million acres of land in the US. These federally-managed public lands make up just under 30% of all land area in the United States. In addition, countless non-federal public lands including state parks, forests, wildlife areas, parks, forests, greenways, and other units are managed at county and municipal levels. In the US, we have a LOT of outdoor spaces to explore. The best part about these public lands is that they are provide access to nature by all.
These lands aren’t owned by only specific groups, but by all people. They are lands reserved and protected for all of our use. They are the property of those in the disabled, LGBTQ+, and BIPOC communities equally. It’s time that we get better at inviting these groups to enjoy their own lands.
Outdoor spaces are good for us all
More and more research is telling us that time spent outdoors is good for us. Most people would agree that spending time outdoors is good for our physical health, but research shows that time spent outdoors has a positive effect on our mental health as well. According to the American Psychological Association, time spent in blue and green spaces has cognitive benefits and can lead to increases in happiness, subjective well-being, positive affect, positive social interactions, a sense of meaning, and purpose in life.
Those who spend a lot of time outdoors already know this anecdotally – the time spent outdoors is good for our bodies, minds, and souls. These important benefits of outdoor experiences should be available (and accessible) to all. Regardless of a person’s ability, skin color, sexual preference, gender identity, or bank balance, all people deserve the therapeutic advantages of time spent outdoors. In a world filled with devices, relentless schedules, and unforgiving expectations, we ALL need the outdoors more than ever. Let’s be better at creating equal and equitable spaces for ALL to enjoy the benefits of outdoor spaces.
While enjoying the outdoors, some members of the LGBTQ+ community have experienced angry reactions from others who disagree with their “lifestyle.”
The outdoors community is better with a diversity of voices
A diversity of voices and perspectives make us smarter and stronger. As we imagine new technology, ways to manage public lands, and ways to be more inclusive, it’s vital that we ensure that many different voices and perspectives are heard.
How can National Parks be more friendly to those who are disabled? What can we do at campgrounds and state parks to prevent expressions of hate toward those in the LGBTQ+ community? What steps can we take to reverse decades of racial discrimination that people of color have experienced in the outdoors community? What outdoor gear can be reimagined at lower price points to lower the financial barrier of entry? How can we make outdoor spaces more accessible for all? These are all questions that are best answered from within the communities they affect. Each of us knows our experiences and each of our experiences is different. Adding in folks who have had different experiences and have different perspectives can only make the outdoors community smart and stronger. It’s time we elevate a diversity of voices in the outdoors community.
The outdoors need us all
When we spend time in outdoor spaces, we become more connected with nature. This connection leads to increased awareness of the environmental challenges we face. With climate change threatening our beloved outdoor spaces (along with the rest of the planet), we need as many people as possible to join the fight. The outdoors need ALL of us to protect and preserve our public lands. Let’s encourage ALL people to join us in protecting outdoor spaces.
At Outward Spaces, we’re committed to promoting the accessibility of the outdoors for all
As we further explore the challenge of equal access to nature, we’re compiling lists of resources of articles, organizations, and companies that are already tackling this issue head-on. There are so many awesome folks working every day to help those who lack access to outdoor spaces. Their efforts both inspire us and challenge us to be more aware of the experiences of inaccessibility some face.
This article is the first of our “Outdoors Inclusivity Series” we’ll be posting in the coming weeks. Our hope is to help bring attention to the challenges keeping some from more fully experiencing and enjoying the outdoors. In this series, we’ll focus on how different communities face accessibility and inclusivity issues in outdoor spaces, suggest ways in which others can help, and point to organizations working with these communities. We’d love your thoughts and feedback throughout this series. If you have stories to share or know of great organizations we’ve missed, please let us know in the comments.
Remember, the outdoors should be for EVERYONE and access to nature should be available equally for all.
View more articles from our Outdoor Inclusivity Series:
Everybody’s definition of what is the wild is different. For some, the wild might be a hike in the hills on the outskirts of town. For others, the wild is backpacking deep in the mountains far from civilization.
My definition of the wild is somewhere in between. I love exploring spaces off the beaten path, usually right on the edge of cell phone coverage. On most trips I take into outdoor spaces, I can’t be sure whether I will have a cell signal where I am going or not. Sure, cellular carriers all have coverage maps, but I find these unuseful for accurately determining whether or not I will be able to make a call in an emergency.
For many, one of the main thrills of exploring the wild is the potential for improvising and displaying self-sufficiency in emergency situations outdoors. For sure, all explorers of wild spaces should have some basic understanding of how to make it out alive when something goes wrong, but I prefer always having a way to “call home” if things go sideways.
Safety in the outdoors demands an appreciation for redundancy. Relying on only one way to start a fire or only one source of food can quickly become a mistake when off-grid. You may be wired differently, but when I’m heading out to enjoy the outdoors, the last thing I am interested in is enacting my own personal survival show. It’s important to me (and to those who depend on me) to come back safely at the end of my trip. Exploring wild spaces is one of my favorite things to do, but it’s not worth my life.
The good news is that we no longer have to take unnecessary risks when spending time outside civilization’s bounds. Cellular coverage in the United States is ever-expanding and you might just find that your favorite spot in the woods has just enough “bars” to get a call out. I’m consistently surprised by where I can manage to find a cell signal these days.
The challenge with relying on cell service is that you never know if you will have it or not when you’re off the beaten path. You may be able to Facetime your family while camping for a night miles outside of the nearest town, but you may not be able to get a call out over the next hill while hiking the next day. I’ve sailed down the California Coast and been able to answer work emails or stream music without issue. I’ve also sailed very similar routes and not had cell coverage for most of the day. The bottom line is that you never know what coverage you will have when you’re exploring remote spaces. If you’re like me, I want a backup plan when I’m off the grid.
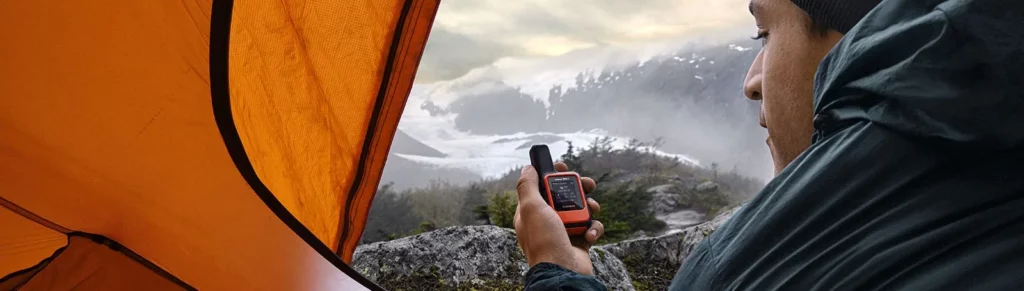
The answer is a satellite communicator – a communications device that utilizes a network of satellites to keep you connected to the outside world, even without cell coverage. With one of these babies, you’ll never need to worry about being outside of cell range again. If something goes wrong while you’re off the grid, a satellite communicator will allow you to send a text to family and friends or call emergency services no matter where you find yourself.
Types of Satellite Communicators
Distinct from satellite phones, satellite communicators are primarily designed to communicate via short bursts of data – text messages, location updates, and even weather reports. While there are a number of models of satellite communicators on the market, there are two main types of satellite communicators.
Satellite Communicators that are designed to be used with your cell phone
These devices don’t have an onboard keyboard and thus can’t be used directly to get a message out. They are meant to be paired with a mobile device with a companion app that handles messaging. These devices are typically cheaper and smaller but do require extra steps to get a message out when far from home.
Satellite Communicators that can be used without a cell phone
These devices can be used on their own to message home but also can connect to a mobile device and companion app for easier messaging. They typically have more features that may include GPS mapping, an altimeter, a compass, and other useful tools. Some devices of this type include a screen and keyboard (think the old Blackberry format) and others utilize a screen with a number of buttons that can be used to type out a message.
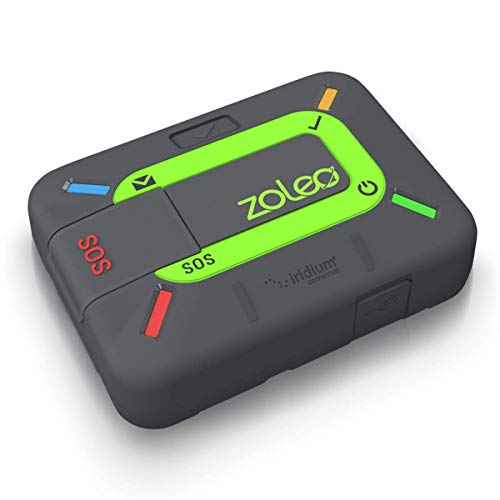
The Zoleo Satellite Communicator is a wallet-sized black and green device that is marketed to extend your messaging capabilities around the globe without coverage gaps. When paired with its free companion app, the Zoleo uses wifi or a cellular network to send and receive messages when available. When not in wifi or cellular range, the Zoleo uses the Iridium satellite network to get your messages out. It has a protected SOS button on its front as well as an additional “Check-in” button that allows for sending predetermined check-in messages without using the phone/app. Once activated with a Zoleo plan, the Zoleo includes a dedicated SMS number and email address – a nice feature that makes for easier messaging for friends and family.
The Garmin inReach Messenger is an all-black, square device that’s about half the size of a cell phone – though thicker. Much like the Zoleo, the inReach Messenger is meant to be paired with a companion app and it has minimal direct functions on the device. Unlike the Zoleo, the inReach Messenger includes a small, black-and-white, display on the front of the device to allow you to see what’s happening on your device without using your phone. The Messenger also takes advantage of your connected phone’s cellular or wifi connectivity (when available) to send messages without tapping into your satellite service plan allowance. With up to 28 days of battery life and a “safety charging” option – allowing you just enough juice to send a message – the inReach Messenger is a great option for those serious about the outdoors, as well as serious about safety.
The Garmin inReach Mini 2 is Garmin’s fuller-featured satellite communicator. The Mini 2 is a tiny device with a larger display than the Messenger allowing for some advanced routing and tracking features when hiking. The larger display gives you the ability to scroll through received messages and easily send preset messages. Fitting easily in your hand, the biggest selling feature of the Mini 2 is its small size. Like most of these devices, pairing the Mini 2 with its companion app makes the device infinitely more usable. Overall the Mini 2 is a nicely designed device, but it doesn’t give you a whole lot more than the Messenger.
The ACR Bivy Stick is similar to the Zoleo in that it doesn’t have a display on the device itself. Its rectangular shape includes a large hole through the top of the device to use for hanging. While most will hang their satellite communicator from a backpack, devices that have easy attachments to hang, like the Bivy Stick, allow you to store it in more places. Speaking of storing it, the Bivy Stick relies heavily on its companion app to access and complete the typical satellite communicator features: global satellite messaging, weather reports, location sharing and tracking, and check-ins. Like other similar devices, it does have dedicated check-in and SOS buttons. One plus with the Bivy Stick is that its available service plans do not have activation fees.
For the messaging addicts out there, the Spot X is a satellite Communicator that has a built-in keyboard. With a similar “Blackberry” designed front, half of the Spot X is a display and the other has a small keyboard. Beyond the keyboard, the Spot Z also has dedicated SOS and tracking buttons. With its own dedicated phone number, the Spot X truly is a stand-alone device. With most of the industry moving to devices that heavily rely on companion apps, some may love the independence of the Spot X. While it does have its own companion app, the Spot X is the device most capable of being used without the app. With only one battery to worry about keeping charged and only a single device to worry about, the Spot X may be perfect for the minimalist outdoorsmen types.
Satellite Communicators rely on a satellite network to send and receive messages outside of cell phone range. Each company has its own service plans for its satellite communicators. When choosing a plan, first consider the number of messages you’ll need per month as well as the costs involved to suspend your service in months when you won’t make it off-grid.
Zoleo Plans:
Basic
In Touch
Unlimited
Monthly Fee
$20
$35
$50
# of Satellite Messages
25
250
Unlimited
Additional Messages
50¢/ea
50¢/ea
Free (unlimited)
Zoleo Plan Notes:
$20 activation fee for all plans
Location Share can be added to all plans for $6/mo
Once activated, plans can be changed or suspended after 3 months
$4/mo to suspend service
Garmin inReach Plans:
Safety
Recreation
Expedition
Monthly
$14.95
$34.95
$64.95
Annual
$11.95/mo
$24.95/mo
$49.95
# of Satellite Messages
10
40
Unlimited
Additional Messages
50¢/ea
50¢/ea
N/A
Garmin inReach Plan Notes:
$29.95 activation fee for annual plans
$34.95 annual program fee for monthly (freedom accounts)
Unlimited Check-in (preset) messages are included in all plans
Unlimited Tracking/location points are included in the Recreation and Expedition plans. 10¢ each for Safety Plan
Free to suspend service after 30 days (must pay annual fee only)
Bivy Plans:
Basic
Plus
Unlimited
Premium
Monthly
$19.99
$34.99
$59.99
$69.99
Annual
$14.99/mo
$29.99/mo
$54.99
$64.99
# of Satellite Messages
20
80
Unlimited
Unlimited
Additional Messages
75¢/ea
50¢/ea
N/A
N/A
Bivy Plan Notes:
$0 Activation Fees
Unlimited Check-In messages (preset) are included with all plans
Once activated, plans can be changed or suspended after 4 months
Free to suspend service after 4 months
Spot Plans:
Basic
Advanced
Unlimited
Monthly
$14.95
$29.95
$39.95
Annual
$11.95/mo
$19.95/mo
$29.95
# of Satellite Messages
20
100
Unlimited
Additional Messages
25¢/ea
25¢/ea
N/A
Spot Plan Notes:
$29.95 Activation Fee for all plans
$34.95 Annual Fee for monthly (Flex) plans
Unlimited Check-In messages (preset) are included with all plans
Once activated, plans can be changed or suspended after 4 months
Free to suspend service after 30 days for no fee (annual fee still applies)
Most of us really don’t need (or want) to stay in touch with those back home while we’re out in the wild. We don’t need to carry on full text conversations when we’re camping, hiking, fishing, sailing, or doing anything else off the grid. What we need is the safety of being able to communicate with friends, family, and emergency services IF we need to. The Zoleo gets the messaging and SOS functions done well. And if you do choose to send a few more messages while outdoors, the Zoleo and its companion app can do that too. But the price of the Zoleo is what sets it apart. It’s the cheapest device on our list and its service plans are some of the cheapest and most flexible of the bunch. It’s a great device. It does everything the others do at a much lower price. If you’re looking for a satellite communicator, save your money for other gear and get the Zoleo.
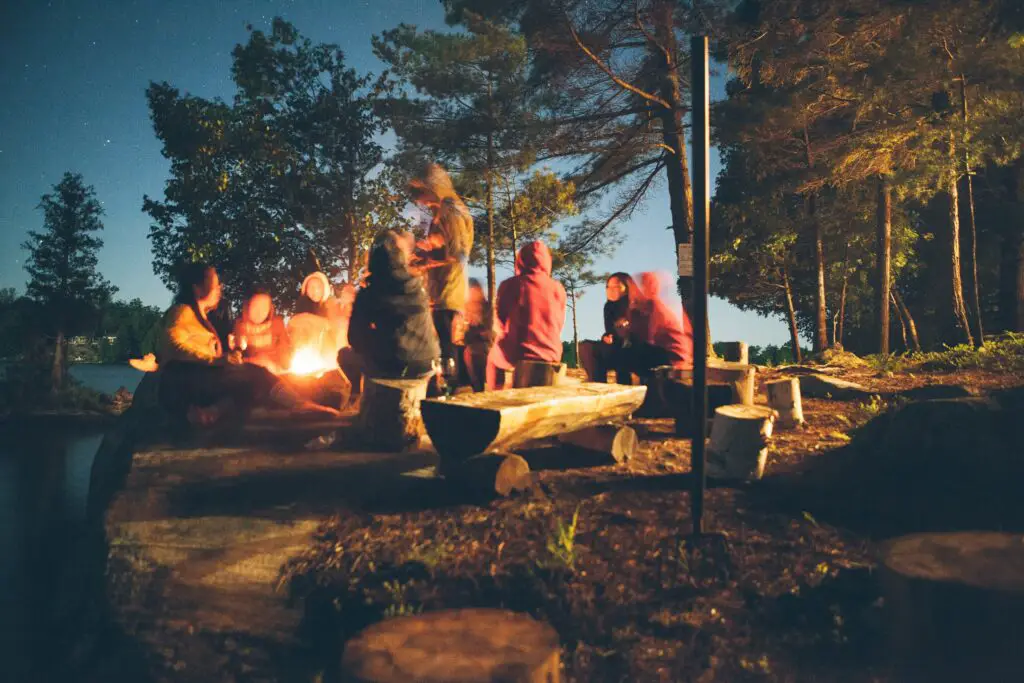
Camping is an awesome way to start enjoying the outdoors.
Camping is one of the best ways to leave the stress of everyday life behind and enjoy the beauty of the outdoors. The fresh air, starry skies, and campfire all allow for unique experiences that help refill our tanks. If you’re jonesing for some time outdoors, in this guide to camping for beginners, we’ve put together some tips to help you on your initial trips. Following these steps will ensure successful camping for beginners.
Initial Tips
Start with Car Camping
Car Camping doesn’t mean sleeping in your car (though this is an option). Car Camping simply camping somewhere you can drive to and unpack all of your gear. Car camping allows you to pack anything you might want to bring along without worrying about the size and weight restrictions of what you bring.
Keep it Simple
Don’t overthink your first few camping trips. You don’t need to find nearby hikes to fill your day or catch your own fish for dinner. Ensure a successful and pleasant entrance into camping by focusing on the essentials and leaving plenty of time to simply enjoy the experience.
Keep it Short
Don’t be overly ambitious on your first few trips. An overnight camping trip allows you to bring less, requires less planning, and has less to go wrong. Get the basics down for a single night before pushing things on a multi-day trip that requires a lot more preparation and planning.
Don’t Stress About Not Having All the Right Gear
Don’t be intimidated by all of the specialty camping gear available on the market. You don’t need to spend hundreds of dollars to have a fun camping trip. You can bring a lot of necessary gear from your home to get you through your first few trips. When you decide to camp more frequently, then you can invest in gear.
Planning Your First Trip
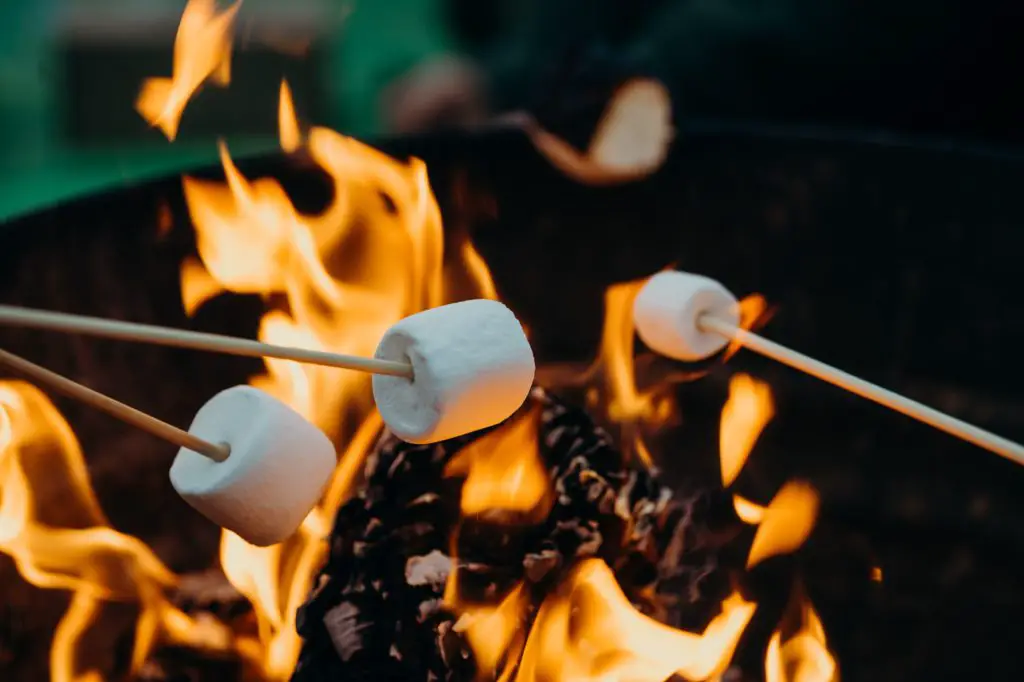
Making s’mores over a campfire is a “must-do” activity when camping.
The key to successful camping for beginners is proper planning. Once you’re comfortable sleeping outdoors, planning is less essential, but when just getting started with camping, it’s important to think through your trip beforehand.
Where to camp
Modern campgrounds are typically a mix of rustic and comfortable. Most campgrounds have toilets, potable water, and garbage facilities on site. Campsites typically have a parking spot (or 2), a cleared and level area for your tent, and a picnic table. Some campsites have a firepit ring.
The best campsites to choose when beginning camping are ones that are reservable online. Reserving your spot ahead of time will ensure that you have a site when you arrive. The website Recreation.gov has a searchable list of campgrounds in National Forests across the US and is a great spot to start your search. Campendium is another campsite resource we highly recommend. While primarily focused on RV campers, Campendium has campground reviews, cell service information, and camper-taken photos that can also help you find the perfect tent campsite. Popular campsites book quickly, so plan ahead to reserve your dates.
Most campgrounds have a number of campsites that aren’t reservable. These are first-come-first-serve campsites that can be claimed when you arrive. If you head out without a reservation, make sure to plan to be there early to have the best chance to get one of these spots. Don’t plan on arriving at 5 pm on a Friday and being able to find a spot. Your best bet is to plan on arriving just before the “check-in” time to grab an open spot before the masses arrive.
Watch the Weather
Knowing what Mother Nature may throw at you while camping is important. Not having warm enough clothes during a chilly evening or having your single pair of shoes soaked by rain can ruin a camping trip quickly. Check the weather at your camping location when packing to make sure you have the right clothing. If rain is in the forecast, don’t necessarily cancel your trip – some of our most memorable outdoor experiences have been accompanied by the soothing sound of rain on our tent’s roof. On the other hand, if the forecasted low temperatures are cooler than expected or if extended rain is in the forecast, it may be a good idea to reschedule.
Temperatures also will have an effect on your outdoor activities. If it’s hot during the daytime, you’ll want to make sure you have plenty of shade – either by trees at your campsite or provided by the gear you bring. If rain is in the forecast, make sure to plan indoor activities. Books and board games are great things to have on hand for rainy days spent inside your tent. When camping, it’s important to allow for weather to be a part of the experience. A rainy day is a great excuse the get that long nap you’ve been dreaming of taking or working through that book you wish you had more time to read.
Whatever the weather is, be sure to plan and pack accordingly. Bring an extra change of clothes in case you get wet. Pack layers of clothing. Remember that you can always remove layers as temperatures warm. For your first few camping trips, steer clear of nighttime temperatures lower than 40 degrees. You’ll most likely need specialized gear or a heat source to sleep comfortably in temperatures lower than 40.
Plan Properly
Beyond watching the weather, it’s a good idea to think through your trip to make sure you have everything you need. If you plan on exploring the nearby area and plan to leave your campsite unattended, do you have a plan to secure your valuables? If you plan on fishing in a nearby creek, don’t forget to pack your rod, reel, bait. Do you have a valid fishing license? Looking forward to having s’mores around the campfire at night, don’t forget to bring everything you’ll need to start the fire and the ingredients for the s’mores. Even the most experienced campers forget things from time to time, but walking through your trip outdoors will help you make decisions before you head out.
What to Wear
When packing for your first camping trip, don’t over-pack – one of the joys of camping is the simplicity of it, and lugging around extra gear isn’t fun. Bring what you’ll need, with backups of the essentials in case of rain. Like your mom suggested when spending the night at a friend’s house when you were a kid, an extra pair of socks and underwear is always a good idea. Pack warmer clothing that you think you’ll need. It’s easy to add and remove layers of clothing as the temperature changes, but it’s tough to do if your layers are at home. In the outdoors, evenings and early mornings can be chilly – it’s part of the charm of camping – so plan accordingly. If rain is in the forecast, a light rain jacket will do wonders to keep you dry.
Shoes
You don’t have to go out and buy hiking boots to go camping. Honestly, for many hikes, you don’t need hiking boots. In most cases, simple tennis shoes will do fine for both camping and hiking. Since you’ll be treading in natural areas, open-toed shoes aren’t ideal. You can bring a pair of sandals if that’s your thing, but you’ll discover quickly that your feet will be filthy. In case your shoes get wet, it’s a good idea to have a second dry pair t put on. It’s not necessary, but if you have the room, bring them along.
Toiletries
If you’re camping for one night, toiletries will be minimal, but there are a few items you shouldn’t be without when camping for the first time. Make sure to bring your medications and personal hygiene items. You won’t need to worry about shower items as you most likely won’t have a shower at your campsite – you don’t need a shower anyway for one night away. Bring hand soap and a bottle of hand sanitizer is always good to have on hand in a pinch. A first-aid kit is helpful to have in case of injury, but you can also just bring a few bandaids and medication from home. I always bring along some sort of pain reliever when I camp and recommend bringing a small bottle to fight off a headache, stiff back, or sore muscles. Don’t forget sunscreen and bug spray – you may not need them, but you’ll be glad you packed them in case you do. A towel to dry your hands and a roll of toilet paper in case the campsite bathroom runs out are also good ideas.
Meals while Camping
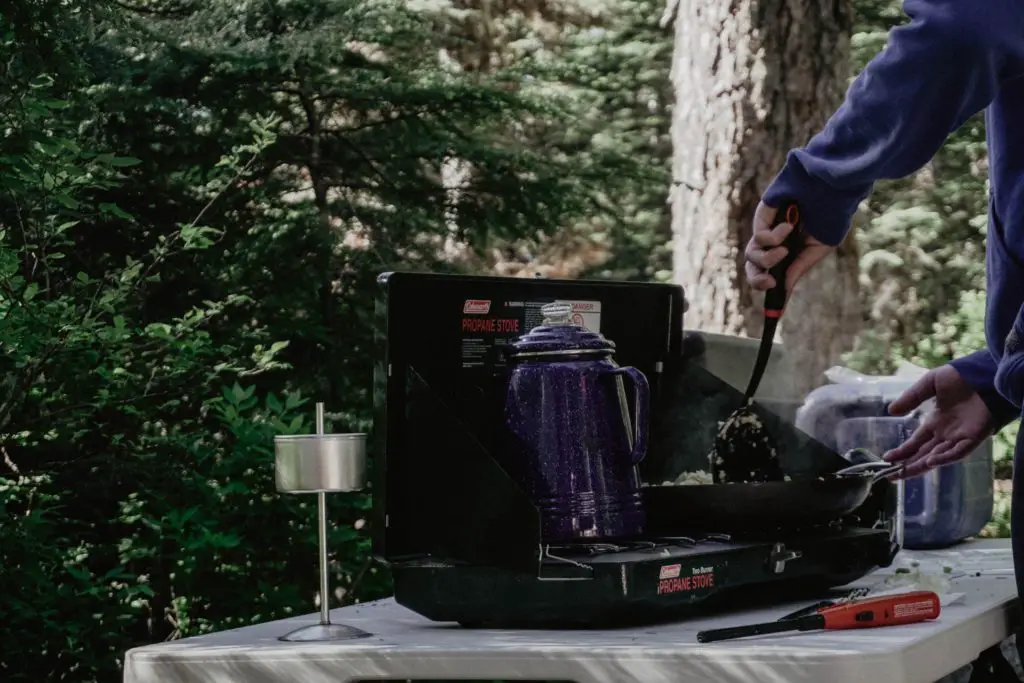
A 2-burner stove allows you to make coffee while cooking breakfast.
With a little advanced preparation, camping meals can be a highlight of the experience. Regardless of how you approach cooking while camping, it’s important to plan out your meals before you leave for the trip. Meals with simple ingredients and simple preparation are best, but that doesn’t mean your camping meals have to be bland or boring.
I’d caution against being overly ambitious on your meal planning for your first few trips. Scratch plans to cook over an open fire. Weather conditions and fire restrictions may leave you hungry if you don’t have another way to cook your food. It’s better to plan meals that can be cooked over a small camp stove. Plan meals that will be easy to cook and pull off while outdoors with minimal effort. Hamburgers, bratwurst, or even chicken breasts marinated at home are great lunch or dinner options.
Breakfast is typically the meal my family looks forward to while camping. There’s nothing better than some eggs, country potatoes, and bacon – all cooked in the same pan after a night of deep sleep under the stars. Pancakes are another campground favorite. A “just-add-water” pancake mix makes the process easy with minimal utensils needed.
Lunch is the easiest meal to keep it super simple. Sandwiches are a great option here to keep the stress low, but any dinner meal can also be subbed in for lunch.
Basic is best in the spice & seasoning department. Salt and pepper are must-brings, but packing your favorite all-around seasoning is a good idea as well to give your meals an extra kick of flavor.
Don’t forget the coffee or tea. If you have a stovetop kettle and have room in the car, bring it along. If not, you can heat water in a pot on the stove to use for your coffee or tea. When camping, I make my coffee using a stovetop espresso maker (moka pot), but a percolator will do the trick as well.
Whether you grab dinner on the road on the way to your campground or cook a 5-course dinner at your campsite, thinking through each meal ahead of time will help you shop and pack appropriately. And don’t forget the details to make sure you bring everything you need along on the trip.
Essential Gear for Camping
Campsites are built to help campers get into nature. They are primitive with only basic facilities (water, bathrooms, trashcans), so keep that in mind when packing your gear. Camping is all about getting away from the complexity and stress of everyday life in the city, so embrace the environment you’re headed into. Pack what you need, and leave behind what you don’t.
A typical campsite will have an area for your tent, a table, a parking lot, and (possibly) a campfire ring. Bathrooms and water sources will be a short walk away. The benefit of car camping is that you can bring as much gear as you can fit in your vehicle – and can leave it in your car if you don’t need it.
Camping gear can be expensive. Don’t be intimidated by the high cost of some camping gear or discouraged by the wide variety of specialized gear that you don’t have. Ask friends, family, or a neighbor to borrow the essentials before investing in the gear yourself. Whether you purchase the essentials or borrow them, here is a list of the gear you’ll need for a successful camping trip.
Tent – Your tent will keep you out of the rain and away from the bugs while you sleep. Tents are rated by how many people they will sleep, but it’s wise to size up for extra room if possible. 3 or 4-person tents will be perfect for a couple and 6 or 8-person tents will sleep a family of 4 with room to breathe. This 3-person Colemen tent is highly rated and is easy to put up if you choose to invest in a tent rather than borrow one. Whether you buy or borrow a tent, it’s a good idea to set it up in your backyard before heading to the mountains. This “practice” will make setup at your campsite a breeze and save you stress on your camping trip.
Sleeping Bag – Sleeping bags typically have temperature ratings – the outside temperatures they are rated to keep you warm in. For most beginning campers venturing out in warm weather, a 3-season bag will be more than warm enough. Rectangular sleeping bags (not mummy bags) are the better option for beginners as they’ll give you room to move while you sleep. This Oaskys 3-season Sleeping Bag comes in a variety of colors and is a great value pickup for beginning campers. If you’re camping on a budget, you can also bring bedding from home to use while camping. Fleece blankets or duvet comforters work great and make it feel like you’re sleeping in your own bed. Just don’t bring anything that you can’t handle getting dirty – it will get dirty.
Sleeping pad (or air mattress) – Your sleeping bag will keep you warm, but it won’t do much to protect you from the hard ground you’re not used to sleeping on. For most of us, sleeping on a hard surface is guaranteed to equal a sore back in the morning. A sleeping pad will help provide some cushion between you and the ground. It won’t be near as comfortable as your mattress at home, but it will be much better than sleeping on the ground – trust me. Another option is to pack an air mattress – especially for those that already have one laying around for house guests. Air mattresses will keep you higher off the ground than a typical sleeping mat, but will take more effort to blow up. Another issue people often have when camping with air mattresses is air loss during the night. Temperatures fluctuations and small leaks can find you waking up to a leaky air mattress. In my opinion, if you trust your air mattress, it’s worth the risk.
Light – Campsites can get dark at night. The benefit of the darkness is the ability to see stars you couldn’t imagine in the city. The challenge is that if you don’t pack adequate light sources, you can be left struggling to see much of anything. Flashlights are the easiest to bring as most of us have a few laying around the house. They provide directional light and when shined at the top of the tent, can illuminate a great deal of space. For lighting to light up larger areas, a lantern is a great piece of gear to have. While kerosene lanterns were the light source of previous generations of campers, LED lanterns are the way to go now. This LE LED rechargeable lantern with a 4400mAh power bank provides light for your campsite and will charge your phone as well.
Camp Stove – The classic 2-burner propane camping stoves are the way to go for beginning campers. The simple devices have two burners that can handle all but your largest kitchen pots and pans and use small 1lb propane tanks that are easily found in stores. The tops of these stoves fold up to form a windscreen to help prevent wind from getting in the way of your cooking. Most people who camp semi0seriously have some version of this classic camp stove and it should be easy to find someone to loan your theirs. You may also be able to find a used one at a discount online. I wouldn’t have too much anxiety about buying one of these used – they typically last a long time.
Cooking Gear – You can bring your pots, pans, and utensils from home on your first few camping trips – so don’t feel the need to go out and buy these new for your camping trip. If you have nice stuff in your kitchen you don’t want to risk damaging while camping, you can often build a “camping” set of pots, pans, and utensils at your nearby thrift store for next to nothing. If you go this route, it’s a good idea to keep all of your camping kitchen gear in a plastic tub for easy storage and quick transport. If cooking is your jam and you want to invest in a good pan and pot for camping, consider picking up this cast iron combo set. Don’t forget to bring along biodegradable dish soap (we love Dr. Bronner’s Pure Castile Soap – an 18-in-1 soap) and a scrubbing pad to do dishes after your meal. While campgrounds typically have water available, most don’t allow washing dishes at the water source. So bringing a plastic tub to serve as a wash basin is a great idea.
Cooler – You probably already have a cooler stored somewhere. On a short camping trip, your cooler, filled with ice, will serve as your refrigerator – keeping your food (and beer) cold. If you don’t have a cooler, borrowing one from a friend or neighbor should be pretty painless.
Camp Chairs – Folding camping chairs aren’t a necessity as most campsites have a table already, but having a few on hand will allow you to sit and relax wherever you want at your site. You’ll especially love having them to sit around the campfire on a chilly evening. Of all the items on this list, investing in a few inexpensive camp chairs will give you the most use beyond camping. They’re great for backyard parties, kids’ sporting events, or just about anywhere you want to sit for a while.
Cups and Water Bottles – While disposable cups and plastic water bottles seem convenient for a camping trip, the extra waste they leave behind isn’t worth the convenience. Bring along some reusable drink tumblers and metal water bottles instead. You can find some great options at Outward Goods including our insulated wine tumbler, sherpa tumbler, and our 22oz vacuum insulated bottle. These all make great items to have when camping and can also be used around the home while keeping your drinks at the desired temperature – in style!
Water Container – At your campground, water will usually be found a short walk from your campsite. It’s great to have a larger water container to fill up once at the start of your trip and then to use to dispense water at your site. We typically keep our water container on the campsite table at all times for easy access to water for drinking, cooking, and cleaning.
Bonus Tips
Don’t forget the pillows. The most forgotten item when my family goes camping are pillows. Having a pillow while camping can make all the difference in the world – don’t forget yours.
Google camping recipes. If you want to put some extra culinary effort into your camping experience, you’ll find some pretty creative camping meal recipes online. These 27 Easy Camping Meals to Make Camp Cooking a Breeze from Fresh off the Grid is a good place to start.
Bring along a power bank. While the point of camping is to get away from technology, it’s wise to keep your phone close by and charged in case of emergencies. Having a power bank on your trip will ensure you can keep your phone charged the whole time.
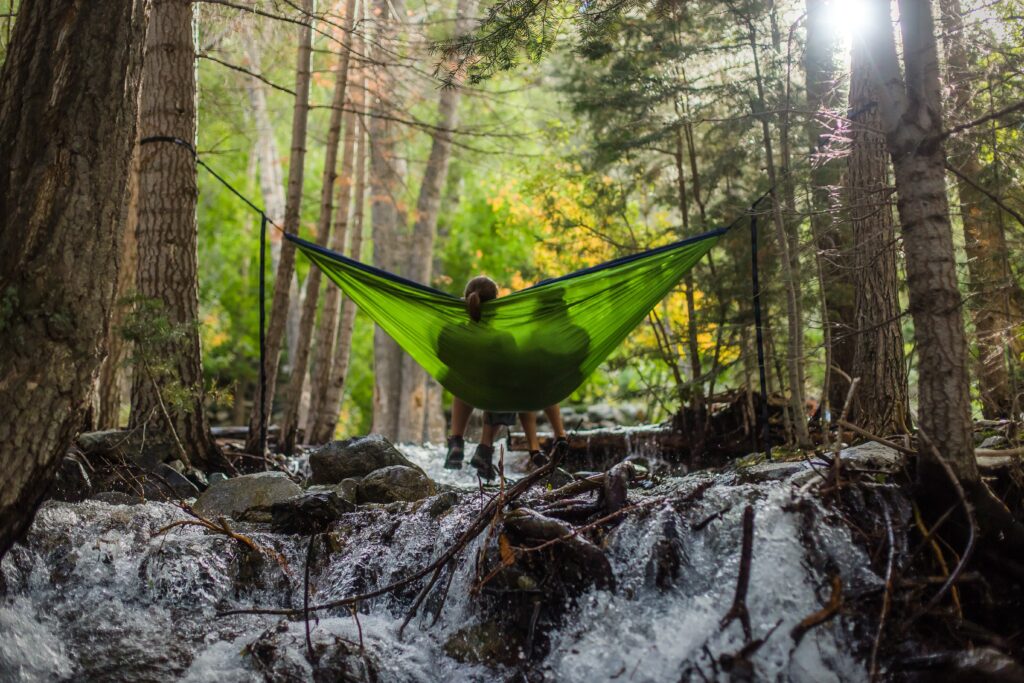
A hammock is a wonderful thing. Stretched between two trees at your campsite – laying in a hammock is the perfect way to read a book or to take an afternoon nap. If you decide to pick one up, try to find one with tree straps included, like this one.
Get Out There and Camp
Don’t forget the most important part of camping: enjoy the experience!
Camping is an awesome outdoor activity. It can help to reduce stress, improve mental health and connect us more deeply with nature. If you haven’t been camping before, don’t be intimidated or discouraged by your lack of experience. Following the camping for beginners tips in this article will get you well on your way toward a successful outdoor experience. With proper planning and preparation, camping can be done easily and inexpensively. So what are you waiting for? Get out there and give it a shot. You may find yourself falling in love with the fresh air, quiet spaces, and freedom from everyday life.