Outdoor Gear Reviews, Tips & Adventure Stories to Inspire an Outdoor Life

Month: May 2023

What is Backcountry Camping? An In-Depth Exploration of Wilderness Adventures

back country camping at the top of a mountain

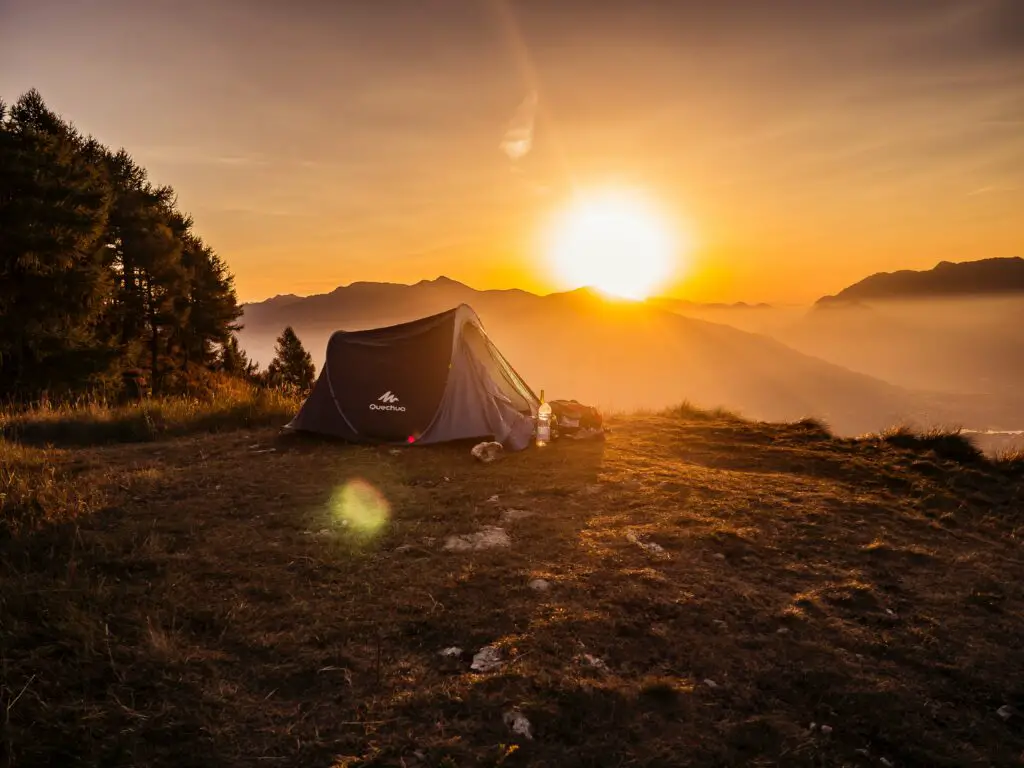
Imagine standing atop a majestic mountain peak, surrounded by untouched wilderness as far as the eye can see. The crisp air fills your lungs, and the serenity of the natural world envelops your senses. This is the allure of backcountry camping—the opportunity to immerse yourself in nature’s untamed beauty and embark on a wilderness adventure unlike any other.

Backcountry camping, also known as wilderness camping or primitive camping, takes outdoor enthusiasts beyond established campgrounds and into remote and secluded areas of nature. It offers an authentic and immersive experience that allows you to reconnect with the earth and find solace in the simplicity of the wild. In this article, we will embark on an in-depth exploration of backcountry camping, unraveling its definition, delving into its benefits, offering practical tips, and highlighting some of the most breathtaking destinations for your own wilderness adventures.

No matter if you’re an experienced camper seeking a new level of challenge or someone yearning to escape the confines of city life and embrace the natural world, backcountry camping opens the door to a world of exploration, self-discovery, and unforgettable moments. So, let’s embark on this journey together as we uncover the essence of backcountry camping and discover why it is an experience truly worth pursuing.

What is backcountry camping?

backcountry camping near lake
Backcountry camping emphasizes self-sufficiency, exploration, and a deeper connection with nature.

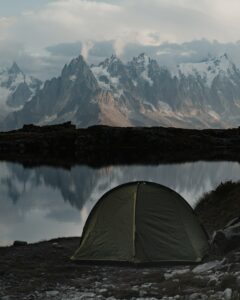
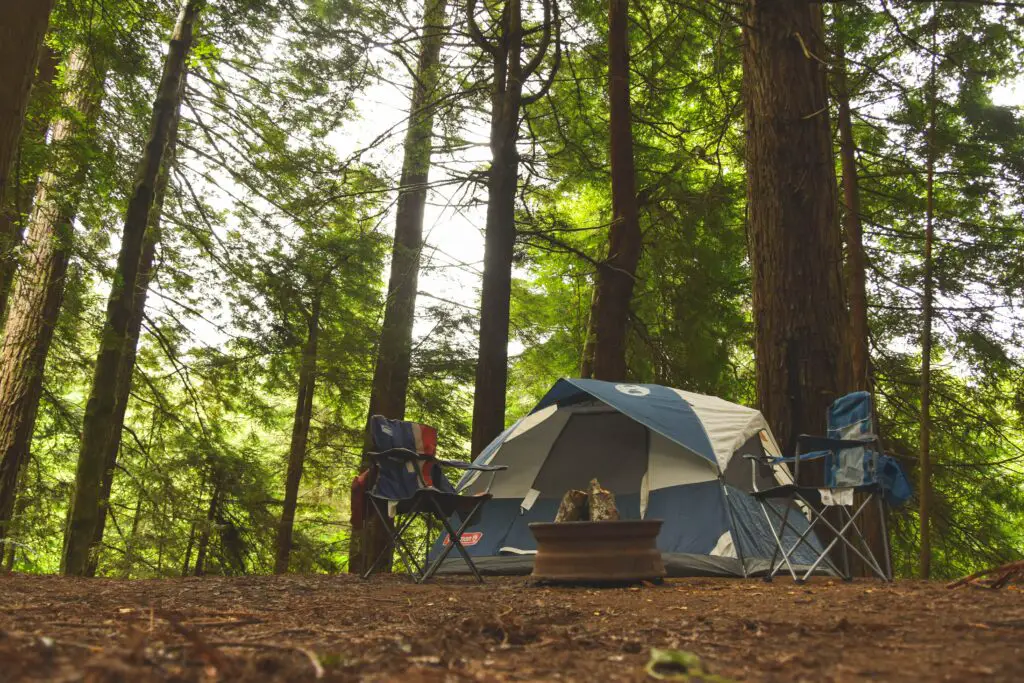
Backcountry camping refers to the practice of setting up camp in remote and undeveloped areas of the wilderness, away from established campgrounds and modern amenities. It involves venturing into unspoiled natural environments, often requiring hiking or backpacking to reach these secluded destinations. Unlike traditional camping, backcountry camping emphasizes self-sufficiency, exploration, and a deeper connection with nature.

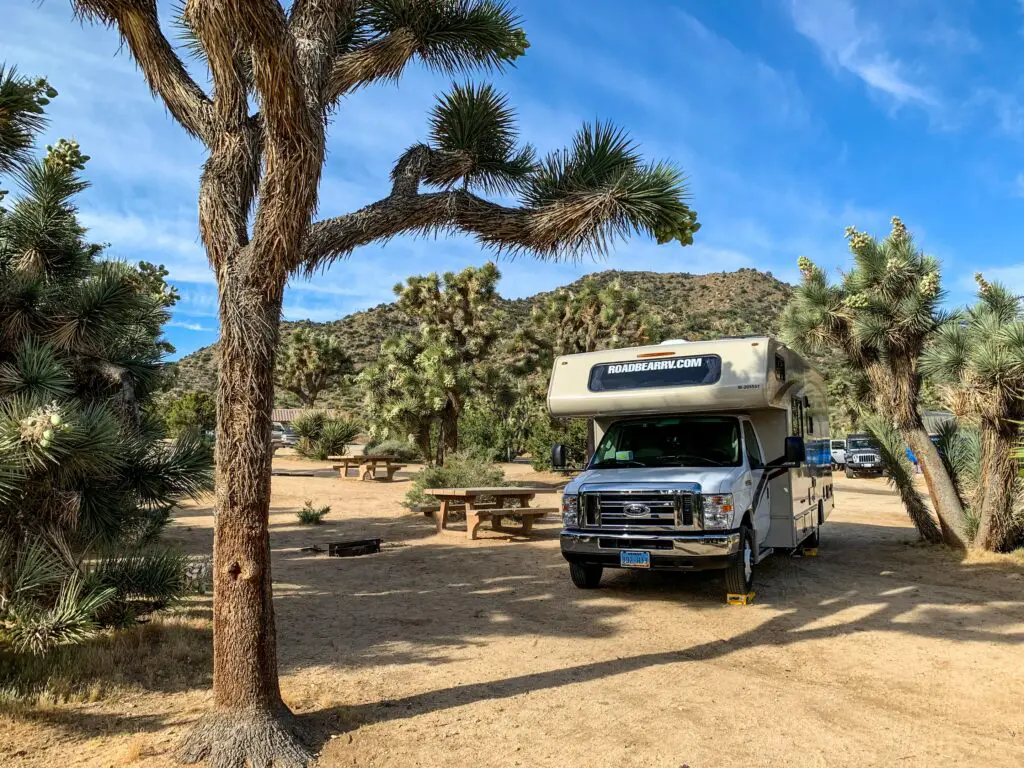
Backcountry camping stands in contrast to front-country camping (car camping or RV camping), where campers can easily access campsites by vehicle and enjoy amenities such as electricity, running water, and designated campsites. In backcountry camping, you rely on your own physical abilities to access remote areas and must carry your gear and supplies with you.

Overlanding is a form of backcountry camping where specialized 4-wheel drive vehicles are utilized to access backcountry areas and campsites.  While dependent on vehicles, overlanding provides the benefits of car camping with the seclusion and remoteness of backcountry camping.

Backcountry camping has roots in humanity’s primal connection to nature. Throughout history, people have ventured into the wilderness to seek sustenance, spiritual enlightenment, and a respite from civilization. However, modern backcountry camping as a recreational activity gained popularity in the late 19th and early 20th centuries as people began to appreciate the beauty and serenity of untouched natural landscapes.

Pioneers like John Muir, Henry David Thoreau, and other early conservationists were instrumental in advocating for the preservation of wilderness areas and encouraging individuals to venture into the backcountry. Their writings and philosophies helped shape the modern understanding and appreciation of backcountry camping.

Over time, advancements in outdoor gear, navigation technology, and environmental awareness have further refined and expanded the practice of backcountry camping. Today, it has become a beloved activity for adventurers seeking a deeper connection with nature and an escape from the pressures of modern life.

Exploring the Benefits of Back Country Camping

Connecting with nature

alone in the wilderness
Backcountry camping offers the opportunity to slow down, breathe in fresh air, and appreciate the beauty that surrounds you.

Backcountry camping provides a unique opportunity to disconnect from the noise and distractions of everyday life and immerse yourself in the beauty and tranquility of nature. Surrounded by towering trees, breathtaking landscapes, and the sounds of wildlife, you can experience a deep sense of peace and rejuvenation. The sights, sounds, and smells of the wilderness awaken your senses and offer a profound connection to the natural world.

In a world filled with constant noise and demands, backcountry camping offers a chance to escape the busy urban environment and find respite in the serenity of the wild. The absence of modern conveniences and technology allows you to disconnect from the digital world and reconnect with the simplicity of life. It’s a chance to slow down, breathe in fresh air, and appreciate the beauty that surrounds you.

Building self-reliance and resilience

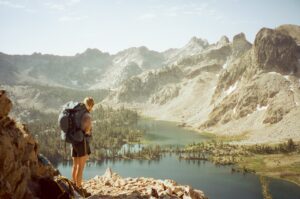
Backcountry camping requires self-reliance and problem-solving skills. As you navigate rugged terrains, face unpredictable weather conditions, and make decisions about water sources and shelter, you develop a heightened sense of self-reliance and adaptability. Overcoming these challenges fosters resilience and a sense of accomplishment, boosting your confidence and ability to handle adversity both on the trail and in everyday life.

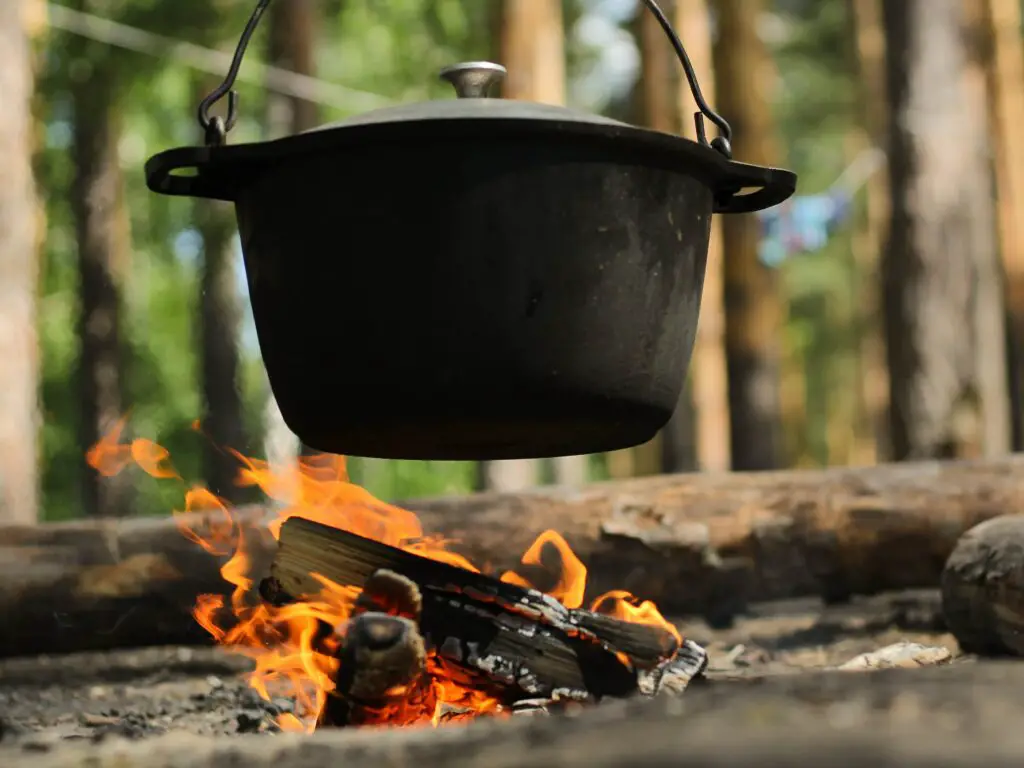
Backcountry camping often involves primitive camping techniques, such as building fires, purifying water, and setting up camp with minimal gear. These experiences allow you to hone essential survival skills and embrace your resourcefulness. Learning to make do with limited resources and finding creative solutions to unexpected situations can be empowering and foster a sense of self-sufficiency.

Seeking solitude and serenity

Backcountry camping offers a unique opportunity to experience solitude in its purest form. Far away from crowded campgrounds and popular tourist spots, you can find solitude in the vast expanses of wilderness. The stillness and silence of remote environments provide space for introspection, self-reflection, and a sense of peace that is hard to find in the hustle and bustle of daily life.

Stepping away from the distractions of modern life and immersing yourself in nature can have a profound impact on your mental well-being. Backcountry camping allows you to disconnect from screens, obligations, and the pressures of society, giving you the space to find clarity, reduce stress, and gain a fresh perspective. It’s an opportunity to quiet the mind, practice mindfulness, and cultivate a deeper connection with yourself and the natural world.

By embracing the benefits of backcountry camping, you can embark on a transformative journey that reconnects you with nature, strengthens your resilience, and nourishes your soul.

Essential Gear and Preparation

Choosing the right equipment

backpacking in the mountains
Backcountry camping demands that you prioritize lightweight and compact options to minimize the strain on your body.

Selecting lightweight and durable camping gear is crucial for backcountry camping. Look for backpacking tents that are compact, easy to set up, and designed to withstand varying weather conditions. Consider investing in a quality sleeping bag that provides warmth and comfort while being lightweight enough to carry on long hikes. Additionally, research and choose gear appropriate for the specific environment you’ll be camping in, such as a sturdy backpack, hiking boots, and appropriate clothing layers.

Since you’ll be carrying your gear for extended periods, prioritize lightweight and compact options to minimize the strain on your body. Look for backpacking equipment made from lightweight materials without compromising durability. Opt for collapsible or foldable utensils, compact cooking stoves, and portable water filtration systems to keep your gear streamlined.

Backcountry camping requires a commitment to preserving the natural environment. Familiarize yourself with the Leave No Trace principles, which include practices such as packing out all trash, disposing of waste properly, minimizing campfire impact, respecting wildlife, and staying on designated trails. By adhering to these principles, you can help protect the fragile ecosystems you explore.

Safety considerations

Navigation tools and maps – Carrying a reliable map and compass, and knowing how to use them, is essential for backcountry camping. Familiarize yourself with the area’s topography, landmarks, and potential hazards before embarking on your trip. Consider bringing a GPS device or smartphone app as an additional navigation tool, but always have a backup plan in case of technology failure.

First aid kits and emergency supplies – Be prepared for emergencies by packing a comprehensive first aid kit. Include items such as bandages, antiseptic wipes, pain relievers, blister treatments, and any necessary prescription medications. Additionally, carry emergency supplies like a whistle, signal mirror, emergency blanket, and a multi-tool to help you handle unexpected situations.

Planning and permits

Before setting out on your backcountry adventure, research different destinations to find the one that aligns with your skill level, preferences, and desired experience. Consider factors such as terrain difficulty, water sources, wildlife activity, and camping regulations. National park websites, hiking forums, and guidebooks are valuable resources for gathering information.

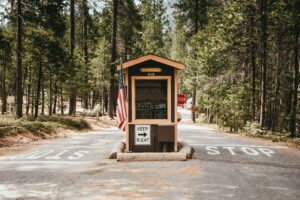
Many backcountry areas require permits to control visitor numbers and protect the wilderness. Research and apply for any required permits well in advance of your trip. Familiarize yourself with the specific regulations for the area you’ll be camping in, including camping restrictions, fire regulations, and rules regarding food storage and wildlife encounters.

By preparing with the right gear, prioritizing safety, and respecting the environment, you’ll ensure a smoother and more enjoyable backcountry camping experience. Remember, proper planning and preparation enhance your ability to immerse yourself in nature and make the most of your wilderness adventure.

backcountry camping in the mountains

Tips for Backcountry Camping

Tip #1: Choose Your Campsite Wisely

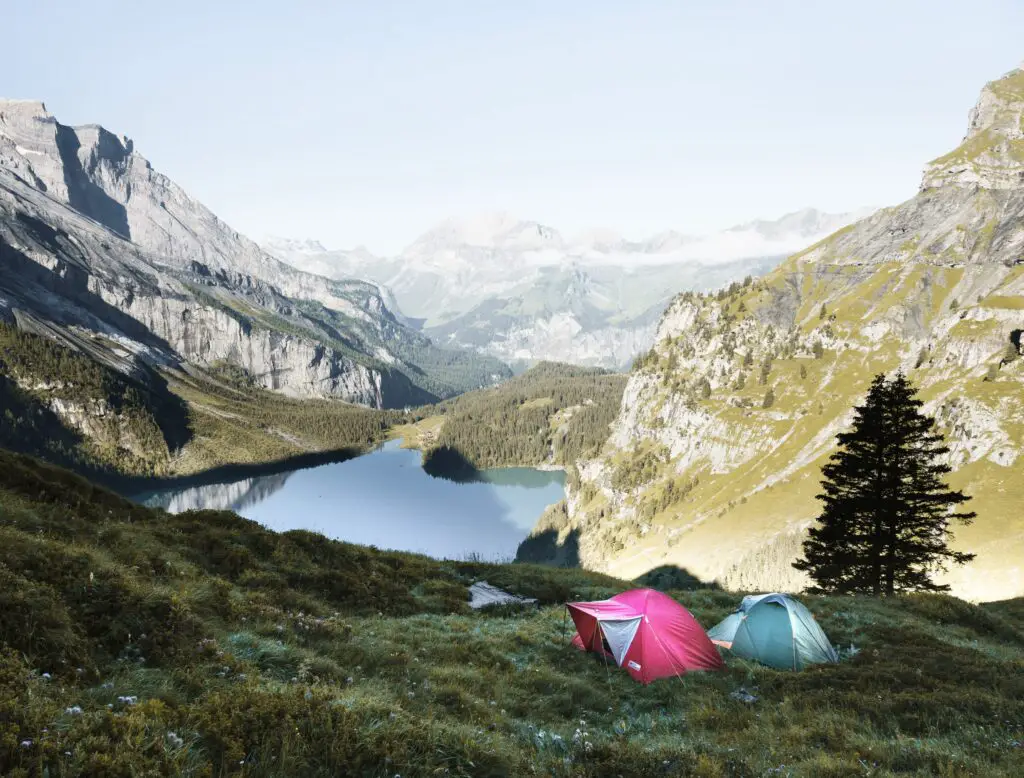
Look for a flat and level area to set up your tent, preferably on durable surfaces like bare soil or rocks, to minimize your impact on the environment. Consider proximity to water sources for convenience but ensure you follow Leave No Trace principles and camp at a safe distance from rivers and lakes. Look for natural features such as trees or boulders that can provide natural windbreaks or shade.

Some backcountry areas have designated camping zones or restrictions to protect sensitive habitats. Familiarize yourself with the rules and regulations of the area you’re visiting and adhere to them. By respecting these guidelines, you contribute to the preservation of the environment and the sustainability of backcountry camping for future adventurers.

Tip #2: Be Smart & Safe with Your Food

When venturing into the backcountry, choose lightweight and nutritious meals. Opt for lightweight, easy-to-pack meals that provide adequate nutrition and energy for your outdoor adventures. Dehydrated meals, trail mixes, energy bars, and dried fruits are convenient options. Plan your meals ahead and portion them into individual servings to minimize waste and save space in your backpack.

Proper food storage is essential to prevent attracting wildlife to your campsite. Use bear-resistant containers or hang food in bear bags away from your sleeping area. Dispose of food waste properly to avoid littering and to minimize environmental impact. Pack out all trash, including food wrappers, to leave the wilderness as pristine as you found it.

Tip #3: Be Prepared for Wildlife Encounters

Before you head out, educate yourself about the local wildlife and their behavior. Respect their space and observe from a safe distance. Avoid approaching or feeding wild animals, as this can disrupt their natural behavior and pose risks to both humans and animals. Familiarize yourself with bear safety protocols, such as storing food properly and making noise to alert bears of your presence.

Use bear-resistant containers to store food and scented items to prevent wildlife from being attracted to your campsite. Be mindful of your actions and avoid leaving behind any food scraps or strong odors that may entice wildlife. By practicing responsible wildlife management, you contribute to the conservation of these magnificent creatures and ensure their safety as well as yours.

Backcountry camping offers unique challenges and rewards. By carefully selecting your campsite, being mindful of food and waste management, and respecting wildlife, you can enhance your safety and enjoyment during your wilderness adventure. Remember, being a responsible backcountry camper ensures the preservation of these pristine natural environments for future generations of outdoor enthusiasts.

Some Popular Backcountry Camping Destinations

Yosemite National Park in California

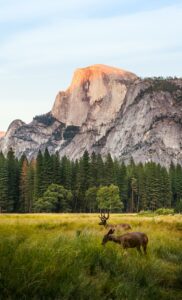
Yosemite National Park – California, USA

Yosemite National Park is renowned for its breathtaking granite cliffs, towering waterfalls, and ancient sequoia groves. With over 750 miles of trails, it offers a multitude of backcountry camping opportunities for all skill levels. From the iconic Half Dome and Yosemite Valley to the remote and serene Tuolumne Meadows, Yosemite’s backcountry promises awe-inspiring adventures amidst its diverse ecosystems.

Notable Yosemite backcountry camping areas:

    • Yosemite Valley: Explore the heart of the park, camp near iconic landmarks like El Capitan and Bridalveil Fall, and embark on challenging hikes to the High Sierra camps.
    • Glacier Point: Enjoy stunning panoramic views of Yosemite Valley, camp at the Glacier Point Campground, and set off on scenic hikes to destinations like Sentinel Dome and Taft Point.
    • Tuolumne Meadows: Discover the beauty of Yosemite’s high country, with pristine alpine meadows, sparkling lakes, and granite peaks. Camp at Tuolumne Meadows Campground and explore trails like Cathedral Lakes and Vogelsang High Sierra Camp.
Banff National Park - Alberta, Canada
Banff National Park – in Alberta

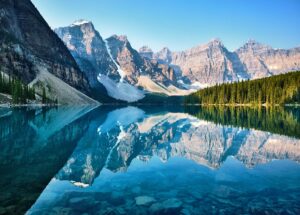
Banff National Park – Alberta, Canada

Banff National Park offers an enchanting backcountry camping experience amidst the Canadian Rockies. Its pristine lakes, awe-inspiring glaciers, and rugged mountain peaks create a postcard-perfect setting. With over 1,000 miles of trails, adventurers can immerse themselves in the serenity of the park’s backcountry.

Notable Banff backcountry camping areas:

    • Lake Louise: Set up camp near the iconic turquoise waters of Lake Louise and explore nearby trails like the Plain of Six Glaciers or hike to stunning viewpoints like Big Beehive.
    • Skoki Valley: Experience a true alpine wilderness adventure by camping in Skoki Valley, surrounded by picturesque meadows and peaks. Hike to destinations such as Hidden Lake, Boulder Pass, and Deception Pass.
    • Assiniboine Provincial Park: While technically outside Banff National Park, this neighboring provincial park is a must-visit for backcountry enthusiasts. Camp near the majestic Mount Assiniboine, also known as the “Matterhorn of the Rockies,” and enjoy breathtaking alpine scenery.
Torres del Paine National Park
Torres del Paine National Park in Patagonia, Chile

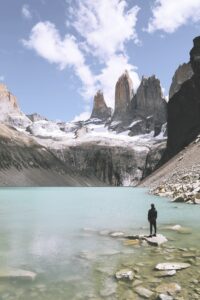
Torres del Paine National Park – Patagonia, Chile

Torres del Paine National Park showcases the raw beauty of Patagonia, with its rugged mountains, turquoise lakes, and expansive glaciers. This remote and pristine park offers unparalleled backcountry camping opportunities for those seeking an unforgettable adventure in one of the world’s most breathtaking natural settings.

Notable Torres del Paine backcountry camping areas

    • Base Torres: Camp at the foot of the iconic granite towers and witness the sunrise casting a golden glow on these magnificent peaks. Hike the challenging but rewarding trail to the lookout point for an unforgettable view.
    • Valle del Francés: Set up camp amidst the dramatic landscapes of the French Valley, surrounded by towering granite walls and hanging glaciers. Explore the diverse trails and be rewarded with awe-inspiring vistas.
    • Grey Glacier: Camp near the stunning Grey Glacier and embark on a glacier hike or boat tour to witness the mesmerizing blue ice formations up close.

These popular backcountry camping destinations offer a gateway to extraordinary natural wonders and unforgettable experiences. Whether you’re drawn to the granite cliffs of Yosemite, the alpine beauty of Banff, or the untamed wilderness of Torres del Paine, these destinations will immerse you in the wonders of nature and create memories that will last a lifetime.

The Bottom Line

Backcountry camping is a doorway to exploration, self-discovery, and a deeper connection with the natural world. As we have delved into the essence of backcountry camping, explored its benefits, discussed essential gear and preparation, shared tips for a successful experience, and highlighted popular destinations, it becomes evident that this outdoor pursuit offers a unique and transformative experience.

By venturing into the remote and untouched corners of the wilderness, we escape the hustle and bustle of modern life and find solace in the serenity of nature. Backcountry camping allows us to disconnect from technology, reconnect with ourselves, and gain a fresh perspective on what truly matters. The rejuvenating effects of wilderness immersion and the opportunities for self-reliance and resilience contribute to personal growth and a renewed appreciation for the natural world.

However, it is crucial to approach backcountry camping with responsibility and respect. Adhering to Leave No Trace principles, practicing proper wildlife management, and following camping regulations ensure the preservation of these pristine environments for future generations to enjoy. By treading lightly and leaving the wilderness as we found it, we become stewards of the natural world, fostering its conservation and sustainability.

So, whether you choose to embark on a backcountry adventure in Yosemite National Park, explore the alpine wonders of Banff, or experience the untamed beauty of Torres del Paine, embrace the opportunities that backcountry camping provides. Immerse yourself in the tranquility of nature, challenge yourself physically and mentally, and let the wilderness guide you on a journey of self-discovery and connection.

As you plan your backcountry camping trip, remember to equip yourself with the necessary gear, prioritize safety, and thoroughly research your chosen destination. Preparation is key to ensuring a memorable and enjoyable experience. And above all, cherish the moments spent under the starlit skies, the encounters with wildlife, and the awe-inspiring landscapes that will forever leave an indelible mark on your soul.

Embrace the call of the wild and let backcountry camping be your gateway to extraordinary adventures, personal growth, and a lifelong love affair with the great outdoors.

We’ll See You in the Backcountry!


Looking to explore the backcountry with the benefits of car camping?  Check out our Beginners Guide to Overlanding.

Prefer the ease and access of camping closer to home? Learn all about Front Country Camping here.

The Pros and Cons of Inflatable Kayaks: Everything You Need to Know

Inflatable kayaks by a lake

Kayaking provides the freedom to explore the beauty of nature from the water.  Whether on the ocean coastline, a mountain lake, or a forested river, kayaks give you a unique perspective of the outdoors. We’ve explored why kayaking is so much fun in the past here at Outward Spaces. From the physical and mental health benefits to the adventure experience of being immersed in nature, it’s clear that kayaking is popular for good reason.

While hard-shell kayaks have dominated the kayak space for decades, inflatable kayaks are becoming increasingly popular as a way to enjoy the water. But which type of kayak is better? We take a look at the pros and cons of inflatable kayaks and share everything you need to know to purchase the right kayak for you.

What is an inflatable kayak?

kayaker kayaking through an ocean cave on an inflatable kayak
Inflatable kayaks are made of multi-layered PVC that allow the kayak to be inflated for use and deflated for storage.

An inflatable kayak is a kayak that is made of a durable fabric that can be inflated with air. Inflatable kayaks are typically made of PVC or nylon, and they come in a variety of shapes and sizes.

Like inflatable stand-up paddleboards, inflatable kayaks have multi-layered PVC with air chambers that are carefully designed to provide buoyancy even under a significant amount of weight. The design of inflatable kayaks is similar to their rigid-hull counterparts – with the only real difference being that they are inflatable.

Inflatable kayaks are a great option for people who are looking for a portable and affordable kayak. When deflated, inflatable kayaks can be stored and transported much easier than hard shell kayaks – making them a great option for those without the space or the vehicle to handle a traditional kayak. They are also a good option for people who are new to kayaking, as they are relatively easy to maneuver.

Inflatable kayaks are portable, affordable, and durable, making them a great option for people of all ages and skill levels. However, there are also some potential drawbacks to inflatable kayaks, such as their speed and maneuverability.

In this article, we will discuss the pros and cons of inflatable kayaks in more detail. We will also provide some tips for choosing the right inflatable kayak for your needs.

What are the pros of inflatable kayaks?

There are many advantages to owning an inflatable kayak. Some of the most common pros include:

Portability

Inflatable kayaks are very portable. They can be deflated and rolled up into a small package, making them easy to transport.

Imagine that you are headed out to your favorite lake to kayak.  You can strap your 10ft long hard shell kayak to the roof of your car and hope it stays put or you can simply throw your rolled-up inflatable kayak into the trunk of your car. Now imagine that once you’ve arrived at the lake, you realize that the water’s edge is further from the parking lot that you imagined. Would you rather lug a 50lb, 10ft long kayak to the shore or would you prefer to carry your 10lb inflatable kayak to the water in its carrying bag?

Inflatable kayaks also usually include a carrying bag or backpack that makes storage even easier. Finding the right storage space for hard shells kayaks 9that can be more than 10ft long) can be tricky.  Storing an inflatable kayak only requires a few feet of space and being lighter, you’ll have more options of where to put it.

Affordability

Inflatable kayaks are typically more affordable than hard-shell kayaks. Entry-level hard shell kayaks start around $400 for a single kayak and more advanced versions can set you back more than $1000. Entry-level inflatable kayaks can be found for between $100-$200 and most advanced inflatable kayaks can be found in the $700-$900 range.

The quality of inflatable kayaks can vary significantly with the least expensive kayaks typically being questionable in terms of durability. When searching for the right inflatable kayak for you, try to stay away from the models that look more like toys than adventure vehicles.  Some inflatable kayaks (the lower-end Intex models for example) are better suited for your backyard pool than your local paddling water.

Durability

kayaking in an inflatable kayak
While they won’t last as long as hard-shell kayaks, inflatable kayaks are surprisingly durable.

Inflatable kayaks are made of durable materials that can surprisingly withstand a lot of wear and tear.  If properly taken care of, the PVC of inflatable kayaks can last many years without developing holes.  If you do find a leak in your inflatable kayak, small holes in your kayak’s PVC are simple and inexpensive to patch with a repair kit.

Don’t get us wrong here though, no inflatable kayak is as durable as a hard-shell kayak.  Hard shell kayaks are built to take a beating.  They are made of hard plastic materials that are difficult to break or crack no matter how hard you are on them.  Most hard shell kayaks will outlive you. Inflatable kayaks will begin to break down after some years of use – especially at the seams where the PVC glue can degrade.

While inflatable kayaks aren’t as durable as hard shell kayaks, the multi-layered PVC materials they use are tougher than you’d imagine.  Inflatable kayaks stand up well to abrasion and due to being air-filled, they respond well to hard knocks against the hull.

Stability

Built for speed and maneuverability, hard-shell kayaks are often unstable – especially when getting in and out of them. Due to the give of multiple air chambers, inflatable kayaks are usually much more stable, making them a good option for beginners. This increased stability is also welcomed by those who prefer to stay as dry as possible when kayaking.

Versatile

Perhaps the biggest advantage of inflatable kayaks is that they be used for a variety of activities, including fishing, touring, and recreation. Hard shell kayaks are often more purpose-built specifically for recreational paddling or serious fishing, for example. Between the small size inflatable kayaks pack up into and the extra stability they provide, they are better suited for a wider range of activities on the water.

What are the cons of inflatable kayaks?

When exploring the pros and cons of inflatable kayaks, there are also a few disadvantages to owning an inflatable kayak. Some of the most common cons include:

Speed

Inflatable kayaks are not as fast as hard-shell kayaks. The flexible air chambers, textured PVC surface, and a variety of seams of inflatable kayaks all make for a slower boat. On top of this, inflatable kayaks are often shorter than the average hard-shell kayak – causing slower top speeds.

In contrast, the surfaces of hard-shell kayaks are typically smooth, rigid, and strong.  The hard plastic of the hull better cuts through the water and the waves.  The longer lengths of hard shell kayaks – especially found in “touring” models – are built for speed and they respond much more efficiently when paddling.

Though inflatable kayaks aren’t as fast as hard shell kayaks, they still respond well and can be quick when paddling them efficiently.  Most recreational paddlers will gladly trade a little speed for the convenience of an inflatable.

Maneuverability

inflatable kayaking
Inflatable kayaks aren’t as fast or as maneuverable as hard-shell kayaks.

Like speed, inflatable kayaks also sacrifice maneuverability compared to hard-shell kayaks. The rigid hulls of hard-shell kayaks make them more responsive to turns or changes in direction.  The “give” of inflatable kayaks means that they flex more and less power generated by paddling directly transfers to the water.

Inflatable kayaks also don’t track as well as most hard-shell kayaks. Tracking means “how well it will stay moving in a straight line”.  Due to increased wind resistance and the fact that most inflatable kayaks sit higher in the water, tracking can be an issue on inflatables.  Many inflatable kayaks have skegs on the bottom of the hull to help the inflatable track better.  If you are concerned about tracking when paddling an inflatable kayak, look for models that have larger (or even multiple) skegs.

Most paddlers won’t have any trouble maneuvering an inflatable kayak, but advanced paddlers – especially those with hard-shell experience – may be frustrated with the lack of response from an inflatable.  If you plan on tackling a skills or slalom course on your local water or are planning to paddle highly technical rapids, it’s best to go with a hard-shell.  In all other cases, you should be able to get to your destination without any trouble on an inflatable kayak.

Can be more difficult to paddle in windy conditions

Inflatable kayaks are light with inflated air chambers that often leave a larger boat profile to be caught by the wind. This means that inflatable kayaks can be more difficult to paddle in windy conditions than hard-shell kayaks.  The loss of speed and maneuverability found in inflatables can make the feeling of being “blown by the wind” more apparent in inflatable kayaks.

Despite being blown more by the wind, in most cases, you’ll arrive at your destination just as easily as you would in a hard-shell kayak.  You may expend a few more calories by having to paddle harder than you would have had to in a hard-shell kayak, but for most kayakers, the overall convenience of an inflatable kayak is well worth it.

Won’t last as long as a hard-shell

Hard shell kayaks are designed of hard plastic and are meant to endure years of exposure to the sun and water.  Their rigid hulls are more resilient against hard bumps against rocks or punctures from sharp objects.

Most hard shell kayaks are floating tanks – they will take a beating being drug across shorelines and shallow, rocky water and will continue to do their thing.  But this durability comes at the cost of increased weight and a hull that can be folded, packed away, or stored in small spaces.

Inflatable kayaks, on the other hand, will puncture and leak when exposed to sharp objects.  While leaks do happen on inflatable kayaks, having multiple air chambers will keep the kayak afloat allowing you to return home safely. Leaks and punctures can usually be patched and repaired easily within minutes.To increase the life of an inflatable kayak, keep in out of the sun when not in use.  It’s best to deflate and pack away inflatable kayaks after each use.  This “packing away” will prevent the seams from being stressed during temperature changes, protect the PVC fabric from harmful UV rays, and keep it ready to go for your next adventure.

The Bottom Line

After weighing the pros and cons of inflatable kayaks, inflatable kayaks are a great option for people who are looking for a portable, affordable, and durable kayak. However, they are not as fast, maneuverable, or as durable as hard-shell kayaks.

When choosing an inflatable kayak, it is important to consider the type of water you will be paddling in, the size of the kayak, and the number of people who will be using it. See our recommendations below to find the inflatable kayak that best fits your needs.

Inflatable kayaks can be used for a variety of activities, including fishing, touring, and recreation. By far, the largest advantage of an inflatable kayak is convenience.  Inflatable kayaks can be deflated and packed away needing less storage space and making them easy to transport in any vehicle. While some performance is sacrificed when choosing an inflatable kayak, easier storage and transport to and from the water will have you paddling more often.

There are many shapes and sizes of inflatable kayaks available on the market. To find the right inflatable kayak for your needs, we encourage you to go beyond our list of the pros and cons of inflatable kayaks and research models for yourself.

Happy Paddling!


Inflatable Kayaks To Consider:

Hands-On Review: Renogy 200Ah Lithium Iron Phosphate Battery

Renogy 200Ah Lithium Iron Phosphate Battery unboxed

Outdoor adventures, whether it’s camping, van life, sailing, or off-grid travels, often require a reliable source of power to keep devices charged and essential equipment running smoothly. In recent years, lithium iron phosphate (LiFePO4) batteries have gained popularity due to their superior performance, longer lifespan, and enhanced safety features compared to traditional lead-acid batteries. Among the top contenders in this category is the Renogy 200Ah Lithium Iron Phosphate Battery. For our Renogy lithium battery review, we put the Renogy 200Ah LiFePo4 to the test.

We installed 2 Renogy 200Ah Lithium Iron Phosphate Batteries in our 46ft sailboat, Gratitude, and after 5 months of use, we’re giving you an inside look at how these batteries have performed. In this hands-on review, we’ll dive deep into the features and performance of the Renogy 200Ah Lithium Iron Phosphate Battery, examining its suitability for outdoor enthusiasts seeking a robust and versatile power solution.

Renogy 200Ah LiFePO4 Battery installed
Our 2 200Ah LiFePO4 batteries made for a clean installation in our 46ft sailboat.

Throughout this Renogy lithium battery review, we’ll explore the design and build quality of the Renogy 200Ah Lithium Iron Phosphate Battery, assessing its durability and ease of use in demanding outdoor conditions. We’ll also take an in-depth look at its performance, examining its capacity, charging and discharging efficiency, and overall power output.

Additionally, we’ll delve into the battery management system (BMS) and safety features integrated into the Renogy battery – important features for peace of mind during your adventures. We’ll also evaluate the battery’s Bluetooth connectivity and let you know how monitoring your battery from your phone works in real-life.

To put these batteries through their paces, we’ve had them running our sailboat’s main 12V power system with a number of power-hungry electronics. Now that we’ve spent some time with these batteries, we can share with you how they’ve worked for us and help you decide if they are right for your needs.

The Verdict

4.5 out of 5 Stars

We LOVE our Renogy 200A LiFePO4 batteries! Their simple, but slick design cleaned up our battery compartment.  They have performed much better than our previous lead-acid batteries and with the increased depth of discharge, give us more usable power overall.  We are obsessed with connecting to the batteries via Bluetooth to see exactly what’s happening on each battery.  We love them so much that we’re already working on adding them to our Overland Trailer. Our only hiccup with these batteries is that we have experienced some misreporting of the capacity status using the DC Home app.

Buy Now at Renogy’s Website

12V 200Ah Lithium Iron Phosphate Battery w/ Bluetooth

12V 200Ah Lithium Iron Phosphate Battery w/ Bluetooth

Buy Now at Renogy.com


Overview of the Renogy 200Ah Lithium Iron Phosphate Battery

Renogy 200Ah Lithium Iron Phosphate battery in the box
Our Renogy LiFePO4 batteries arrived and ready for install.

Renogy has established itself as a serious brand in the off-grid power space, specializing in solar panels, inverters, and batteries. With a focus on innovation and reliability at affordable prices, Renogy has gained the trust of outdoor enthusiasts and off-grid adventurers worldwide.

The Renogy 200Ah Lithium Iron Phosphate Battery is yet another Renogy product that shows their commitment to delivering high-quality off-grid power solutions. In this battery, Renogy has packed 200Ah of LiFePO4 storage with a battery management system (BMS) and Bluetooth built-in. Its impressive capacity of 200Ah provides ample power for extended periods, reducing the need for frequent recharging. When paired with solar panels, the time you could spend off the grid is limitless.

The Renogy 200Ah Lithium Iron Phosphate Battery packs a range of features that make it an appealing choice for RV, marine, van, and off-grid applications. The lithium iron phosphate (LiFePO4) chemistry provides several advantages, including a longer lifespan, faster charging, and increased safety compared to lithium-ion battery technology.

The battery’s compact and lightweight design makes it easy to transport and install in various setups, whether it’s installed in an RV, van, camper, boat, or an off-grid cabin. Its dimensions and form factor have been optimized for space efficiency while maintaining robustness and durability.

The feature that sets the Renogy 200Ah apart from other similar batteries is its baked-in Bluetooth technology.  Using Renogy’s DC Home app (free), you can monitor your Renogy battery in real time.  Being able to know exactly what is happening to your battery at any moment helps troubleshoot issues with your electrical system and gives you peace of mind when it’s functioning smoothly.

By familiarizing ourselves with the key features, specifications, and market positioning of the Renogy 200Ah Lithium Iron Phosphate Battery, we can proceed to examine its design, build quality, and performance in subsequent sections. Join us as we delve deeper into the intricacies of this battery and discover what sets it apart from the rest.

Design and Build Quality

Physical design and dimensions
Insert terminals on a 200Ah LiFePO4 battery
The insert terminals on the Renogy make for an easy and flexible installation.

The design of a battery plays a crucial role in its usability and integration into various setups. The Renogy battery’s design aims to strike a balance between compactness and functionality. Renogy’s battery design is simple – a solid black plastic box with 2 posts.  That’s it.  We appreciate the lack of extra curves and cutouts that often cause batteries to collect gunk and make them difficult to clean. Not that you’ll be cleaning your batteries much, but it is nice to have a clean and tidy battery box when showing off your new LiFePO4 batteries.

The Renogy clocks in at 60.2 lbs, which is lighter than our old lead-acid batteries weighing 88 lbs each.  The lighter weight made it a lot easier to install the Renogys than it was to remove the old batteries.

Specifications:
  • length: 20.55″
  • width: 9.45″
  • height: 8.62″
  • weight: 60.2 lbs

Durability is a crucial aspect when choosing a battery for off-grid adventures. Our batteries are strapped down deep in the bilge of our sailboat, so they won’t be taking a beating.  In our case, the IP65 rating means our battery will be protected against everything it will see on our boat. IP65 means that it’s dustproof (the 6) and is protected against light water pressure (the 5).

Renogy 200Ah Lithium Iron Phosphate battery handles
You’ll find handles on each end of the battery that can be easily stowed away once installed.

The Renogy is rated to charge in temperatures from 32-131°F and it’s rated to discharge in temps from -4-140°F – meaning you won’t be out of luck trying to use it to power your stuff in the desert heat or icy winter camping.  This battery does not have a self-heating function like some competitors – so if you plan to use it in cold areas that routinely get below 32°F, you may want to choose a heated battery instead.

While lighter than many batteries of this capacity, the 60lb Renogy battery still isn’t really made for portable use.  It’s heavy enough to demand a solid and permanent mounting location, but it’s light enough to lighten your vehicle load or to save your back a bit while installing. This battery has 2 solid handles at each end to make carrying these less awkward.  The handles stow away into the side of the battery when not needed.

The terminals on this battery are insert terminals, also known as internal threads, and come with 2 M8 bolts.  Out of the box, the Renogy 200Ah comes with 1″ M8 bolts installed, but longer 1.25″ bolts are also included.

Performance and Power Output

The most important aspect of a battery is its capacity and energy storage capabilities. With 200Ah of capacity, the Renogy can charge at up to 100A continuously – leading to ultra-fast charges if you have a beefy charger.  Our batteries arrived at 80% capacity and our 30A charger had them full in under 3 hours.

Renogy DC Home App interface
Renogy’s DC Home app allows you to view data from your Renogy devices via Bluetooth connections.

As far as output, this battery is rated to discharge continuously at up to 200A – valuable for applications that need high power available when required.  The electric winches and anchor windlass on our boat require about 150A to operate under high loads and the Renogy 200Ah LiFePO4 handles them all without issue.  These power-hungry devices typically only operate for short periods of time so the 200Ah capacity isn’t an issue, but the 200A continuous output is a necessity for them.

For most of the 5 months of our testing for this Renogy lithium battery review, they’ve been tasked with powering our day-to-day appliances on the boat.  2 12V refrigerators and a 12V freezer are the biggest power hogs in our system – with the two fridges consuming up to 140Ah of power per day when running nonstop.  The Renogy 200Ah battery has handled these without issue, but with only the 400Ah of capacity these provide, it’s vital to our system that when we’re away from the dock, we’re conserving our power usage.

When we do need to lean on the batteries for a few days at sea, the 80% depth of discharge (DoD) of these batteries is a valuable spec.  LiFePO4 batteries can be discharged up to 80% of their capacity without damaging the battery or shortening its life.  Comparing this to the 50% recommended DoD of lead-acid batteries, LiFePO4 batteries give you more usable power than lead-acid batteries of the same capacity. For example, a 200Ah lead acid battery can only be discharged to 100Ah, but a 200Ah LiFePO4 battery can be discharged to 40Ah – giving you 60 additional amp hours for your system to use.  That’s 30% more power!

Renogy Battery Monitor
Our Renogy battery monitor helps to verify the data coming out of the DC Home app.

In our boat, we have a Renogy Battery Monitor installed that gives us another source of data to check the Bluetooth battery information against. As we powered up and powered down various devices, we were able to view the charging and discharging on each battery and verify that the numbers were consistent with the Renogy battery monitor. The best data the DC Home app gives when connected to the battery is current capacity.  It’s important to know exactly where you’re battery capacity is at – especially on longer trips.  The Bluetooth connectivity gives you the ability to check your capacity at any time.  If you’re like us, you’ll check it every 10 minutes at first because having the data at your fingertips is just too cool to resist.

While we do not have the equipment or know how to properly test the capacity of our batteries, we can verify that the capacity reading via Bluetooth corresponds closely with our actual power usage.

As mentioned previously, the 100A maximum continuous charge rate on these batteries means they can be charged fast.  We recommend a 60A or above charger to take full advantage of this feature and to be able to charge in record time.

The Renogy is rated to last 2000 cycles – meaning it can be charged and discharged (up to 80% DoD) 2000 times before losing performance or capacity. Compare this to the 500-1200 cycles you’ll get from lead-acid batteries and you’ll see how this Renogy battery will last a lot longer.

Since this is a 12-volt battery, it operates between 10-14.8 volts and prefers to be charged at 14.4 volts.  When the battery reads higher than 14.8V or lower than 10 volts, it will trigger overvoltage or undervoltage warnings on the DC Home app.

Safety Features

Battery Management System

Encased somewhere inside the shiny black rectangle that is the Renogy 200Ah LiFePO4 battery is an advanced battery management system (BMS) that intelligently monitors the battery’s operating conditions and oversees its safe operations.  The main benefit of a BMS is that it manages and redistributes temperature across the battery cells to maintain consistent temperatures to optimize battery performance.  The BMS also aids in efficiently charging the battery to speed up charges and get the most out of your charging source. In Renogy’s case, the BMS also reports some of its data vis the DC Home app to give you even more data and control over your battery.  Battery error messages, temperatures, and individual cell voltage can all be easily viewed in the DC Home app.

Auto-balancing Function

The Renogy 200Ah battery has an auto-balancing function that monitors and equalizes the voltage across the individual cells. When multiple Renogy batteries are connected in parallel, this function ensures all batteries will equally charge optimizing and speeding up the charging process.

Energy Saving Mode

When stored or not used, batteries lose their charge over time.  Renogy has given their LiFePO4 batteries an energy-saving mode which it switches to if not charged or discharged for 24 hours. When in this mode, the battery will only lose 3% per month – meaning you’ll have more power available when you’re ready to put it back into use.

Bluetooth Connectivity

The Renogy 200Ah Lithium Iron Phosphate battery includes Bluetooth connectivity allowing you to monitor the current status of your battery via Renogy’s DC Home app on a smartphone or tablet.

in our Renogy lithium battery review, we were able to boot up the Renogy DC Home app on our iPhone and connect to our batteries easily. The DC Home app shows the following battery data

  • Battery data on DC Home app
    The battery data available via the DC Home app.

    Battery Level (percentage)

  • Total Max Capacity (in Ah)
  • Present Capacity (in Ah)
  • Present Voltage (in V)
  • Present Current (in A)
  • Heating Module status (this battery not equipped)
  • Firmware Version
  • Error (messages)
  • Maximum Temperature
  • Minimum Temperature
  • Cell Voltage

Bluetooth on this battery works really well.  We had no problem connecting our batteries once installed.  After downloading the DC Home app and opening it, our new batteries were found and we could add them to the app.  Once added, the battery (or batteries) in our case show up each time the DC Home app is opened.

Our only real gripe with the DC Home app is that the added devices drop the connection each time you browse away from the app, forcing you to refresh the devices once you go back to the DC Home app.  While we wish the Bluetooth connection would remain even when checking our messages or emails for a minute, we assume that Renogy designed this Bluetooth functionality intentionally to save power on your devices and phone.  It’s not that big of a deal – but can be frustrating constantly having to refresh the devices when observing battery data over time.

The only other issue we’ve experienced during our Renogy lithium battery review is that we once arrived to our boat after some time away to find our batteries reading around 50% battery level via the DC Home app.  Our boat is constantly being charged via a 110V/30A charger and we were concerned to find that the batteries were at half capacity and seemingly not being charged.  Checking the battery charger, we found it in floating (maintenance) mode even though our batteries needed a fuller “boost” charge to get to full capacity.  After powering our battery charger on and off a few times, the battery capacities both changed to show a full charge at 100% battery level.  Apparently, our batteries were being properly charged while we were away, but for some reason, the capacity was not reflecting the charging on the DC Home app.  While this is less of a problem than our batteries actually being at 50%, this experience will leave us wondering if the battery level is correct each time we arrive back at our boat.  Luckily, we can verify battery levels via the Renogy Battery Monitor if this problem occurs again.

All in all, having the Bluetooth functionality is worth some occasional bugs, and we’re hopeful that over time, Renogy will release new battery firmware to fix these types of issues.  Using the DC Home app is generally a pleasant experience and we’re thankful to be able to monitor our Renogy batteries and other devices.  We do wish we could view our data over the internet and not just when we’re near our Renogy devices.  Renogy has recently released the Renogy One that locally connects to your devices via Bluetooth and then makes the data available anywhere over the internet.

Pros and Cons of the Renogy 200Ah LiFePO4 battery

Pros

  1. High capacity: The 200Ah capacity provides ample power for extended periods, reducing the need for frequent recharging.
  2. Long lifespan: The lithium iron phosphate chemistry offers a longer lifespan of 2000 cycles compared to other battery types, ensuring lasting reliability.
  3. Fast charging: The battery’s fast charging capability minimizes downtime and allows for more efficient power replenishment.
  4. Compact and lightweight: The battery’s compact design and lightweight nature make it easy to transport and install in various setups.
  5. Comprehensive safety features: The built-in Battery Management System (BMS) and additional safety features ensure safe operation and protection against potential hazards.
  6. Bluetooth connectivity: Via Bluetooth and the DC Home app, the battery offers convenient monitoring capabilities.

Cons

  1. Higher cost: Lithium iron phosphate batteries are generally more expensive upfront compared to traditional lead-acid batteries, though they offer long-term cost savings. The Renogy battery is less expensive than many similar LiFePO4 batteries.
  2. Weight: While the battery is designed to be compact and lightweight, it still has a significant weight due to its capacity, which may affect portability for some users.

2x 200Ah LiFePO4 batteries installed

Renogy Lithium Battery Review: Is It Worth It?

The Renogy 200Ah Lithium Iron Phosphate Battery is a solid option for those looking to upgrade their battery bank. While expensive, its longer lifespan and increased usable power due to a higher depth of discharge make it comparable to less expensive batteries in the long-term.

The Renogy 200Ah Lithium Iron Phosphate Battery has demonstrated several notable strengths. Its high capacity provides ample power for extended periods, while the long lifespan ensures reliable performance over time. The fast charging capability minimizes downtime, and the compact, lightweight design enhances portability. The battery’s comprehensive safety features, including the Battery Management System, Auto-balancing Function, and Energy Saving Mode offer peace of mind during operation. Moreover, the Bluetooth connectivity makes it a high-tech option that lets you keep track of where your battery is at from the palm of your hand.

We hope this review has been informative and helpful in your search for a reliable power solution. Whether you’re embarking on off-grid adventures or seeking a backup power source, the Renogy 200Ah Lithium Iron Phosphate Battery has proven to be a versatile, efficient, and affordable option. If you choose the Renogy 200Ah Lithium Iron Phosphate battery for your RV, van, boat, or off-grid cabin, we’re confident it will power your systems for years to come and that you’ll be glad you went with Renogy.

Have thoughts or questions about our Renogy lithium battery review?  Let us know in the comments.

Buy Now at Renogy’s Website

12V 200Ah Lithium Iron Phosphate Battery w/ Bluetooth

12V 200Ah Lithium Iron Phosphate Battery w/ Bluetooth

Buy Now at Renogy.com

Seasoning a Camp Oven: A Step-by-Step Guide to Perfectly Seasoned Cast Iron Cookware

Cast iron camp oven over a campfire
Seasoning a camp oven is a skill that you’ll want to master to keep your cast iron cookware in great shape.

If you’re an avid camper or outdoor enthusiast, you know that having the right gear can make or break a trip. One essential piece of equipment that should be on every camper’s list is a cast iron camp oven. A camp oven is a versatile piece of cookware that can be used to make everything from stews and soups to bread and desserts. It’s rugged and indestructible, making it a perfect fit for the outdoor lifestyle

But like any piece of cookware, a camp oven needs to be properly cared for to perform at its best. One of the most important steps in caring for a camp oven is seasoning it. Seasoning a cast iron camp oven is the process of coating it with oil and heating it to create a non-stick surface that will make both cooking and cleaning a breeze.

In this article, we’ll provide a step-by-step guide on how to season a camp oven to perfection. We’ll also cover the benefits of using cast iron cookware and provide tips for maintaining a seasoned camp oven. Whether you’re a “seasoned” camper or new to outdoor cooking, seasoning a camp oven is a skill that you’ll want to master. So, let’s get started!

What You’ll Need

Before you start seasoning your camp oven, there are a few items you’ll need for the job. Here’s a list:

  1. Items you'll need to season a cast iron camp oven
    Items you’ll need to season a cast iron camp oven.

    Camp oven – Our seasoning instructions are specifically focused on cast iron dutch ovens, but can also be used for any cast iron cookware. Don’t have a cast iron camp oven yet? Check out this popular 6-quart dutch oven on Amazon.

  2. Oil – You can use a variety of oils for seasoning, such as vegetable oil, flaxseed oil, or canola oil. If you prefer to use oil that is specifically formulated for seasoning cast iron cookware, consider this cast iron seasoning oil from Caron & Doucet.
  3. Paper towels or a clean cloth – You’ll need something to wipe the oil onto the camp oven.
  4. Oven – You’ll need an oven to heat the camp oven during the seasoning process.
  5. Aluminum foil – Optional, but recommended for easy cleanup when you’re done seasoning your camp oven.

Once you have these items on hand, you’re ready to start seasoning your camp oven. Let’s move on to the next section for the step-by-step instructions.

Steps for Seasoning a Camp Oven

Step 1: Cleaning

Cleaning a camp oven
Make sure your camp oven is good and clean before starting the seasoning process.

The first step in seasoning a camp oven is to make sure it’s clean. Over time, moisture from cooking, cleaning, or storing can cause your cast iron cookware to rust. If there’s any rust or debris on your camp oven, it can affect the seasoning process and the quality of your food. Make sure your camp oven is good and clean before seasoning by following these steps:

  1. Scrub the oven with hot, soapy water and a stiff brush or sponge. Since you’ll be seasoning the camp oven shortly, this is one of the few times it’s recommended to use soap on your cast iron.
  2. Rinse the oven thoroughly with hot water.
  3. Dry the oven completely with a clean towel or let it air dry.

Step 2: Preparing your Home Oven

Once your camp oven is clean, you’ll need to get your home oven prepared for seasoning your camp oven. Here’s what to do:

  1. Preheat your home oven to 350°F (175°C).
  2. Line the bottom rack of your oven with aluminum foil to catch any drips. While optional, using aluminum foil under your seasoning cast iron will make clean-up a snap. Do it.

Step 3: Applying the Oil

Applying oil to a camp oven to season it.
Apply a thin film of oil on all surfaces of your cast iron camp oven.

Now it’s time to apply the oil to your camp oven. The goal is to cover the entire surface of cast iron with a light coat of oil. Applying too much oil can result in a sticky residue on your camp oven after the seasoning process. Follow these steps:

  1. Pour a small amount of oil onto a paper towel or clean cloth.
  2. Rub the oil onto the entire surface of the camp oven, including the lid and handle.
  3. Use a fresh paper towel or cloth to wipe off any excess oil. Again, the goal is a light, even coat of oil over the entire surface.

Step 4: Heating the Oven

Seasoning a cast iron camp oven.
Place your camp oven upside down on the middle rack of your home oven.

After applying the oil, it’s time to heat the cast iron oven. Heating the camp oven allows the light coat of oil you applied to set on the surface of the cast iron – resulting in a non-stick surface. Here’s what to do:

  1. Place your camp oven on the middle rack of your home oven, upside down.
  2. Bake the camp oven for one hour at 350°F (175°C).
  3. After 1 hour, turn off your home oven and let the camp oven cool inside the oven.

Step 5: Cooling and Repeating

Once the camp oven has cooled, you’ll want to repeat the process several times for the best results. Building up a few light layers of seasoning on your cast iron will make it a cinch to both cook and to clean. To repeat the seasoning process:

  1. Repeat steps 3 and 4, applying oil and heating the oven, three to four more times. A total of 5 rounds of seasoning is ideal for a new cast iron camp oven.  If your camp oven comes pre-seasoned, we recommend still going through this process 2-3 times to ensure your non-stick surface is set and your cast iron properly protected.
  2. After the final seasoning, let the camp oven cool completely inside the oven.

Congratulations, you’ve now successfully seasoned your camp oven! It’s important to maintain the seasoning of your camp oven to protect the cast iron surface and to retain the non-stick properties of your cookware. In the next section, we’ll outline some tips for maintaining your seasoned camp oven.

Camp Oven over a campfire
Proper maintenance will keep your camp oven in great condition.

Maintaining a Seasoned Camp Oven

Now that you’ve seasoned your camp oven, it’s important to maintain it to keep it in top condition. Here are some tips for maintaining your seasoned camp oven:

  1. Clean your camp oven after each use. Use hot water and a stiff brush, sponge, or chainmail scrubber to clean the oven. Once clean, rinse the oven thoroughly with hot water and dry it completely with a clean towel.
  2. Avoid using soap or harsh detergents to clean your camp oven. Soap can strip the seasoning from the oven, and harsh detergents can damage the non-stick surface.
  3. Never soak your camp oven in water. Moisture can cause the oven to rust and damage the seasoning.
  4. Store your camp oven in a dry place. Moisture can cause the oven to rust and damage the seasoning.
  5. Re-season your camp oven as needed. Over time, the seasoning may wear off, especially if you use your camp oven often. If you notice food sticking to the surface, it’s time to re-season it.

By following these tips, you can keep your camp oven in great condition and enjoy amazing meals on your next camping trip. Happy cooking!

The Bottom Line

Seasoning a camp oven is an essential step in ensuring the longevity of your cast iron cookware and improving the quality of your cooking. By following the seasoning steps above and maintaining your seasoned camp oven, you’ll be able to enjoy delicious, perfectly cooked meals on your future camping trips.

Remember to always clean and dry your camp oven thoroughly after each use, avoid using soap or harsh detergents, and store it in a dry place to prevent rust. Re-season your camp oven as needed to maintain the non-stick surface and avoid cooking acidic foods that can damage the seasoning.

With these tips in mind, you’ll be able to enjoy many tasty meals with your seasoned camp oven for years to come. Happy camping and happy cooking!


Just getting into camping? Check out our Beginner’s Guide to Camping for tips on how to make your first few first a huge success!


Check out this camp oven and accessories to keep your cast iron camp oven in tip-top shape!

What Is Front Country Camping? Everything You Need to Know

front country campsite at a campground

Camping is awesome! It’s a fantastic way to unplug from your daily routine and connect with nature. At Outward Spaces, we love camping so much that we built this website dedicated to it. And while there are various types of camping to choose from, front country camping is one of the most popular ways people camp. But what is front country camping? In this article, we’ll answer that question and provide you with everything you need to know about this type of camping.

Front country camping, also known as car camping or campground camping, is a form of camping that takes place in designated campsites usually with vehicle access. Unlike backcountry camping, front country camping usually takes place in established facilities with included amenities, such as restrooms, showers, and picnic tables.

What is Front Country Camping?

Front country camping, also known as car camping or campground camping, is a type of camping that takes place in designated campsites that are accessible by vehicles. Unlike backcountry camping, where campers must hike into the wilderness to find a suitable campsite, front country camping typically takes place in established campgrounds that have designated sites with amenities, such as restrooms, showers, and picnic tables. In short, it’s a way to enjoy the outdoors without having to rough it too much, making it ideal for families and beginners.

Front country campsites can vary in size and amenities, from small sites with just enough space for a tent to large group sites with enough room for multiple tents, RVs, and other camping equipment. Many front country campsites also come equipped with amenities like picnic tables, fire pits, and access to water and restrooms. Some campgrounds may also offer additional amenities such as playgrounds, hiking trails, swimming areas, and RV hookups.

For most people, front country camping is more accessible than backcountry camping, making it ideal for families, first-time campers, and those who would rather spend more time camping and less time getting to the campsite. Front country camping can be found in state and national parks, private campgrounds, and other outdoor recreational areas. Popular front country camping destinations include Yosemite National Park, Yellowstone National Park, and Zion National Park.

Below are some resources to find front country campgrounds near you:

  • Recreation.gov – a searchable directory of more than 113,000 reservable sites across the US.  Includes National Park Service and the US Forest Service campgrounds.
  • Campendium – a community-driven database of campgrounds, RV Parks, and dispersed camping areas that includes camper photos and reviews
  • The Dryt – a website and mobile app that is another great resource for finding campgrounds

Benefits of Front Country Camping

Front country camping offers a range of benefits that make it a popular choice for many campers. Here are some of the key advantages of this type of camping:

  1. ranger station at front country campground entrance
    Many front country campgrounds have a manned station at the entrance that provides added security.

    Access to amenities: Front country campsites often come equipped with amenities like picnic tables, fire pits, and access to water and restrooms. Some campsites even have on-site showers available to guests. This makes camping more comfortable and convenient, especially for those who are new to camping or have young children.

  2. Safety and security: Front country camping is often located in designated campgrounds that are staffed by park rangers or camp hosts. This can provide a sense of safety and security for those staying at the campground. Knowing that someone is keeping an eye out around the campground has its advantages.
  3. Convenience: Front country camping is easier than backcountry camping. You pack up your camping gear into the car, drive to the campground, and enjoy.  There’s no exhausting hike to your campground and you can bring as much gear as you can stow in your car. Having your car right outside your tent is convenient too.
  4. Ideal for most campers: Front country campgrounds are easy to access, safe, and family-friendly. Being able to drive right to your campsite and camp immediately allows for more time relaxing in the outdoors – making this style of camping ideal for people with busy work schedules. It’s also a great option for beginners who may not have the experience or equipment necessary for backcountry camping.
  5. Opportunities to meet other campers: Front country camping can be as social as you want it to be. While you’ll almost always have camping neighbors when front country camping, there’s no obligation to interact with them.  Alternatively, if you want to invite your campground neighbors over for dinner or for a beer by the campfire, you may meet some great people.

Front country camping offers a range of benefits that make it the go-to option for most campers. Whether you’re looking for a family-friendly camping experience or a quick and easy way to sleep under the stars, this style of camping offers convenience that can’t be beaten.

RV at a campgound in Joshua Tree
The type of camping is ideal for most campers due to the convenience of being able to drive right to your campsite.

What to Expect from Your Front Country Camping Experience

If you’re new to camping, it’s important to know what to expect from your front country experience. Here are few things to know before going:

  1. Reservations: Many campsites require reservations in advance, especially during peak season. Be sure to check the availability of campsites and make reservations in advance to ensure you have a spot. The most popular campgrounds often book up months in advance, so reserve your spot early or consider booking a less-popular campground.
  2. Amenities: Front country campsites are typically equipped with amenities like picnic tables, fire pits, restrooms, and access to water. However, the level of amenities can vary from campground to campground, so be sure to research your campground in advance to know what to expect.
  3. Campsite setup: When you arrive at your campsite, you will need to set up your campsite. This typically involves setting up your tent, arranging your camping equipment, and building a fire if allowed. If you’re new to camping, consider practicing setting up your tent at home before you go camping to make the process easier. Your neighbors may think you are strange for setting up your tent in your front yard, but a little bit of neighborly embarrassment is worth it to avoid the frustration and fighting that can happen when trying to set up a tent for the first time after a long car ride.
  4. Camping etiquette: Front country camping often means sharing a campground with other campers. Be sure to respect their space and follow camping etiquette. Be considerate of your noise levels, properly dispose of your trash, and respect the campground’s designated “quiet hours”.
  5. Activities: Camping this way offers a range of activities, such as hiking, swimming, and fishing. Research the activities available at your campground in advance to know what’s available during your stay.

The Drawbacks of Front Country Camping

While front country camping offers many benefits, there are also some drawbacks to consider. Here are some of the pros and cons of this type of camping:

  1. "Sorry camping is full" sign at a front country campground
    Popular front country campgrounds can fill up quick – especially during peak season.

    Crowds: Front country campsites can be popular and will be crowded during the peak season. This can detract from the wilderness experience and make it harder to find privacy and quiet.

  2. Noise: With many people camping in close proximity, noise levels can be high, especially during the day. This can make it difficult to relax and enjoy the quiet of the outdoors.
  3. Lack of privacy: Front country camping means sharing a campground with other campers, which means you’ll have less privacy. You’ll need to make sure to respect others’ space and practice good camping etiquette.
  4. Less immersion in nature: Front country campgrounds are often located near roads and other amenities, which can diminish the wilderness experience. For those seeking a more immersive experience in nature, backcountry camping may be a better option.

The Bottom Line

Front country camping offers a range of benefits, including access to amenities, safety and security, convenience, and family-friendliness. It’s a great option for those who are new to camping, who may not have the experience or equipment necessary for backcountry camping, or who prefer the convenience of camping in established campgrounds.

However, it’s important to consider the challenges of this style of camping as well, such as crowds, noise, lack of privacy, and less immersion in nature. For the majority of campers, the “pros” of front country camping far outweigh the “cons”. We highly recommend it for beginners and for more casual campers who love spending time outdoors but want to do it reasonably amidst tight budgets and busy schedules.

Whether you choose to camp in the front country or prefer the back country, the most important thing is that you’ll be sleeping under the stars and enjoying time away from the hustle and bustle of everyday life. Camping is an amazing way to connect with nature, spend time with loved ones, and create lasting memories. So pack up the car and get out there.  The wild (or semi-wild) is waiting!

Happy Camping!