Outdoor Gear Reviews, Tips & Adventure Stories to Inspire an Outdoor Life

Month: April 2023

How to Take a Shower When Camping

How to Shower When Camping

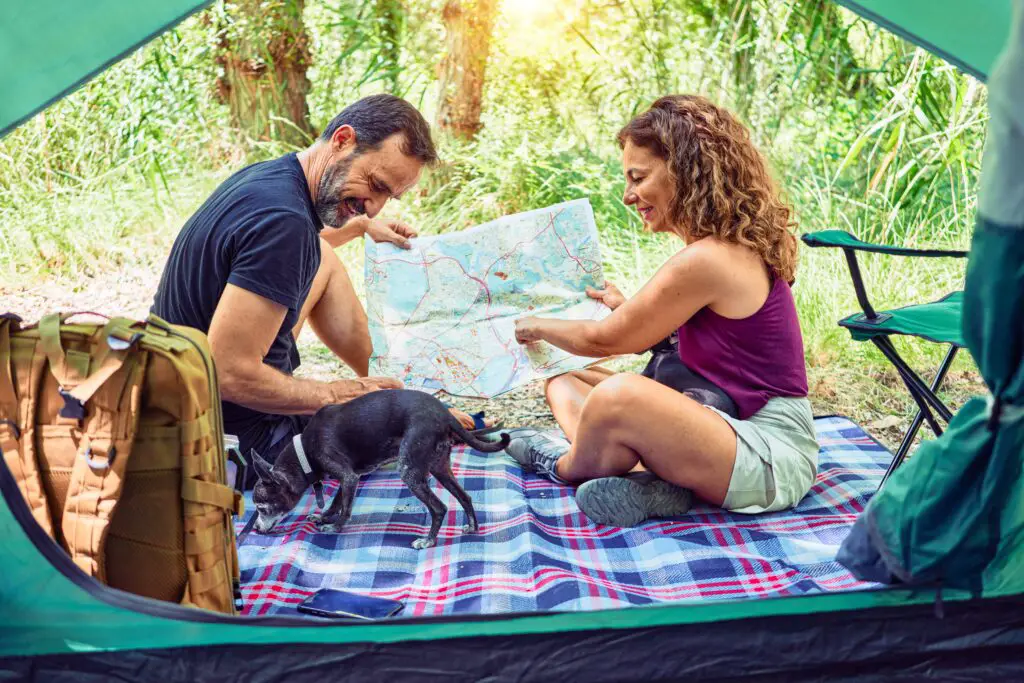
When it comes to camping, many people envision a rugged, back-to-nature experience. While that may be true in many cases, it doesn’t mean that you have to sacrifice getting clean while outdoors. Being able to take a shower can help prolong your camping trips and help keep you comfortable for the duration. In other words, camping doesn’t mean you have to be a sweaty, sticky mess. Showering when camping can help you feel refreshed and rejuvenated, and can also help prevent uncomfortable skin irritation, infections, and odors. But the question many campers (and potential campers) ask is, “How can I take a shower when camping?”

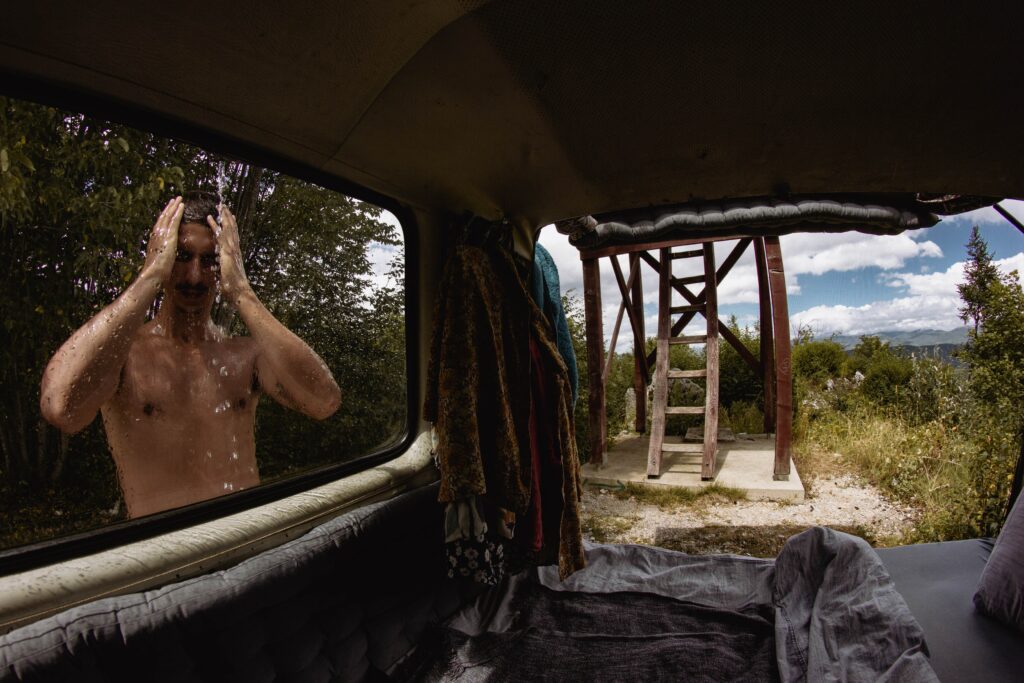
There’s no question that taking a shower when camping can be a bit of a challenge. You won’t have access to the same facilities and resources that you have at home, and you’ll need to plan accordingly to get clean while sleeping under the stars. But have no fear, there are a few different ways to shower when camping, and with a little planning and preparation, you can enjoy a refreshing shower no matter where you are.

Why Showers Are Important While Camping

If you are an experienced camper with years of successful camping under your belt, you may dismiss the idea that showering is important to get outdoors.  But for others, being able to clean up adequately when camping can make the difference between getting out into nature and staying home instead.

1. Access to a shower allows you to get clean and refreshed every few days

Don’t get us wrong, we’re not advocates for a daily shower schedule when camping.  When embarking on an activity centered on nature and simplicity, showering daily is unnecessary and a waste of resources. Sorry to burst the buddle of the “clean freaks” out there, but a big part of camping is the experience of living more closely with nature – and nature is dirty.  When camping, getting dirty is part of the fun and everyone around you will be in the same boat – a little dirty.

However, when camping for more than a night or two, when the dust, dirt, and sweat have a chance to build up, there is nothing better than taking a refreshing shower to clean up and reset the “dirt clock” for a few more days.  If you’ve never had a shower during a multi-day camping trip, you’re missing out.  It’s amazing how rinsing the dirt, campfire smells, and sweat of outdoor activities can rejuvenate you.  In our experience, a nice shower while camping (especially a hot one) can make you feel like you could live outdoors indefinitely.  It restores your ability to enjoy the experience and reframes your perspective.  While it sounds magical, that’s because a good shower while camping IS MAGICAL.

How to Shower When Camping

2. Access to a shower when camping is attractive to those who may otherwise be against camping

We’re big proponents of helping people enjoy the outdoors more often. We are constantly working to make the experience of camping easier in our lives so that it’s easier to camp more often. Having rigid ideas of what can and can’t be a part of the camping experience will only leave you camping alone more often.  In other words, if your idea of camping is “we only eat food out of cans” or “no one needs a shower when camping”, you probably won’t have many of your friends or family begging to come along.

Not being able to get clean while camping can be a big barrier for some folks. Fortunately, having access to a shower when camping can help them more seriously consider coming along.  Camping is always more fun with people you love. Having a shower can make it easier for them to go camping with you.

3. Showering when camping feels really good

I’ve already hinted at this, but being able to take a nice (and preferably hot) shower levels up your camping experience.  Just like your daily showers at home that restore and reset your daily rhythms, showering while camping resets the “dirt clock”.  The “dirt clock” is inevitable when camping.  You’re sleeping on the ground (or close to it) in a questionably clean sleeping bag you’ve had for years and you spend the majority of your time sitting by a smoky campfire surrounded by bugs. The camping experience is special and unique, but it is unquestionably dirty.  Resetting the “dirt clock” reverts your dirt level back to the point when you left home and gives you more opportunity to enjoy the outdoor experience all over again.

Ways to Shower When Camping

1. Choose a Campsite that has Showers

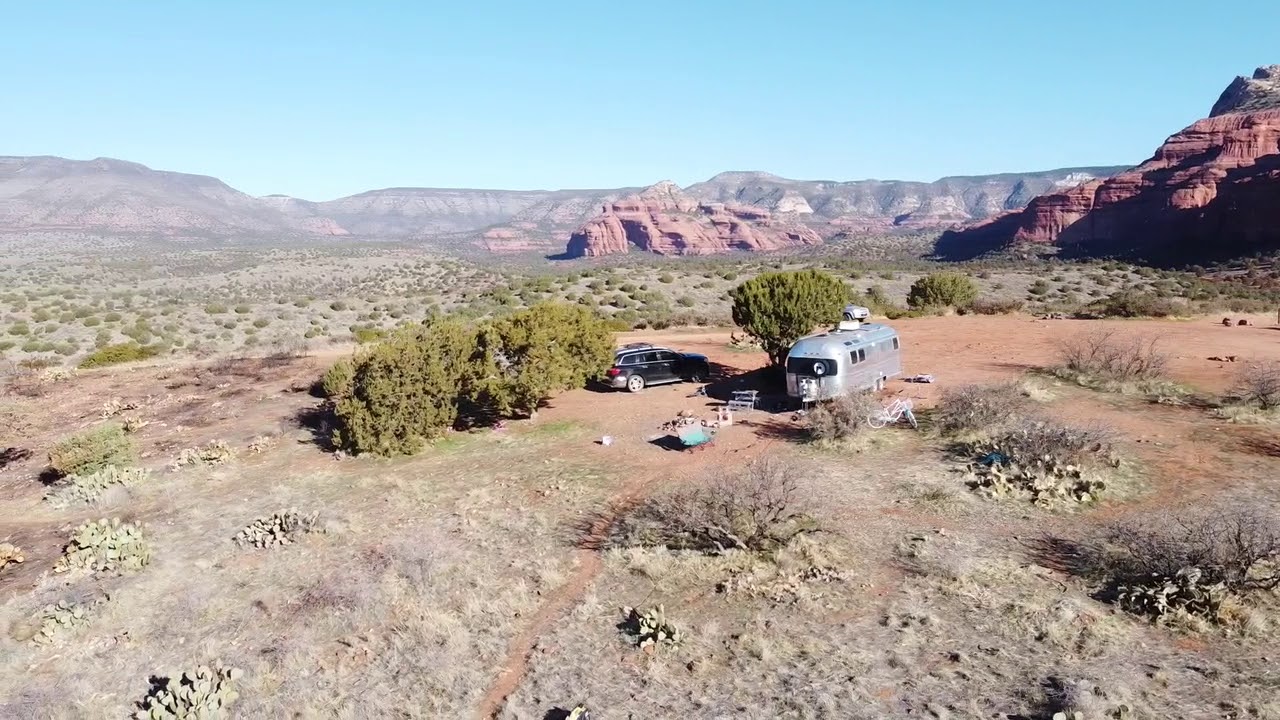
The easiest way to shower when camping is to camp at campsites where showers are available on-site (usually for a fee). Unfortunately, this option severely limits the number of places you can camp as most traditional campsites do not have showers. For example, of the three National Forest campgrounds in Sedona, Arizona, only one (Cave Springs Campground) has showers available. And 33% of campgrounds having showers is high for most areas.

Most RV Parks have showers and many allow tent camping on their facilities, but RV parks are notoriously busy and loud.  In the right situations (camping with friends who have an RV) RV parks can be great camping options, but in most cases, they are not the best places to set up your tent. Nevertheless, if access to a shower is non-negotiable and you can’t find a public campground with showers, camping at an RV park just might fit the bill.

Search for Campsites with Showers at Campendium
To search for campsites with showers, Campendium has a “Showers” filter in its online search function that will show you only campsites with showers available.  Campendium includes both public campgrounds as well as RV Parks, so you’ll be able to see all of your options in one place. Good luck and happy searching!

2. Solar Showers

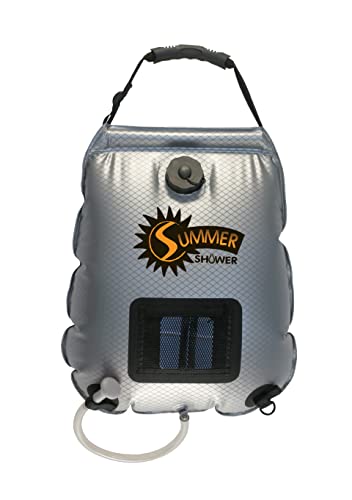
A solar shower is a simple and easy way to bring a shower along with you to your campsite. Solar showers include a large bag for water storage with an attached nozzle and valve.  The bags are typically a dark color to absorb heat from the sun to warm the water before use.  Solar showers are gravity fed and thus are meant to be hung in a high location like a tree.  With the bag hung in the sun above head level, the water gently warms with the sun and warm water is available for showering by opening the valve on the attached hose.

Solar showers are inexpensive and easy to use provided you have the right place to hang them at your campsite.  To help the power of the sun work its magic to warn the water, you may need to experiment with different hanging locations to get the best results.  Your solar shower may need to be moved throughout your trip as conditions change.

Due to their simplicity and low cost, solar showers are our recommended way to shower when camping. Don’t expect the water to be hot – especially if your source of water is cold to begin with – but the solar action will help if the shower is properly hung in the sun.

Our Recommended Solar Shower:

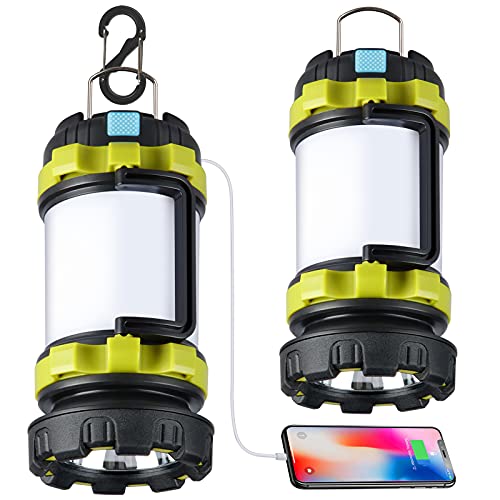
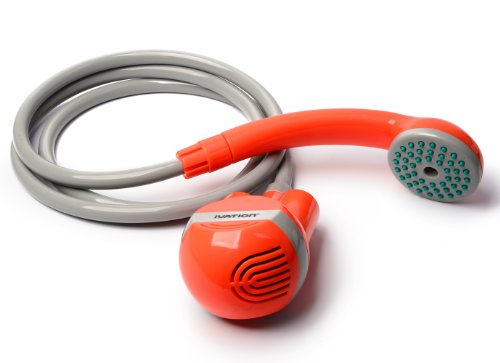
3. Battery-Powered Portable Showers

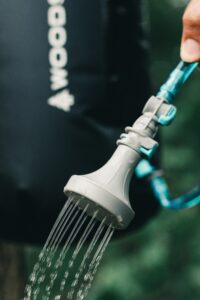
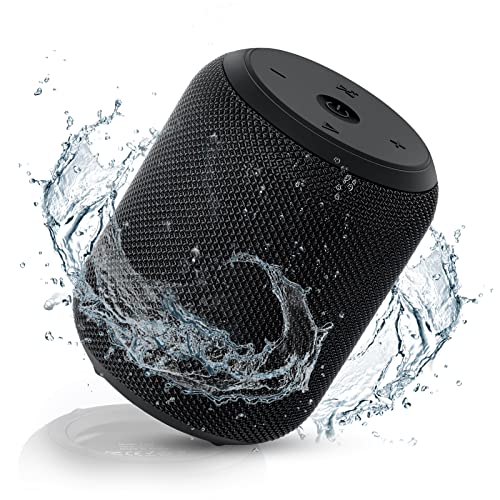
Battery-powered portable showers can be used anywhere you need some water and water pressure.  Battery-powered portable showers typically include a water storage bag like a solar shower, but instead of using gravity to dispense water, they utilize a rechargeable pump that when placed in the bag, pumps the water through a spray nozzle.  Since they create water pressure, these types of showers often feel more like home showers. However, most don’t include a heater to heat the water so you’ll need to heat the water over the campfire before putting it in the bag to have hot water. Since battery-powered showers don’t use gravity, there’s no need to hang the shower giving you more options of where it can be used.

Beyond your campsite, battery-powered portable showers can also rinse sand off at the beach, water plants in a remote garden, clean up off-road toys, and any other way having water pressure may be useful to you. When considering what type of camp shower is best for you, think about these other uses that may make a battery-powered shower right for you.

Our Recommended Battery-Powered Shower:

4. Bucket Shower

The bucket shower is the simplest and easiest way to bring along a shower on your next camping trip.  Simply bring along a 5-gallon bucket, purchased at any Home Improvement store and usually under $5, fill it with water, and have someone dump the water over you as needed.  You may also try dumping the water on yourself, but a filled 5-gallon bucket weighs over 40 lbs and may be difficult to handle.

While certainly the least elegant way to shower when camping, the bucket shower method is cost-effective and requires minimal gear, making it perfect for the minimalist out there. Buckets are useful in a lot of ways when camping – washing dishes, carrying firewood, etc – and take up little space when the space inside the bucket is utilized for packing.

To level up your bucket shower, you can purchase an all-in-one portable shower with a rechargeable battery.  This option will give you the ability to pump the water from your bucket to an attached spray nozzle making your bucket shower the equivalent of the battery-powered portable shower above.

Our Recommended Bucket Shower Upgrade:

5. Tank Shower

Tank Showers are camp showers that include…you guessed it, a tank.  They are typically self-pressurized with a small pressure pump, but some are pressurized prior to use with an air compressor. Due to their larger size, tank showers are meant to be mounted to your vehicle’s roof rack or tow hitch.  This exterior mounting allows them to use the sun to heat the water inside as you travel to your destination.

Tank Showers are much more expensive than our other options and require a bit more know-how to use and maintain properly.  That being said, they can be a great shower solution for those in the overlanding community or for serious campers who don’t mind splurging for top-tier gear.

Our Recommended Tank Shower:

6. Find a Nearby Public Shower

Our final way to shower when camping is to locate a publically available shower near your campsite.  Public showers are often available at truck stops which are usually conveniently located just off major freeways.  If your campsite is lucky enough to be near a facility that offers showers to the public, you can pay between $10-$17 for access to a hot shower.  Some truckstops offer free showers if you purchase a certain amount of fuel – so you may be able to get both your vehicle filled and your body clean in one shot.

Search for Public Showers with PublicShower.directory
Enter your zip code at publicshower.directory and you’ll get a list of available public showers near you.

Camp Shower Accessories to Bring Along

Whichever way you choose to shower when camping, having the right shower accessories can go a long way to make your shower experience that much more enjoyable.  Here are a few camp shower must-haves in our experience:

Camping Towel

Nomadix US National Parks Map Original TowelWhile you can always bring along a towel from home for your camp showers, in our experience we’ve found it best to have a dedicated towel that we keep in our camping gear. We love the Original Towel from Nomadix and have a few that we use when camping.  Nomadix towels are super-absorbent and quick-drying which makes them better than towels from home. The best part is that they come in some really cool designs making it easy to find a towel that uniquely fits your style. Our favorites are the National Park Collection which inspires us to check out all National Parks while drying us off.

Buy Now at Nomadix.com


Shower Mat

Interlocking Rubber Bathroom Flooring TilesOne of the drawbacks of showering when camping is the muddy mess that a shower can create underfoot.  Chances are the area under your shower won’t drain well or dry quickly (especially if you’ve got multiple people showering each day).  To avoid your feet needing a shower of their own after your shower, having a good shower mat is a great addition.  Fopw their low cost, durability, drainage, and packability, we like the tile type that connects together to form a larger area underfoot.

Buy Now at Amazon.com


Privacy Tent

Privacy is important when showering.  With a privacy tent, you’ll make sure that everyone in your group is comfortable utilizing the blessing of the shower you have provided them. Pop-up privacy tents easily pack away and can also be used as a privacy tent for your camp bathroom as well.  We have the Wakeman Portable Pop-Up Pod and can attest firsthand to its usefulness for privacy at the campsite.

Buy Now at Amazon.com


Environmentally-Friendly Soap

Dr. Bronner's 18-in-1 Pure Castile SoapDon’t go through all the trouble of creating the perfect camp shower only to leave behind an environmental mess of soap.  Make sure you truly “Leave No Trace” by using only environmentally-friendly soap in your camp shower.  Our favorite camp soap is Dr. Bronner’s 18-in-1 Pure Castile Soap.  The 18-in-1 means that it can be used for virtually every cleaning use when camping, from washing your hair to doing the dishes.  It smells amazing too!

Buy Now at Amazon.com


Being able to take a shower when camping is a big deal.  It will make your friends and family more interested in joining you for your outdoor adventures and will give everyone at camp the ability to clean up, be refreshed, and reset that nasty “dirt clock”.

Adding a shower to your camping routine is easier than you think and there are options available to fit any budget or needs.  “Level up” your camping with a campsite shower.  You’ll be glad you did and you’re car ride home will be less odorous.

Happy Camp Showering!


Now that you’ve got your shower sorted, remove another big camping barrier – the campsite bathroom. Read our camping bathroom guide, “How to Poop Properly…While Camping” Next!

Why Kayaking is So Much Fun: Exploring the Joy and Thrill of Paddling on the Water

paddling in the middle of a lake
Kayaking is so much fun for a multitude of reasons.

Spending time out on the water is always a privilege.  Whether it’s ocean, lakes, or rivers, there’s something truly special about having the chance to explore bodies of water. Kayaking is one of the most popular ways people enjoy time on the water, and for good reason.  Kayaking is just plain fun.  Paddling across the water in your own personal watercraft provides a unique sense of freedom and enjoyment. It’s easier than paddleboarding and gets you closer to the water than a boat.

If you’ve never had the opportunity to get out in a kayak, you may wonder what all the fuss is about.  Why is kayaking fun?  In this article, we’ll list just a few of the many reasons why kayaking is so much fun.  Hopefully, by the end, you’ll be ready to hop into your own kayak, head off into the sunset, and experience the joy and thrills of kayaking for yourself. And to help out, at the end of this article, we have some links to kayak gear to help you get started.

So grab your paddle and let’s dive into the world of kayaking!

Why Kayaking is So Much Fun

Reason #1: Kayaking is awesome exercise

For most of us, going to the gym isn’t very much fun.  We know we need the exercise, but staring at walls while running on a treadmill isn’t exactly something we’re pining for.  Exercise is SO much more fun when we get to do something we enjoy. Throw in the outdoors and suddenly, we’re stoked to get sweaty.

Kayaking is exactly that – outdoor exploration with exercise thrown in as a bonus. Paddling to propel your kayak across the water is so much fun and it’s great exercise!  Paddling increases your heart rate making for a great cardiovascular workout that you are in complete control of.  Find yourself breathing too hard? Slow it down.  Looking to burn off those extra campfire pancakes you ate at breakfast? Paddle faster and harder. No matter how hard you choose to paddle, the human power will burn calories and improve your cardiovascular system.

And kayaking is not just great for your heart, it’s also great for your muscles, especially in your upper body and core. The physics of paddling a kayak centers on the moving of water.  Move water with your paddle and your kayak moves in response. Moving water with your paddle requires using your muscles. According to Old Town Watercraft, kayaking works out twelve major muscle groups, including your abs, biceps, triceps, lats, shoulders, thighs, and hamstrings. It truly is a whole-body workout. And due to the repetitive actions of paddling, kayaking is a great way to develop arm, back, shoulder, and overall muscles.

Reason #2: Kayaking is good for your mental health

Let’s be honest – most of us are struggling. Just trying to survive in our post-pandemic, politically chaotic, and inflation-adjusted reality is tough. We try our best to look and act like everything is ok, but inside, things are a different story. We are in desperate need of more activities that help us relax, de-stress, and reconnect with ourselves.

Kayaking fits the mental health, self-care bill pretty well.  Gliding across the surface of pristine bodies of water accompanied only by the sound of the water against our kayak is pretty great for your mental well-being. It’s amazing how the thought of all of the unread emails in our inbox fades away and is replaced by the wonder of what lies beyond the next cove when kayaking.  It’s a simple activity that helps to simplify your mind and soul.

Solo kayaking has a special way of feeling like the ultimate freedom.  You alone get to decide which way to go, where to explore, and and what speed it will be done at.  The silence and the solitude of you and your kayak can be incredibly refreshing.  Kayaking with a group of friends can be similarly rejuvenating. Working together with other kayakers to determine the agenda and to share stories along the way can be downright therapeutic.

Reason #3: Kayaking with others is always a good time

paddling out with others
Kayaking with friends and family provides opportunities for bonding and shared experiences.

If you’re like me, you’re always looking for new and fun things to do with friends and family.  Sure, we can always call the crew to grab beers at our local watering hole, but that is exactly what we always do. We can take the family on yet another trip to the movies, but sitting in silence for 2 hours isn’t exactly our idea of a great bonding opportunity.

Do you know what is a spectacular thing to do with friends or family? You guessed it – kayaking. Explore the local lake together. See where the river goes together. Paddle out through the breaking waves together – taking bets to see who is the first to dump their kayak.  All these things are better done with others.

Kayaks come in all sizes from single kayaks to double kayaks with enough room for a cooler full of drinks. When sharing a double kayak, a big part of the challenge and interaction is working together to paddle the kayak efficiently. With everyone in their own kayak, competitions are sure to break out without a word. Either way, kayaking provides opportunities for bonding and shared experiences.

Reason #4: Kayaking is full of adventure

The sense of adventure is another big reason why kayaking is fun. Most of us encounter little adventure in our everyday lives.  Pulling off a big presentation at work or finding a way to pay all of our bills can sometimes feel adventurous, but these fleeting touches of excitement pale in comparison to the true adventure that awaits us in nature. A kayak is the perfect vehicle to pursue adventure while exploring nature.

Leaving the city behind and escaping to the outdoors is an adventure in itself, but dropping your kayak in a mountain lake or flowing river is another level of excitement. No two days on the water are the same. No two bodies of water are identical. You can run a river into remote forests or explore a large mountain lake. How far can you travel in a day? Will you camp on the other side of the lake? Will you catch your own dinner from your kayak on the way?

Your kayak is your personal watercraft. Where will you go?  What will you discover? What’s just around the next bend? What’s it like to go through the rapids? The beautiful thing about kayaking is that each of these questions can be answered by you and your kayak alone. The beauty of your surroundings and the eternal question of “what lies ahead” keep things interesting and exciting.

Reason #5: Kayaking immerses you in nature

why kayaking is fun
Kayaking can provide a deep sense of connection to the natural world

No matter where you kayak, you’ll find yourself immersed in nature.  You’ll see various wildlife flocking to the water for a drink. You’ll feel the water beneath you. In most cases, your increased breathing rate from paddling will be met with fresh, clean air. On a kayak, you’re paddling with be aided by the currents of the river when paddling downstream. If you need to paddle upstream, you’ll come face to face with the power of the moving water against your efforts.

There are few better ways to experience nature than in a kayak. From the unique vantage point of the water, you’ll experience nature in its full effect surrounding you.  Gliding over the water in your kayak, you’ll feel as though you could reach down and grab a fish straight from the water. Master of your own domain, you will choose which aspects of nature to focus in on. Whatever you choose, nature will be all around you – enveloping your experience.

Kayaking allows you to experience the environment in a unique and immersive way. You can feel the water under your paddle, hear the sounds of nature, and feel the wind on your face. This can provide a deep sense of connection to the natural world.

Reason #6: Kayaking offers special access

Being in a kayak affords some unique access to bodies of water that those without a boat just can’t get to. Encountering a gorgeous glacial mountain lake is breathtaking, but being able to examine its boundaries from the water is something else. The length of a river you can travel in a day exponentially increases when aided by the current.

Kayaks allow you to reach places others can’t and provide opportunities to search less-traveled areas easily. In your kayak – your personal water vehicle – you go where you want on the water without restriction. Fishing from your kayak in the middle of a lake will usually yield a better catch. And viewing the shoreline from the water is a different experience than on land.

In a kayak, scenic views abound.  Bodies of water offer increased views of the sky and more of your surrounding can be enjoyed from the water. Being on a kayak is a privilege.  It’s a ticket to experience what others can’t and to go where others don’t. This special access is a big part of why kayaking is fun.

Reason #7: Kayaking provides unique experiences on the water

kayaking through a cave
Cave kayaking is a unique experience that creates lasting memories.

There is something uniquely satisfying about being on the water in a kayak.  The freedom and access a kayak offers can’t be beaten and the thrill of propelling yourself through the water is pretty awesome. Kayaking offers a unique way to explore shorelines, lakes, and rivers. As kayaks sit lower in the water than traditional boats, you’ll feel as though you are in the water as you paddle. Being lightweight and easy to maneuver, kayaks let you do and go where you want without too much effort.

From cave kayaking to kayak fishing, the opportunities for incredible experiences on a kayak are countless. Meander around the boats in a marina.  Paddle through surface vegetation on a crystal clear lake. Ride the whitewater of a raging river. Cruise through the surf to paddle alongside playful dolphins. Catch the big one from the depths of a glacial lake. Take a romantic kayak trip with your partner and watch the sunset from the water. Whatever your preferred water, kayaking offers a multitude of unique and enjoyable experiences.

The Bottom Line

Kayaking is so much fun for a variety of reasons, from physical fitness to access to nature and unique experiences on the water. Whether you’re a beginner or an experienced paddler, kayaking offers something for everyone. As a low-impact activity, paddling a kayak is a fun way for people of all activity levels to get some exercise. It offers thrills, scenic views, adventure, and special access to remote places.

So if you’re looking for a new adventure or a way to connect with nature, consider giving kayaking a try. With its many benefits and endless opportunities for exploration and adventure, kayaking is sure to provide amazing experiences for anyone who’s willing to paddle out and explore the water.


Ready to get out on the water? Here are some kayaks to consider:

The Top 10 Paddle Board Accessories Every SUP’er Should Own

top 10 paddle board gear accessories

Paddle boarding is a popular water sport that a growing number of people enjoy around the world. Regardless of whether you’re a beginner or an experienced paddler, having the right paddle board gear can make a huge difference in your overall experience on the water. In this article, we’ll list the top 10 paddleboard accessories that every stand-up paddleboarder should own.

From paddles to personal flotation devices (PFDs), there are many different types of gear that can enhance your enjoyment while out of the water. By investing in quality gear, you can feel more confident and comfortable while exploring the water. But getting the right gear for SUP’ing doesn’t have the break the bank either.  There are some great and affordable paddleboard accessory options waiting for you.

In this article, we’ll provide an overview of the top 10 paddle board accessories, including why they are important, the types of accessories available, and what to consider when choosing the right paddle board gear for your needs. By the end, you’ll have a better understanding of the essential accessories for your next (or first) paddleboarding adventure.

#1: Paddle

The most important piece of paddle board gear (other than your paddleboard) is a high-quality paddle. Paddles come in a variety of materials and shapes, and choosing the right one can make a big difference in your overall experience on the water.

When choosing a paddle, it’s important to consider the material, weight, and blade shape. Most paddles are made of either aluminum, fiberglass, or carbon fiber. Aluminum paddles tend to be the most affordable but can be heavier and less durable than other materials. Fiberglass paddles are lightweight and durable, while carbon fiber paddles are the most lightweight and offer the best performance.

The weight of the paddle is also an important factor to consider. A heavier paddle can be more difficult to maneuver and can cause fatigue over long periods of use. Look for a paddle that is lightweight and easy to handle.

The blade shape is another important consideration. The most common blade shapes are teardrop, rectangular, and dihedral. Teardrop blades are the most versatile and are suitable for a wide range of conditions. Rectangular blades are ideal for flat water paddling and provide maximum power. Dihedral blades are designed for speed and efficiency, making them ideal for long-distance paddling.

Overall, investing in a high-quality paddle is essential for a successful and enjoyable paddleboarding experience. Consider the material, weight, and blade shape when choosing a paddle that is right for your needs.

Budget
Abahub SUP Paddles - 3 Piece Adjustable Stand up Paddle - Lightweight Oar for Paddleboard, Adjustable Aluminum Alloy PU Coated Shaft 68" - 84", Black Plastic Nylon Blade
Our Favorite
SUP Paddle - Carbon Fiber & Fiberglass Paddles - 3 Piece Adjustable Paddle Board Paddles - Carbon Fiber or Fiberglass Performance Blades with Lightweight Aluminum Shaft Stand-Up Paddles
Splurge
BPS Carbon and Fiberglass Shaft Paddles Koru and Classic Padddles 2-Piece (Carbon Fiber Shaft - Koru Black, 2-Piece SUP Paddle)
Abahub SUP Paddles - 3 Piece Adjustable Stand up Paddle - Lightweight Oar for Paddleboard, Adjustable Aluminum Alloy PU Coated Shaft 68" - 84", Black Plastic Nylon Blade
SUP Paddle - Carbon Fiber & Fiberglass Paddles - 3 Piece Adjustable Paddle Board Paddles - Carbon Fiber or Fiberglass Performance Blades with Lightweight Aluminum Shaft Stand-Up Paddles
BPS Carbon and Fiberglass Shaft Paddles Koru and Classic Padddles 2-Piece (Carbon Fiber Shaft - Koru Black, 2-Piece SUP Paddle)
$34.95
$69.95
$124.99
Budget
Abahub SUP Paddles - 3 Piece Adjustable Stand up Paddle - Lightweight Oar for Paddleboard, Adjustable Aluminum Alloy PU Coated Shaft 68" - 84", Black Plastic Nylon Blade
$34.95
Our Favorite
SUP Paddle - Carbon Fiber & Fiberglass Paddles - 3 Piece Adjustable Paddle Board Paddles - Carbon Fiber or Fiberglass Performance Blades with Lightweight Aluminum Shaft Stand-Up Paddles
$69.95
Splurge
BPS Carbon and Fiberglass Shaft Paddles Koru and Classic Padddles 2-Piece (Carbon Fiber Shaft - Koru Black, 2-Piece SUP Paddle)
$124.99

#2: Personal Flotation Device (PFD)

A personal flotation device (PFD) is an essential accessory for anyone participating in water sports, including paddle boarding. PFDs are designed to keep you afloat in the water in case of an accident or emergency.

When choosing a PFD, it’s important to look for one that is specifically designed for paddle boarding. These PFDs are designed to be lightweight and comfortable, allowing for ease of movement while on the board. They also often come with features like pockets for storage and reflective strips for increased visibility.

There are several different types of PFDs available, including inflatable and non-inflatable options. Inflatable PFDs are compact and easy to store, but require manual inflation in an emergency situation. Non-inflatable PFDs are bulkier but provide constant flotation without the need for manual inflation.

It’s important to choose a PFD that fits properly and is comfortable to wear. Make sure to try on different PFDs before making a purchase to ensure the best fit. Additionally, make sure that the PFD is approved by the United States Coast Guard (USCG) to ensure its effectiveness in an emergency situation.

Overall, a PFD is a necessary accessory for paddle boarding and can help ensure your safety on the water. Look for a PFD that is designed specifically for paddle boarding, fits properly, and is USCG-approved.

Budget
awesafe Adult Watersport Universal Vest
Our Favorite
Onyx M16 Unisex Belt Pack Manual Inflatable Life Jacket (PFD), Grey
Splurge
BOTE Life Jacket Manual Inflatable Mechanism Teen to Adult Life Vest Fanny Pack Inflatable PFD Waist US Coast Guard Approved CO2 Included Unisex Belt Pack Manual Inflatable Life Jacket Adjustable
awesafe Adult Watersport Universal Vest
Onyx M16 Unisex Belt Pack Manual Inflatable Life Jacket (PFD), Grey
BOTE Life Jacket Manual Inflatable Mechanism Teen to Adult Life Vest Fanny Pack Inflatable PFD Waist US Coast Guard Approved CO2 Included Unisex Belt Pack Manual Inflatable Life Jacket Adjustable
$42.98
$75.78
$89.00
Budget
awesafe Adult Watersport Universal Vest
$42.98
Our Favorite
Onyx M16 Unisex Belt Pack Manual Inflatable Life Jacket (PFD), Grey
$75.78
Splurge
BOTE Life Jacket Manual Inflatable Mechanism Teen to Adult Life Vest Fanny Pack Inflatable PFD Waist US Coast Guard Approved CO2 Included Unisex Belt Pack Manual Inflatable Life Jacket Adjustable
$89.00

#3: Leash

A leash is a vital accessory for anyone paddle boarding in open water. A leash attaches to your ankle or calf and connects to the board, keeping you attached to the board in case of a fall or accident. A leash not only helps prevent your board from floating away, but it also helps prevent the board from becoming a hazard to other water users.

When choosing a leash, there are a few things to consider. First, make sure to choose a leash that is appropriate for the type of paddle boarding you’ll be doing. There are different types of leashes for flatwater paddling, river paddling, and surf paddling.

It’s also important to choose a leash that is the appropriate length. A leash that is too long can drag behind the board and get tangled, while a leash that is too short can cause the board to bounce back and hit you in the face.

Finally, make sure to choose a leash that is high-quality and durable. Look for a leash that is made from strong materials like nylon or polyurethane, and that has a strong and secure attachment to the board.

Overall, a leash is a bug safety accessory for anyone paddle boarding in open water. Choose a leash that is appropriate for your type of paddle boarding, is the right length, and is made from high-quality materials to ensure your safety on the water.

Budget
HEYTUR Coiled SUP Leash 10' Surfboard Leash Sup Leg Rope Strap Stand Up Paddleboard Leash(Black)
Our Favorite
BPS 'Storm' Premium Coiled SUP Leash - 10ft Leash with Triple Rail Savers and Double Swivels (Koru White)
Splurge
BOTE Coiled PVC Wrapped Ankle Leash Universal Design for SUP Stand Up Paddle Boarding Surf Wake Watersports Accessory 10 FT Leash Adults Kids Friendly
HEYTUR Coiled SUP Leash 10' Surfboard Leash Sup Leg Rope Strap Stand Up Paddleboard Leash(Black)
BPS 'Storm' Premium Coiled SUP Leash - 10ft Leash with Triple Rail Savers and Double Swivels (Koru White)
BOTE Coiled PVC Wrapped Ankle Leash Universal Design for SUP Stand Up Paddle Boarding Surf Wake Watersports Accessory 10 FT Leash Adults Kids Friendly
$6.99
$17.99
$45.00
Budget
HEYTUR Coiled SUP Leash 10' Surfboard Leash Sup Leg Rope Strap Stand Up Paddleboard Leash(Black)
$6.99
Our Favorite
BPS 'Storm' Premium Coiled SUP Leash - 10ft Leash with Triple Rail Savers and Double Swivels (Koru White)
$17.99
Splurge
BOTE Coiled PVC Wrapped Ankle Leash Universal Design for SUP Stand Up Paddle Boarding Surf Wake Watersports Accessory 10 FT Leash Adults Kids Friendly
$45.00

#4: Dry Bag

A dry bag is another important piece of paddle board gear, especially if you plan on carrying extra clothes, food, or other items with you on the water. A dry bag is designed to keep your items dry and protected from water damage, even if the bag itself gets wet.

When choosing a dry bag, consider the size and capacity you’ll need. There are many different sizes available, from small pouches to large duffel bags, so choose one that fits your needs.

It’s also important to consider the material and quality of the bag. Look for a bag made from high-quality, waterproof materials like PVC or nylon. Additionally, make sure the bag has strong zippers and closures to prevent water from seeping in.

When using a dry bag, make sure to properly seal it before heading out on the water. Test the bag by filling it with some paper or other non-electronic items and submerging it in water for a few minutes. If the contents stay dry, the bag is properly sealed and ready to use.

Overall, a dry bag is a necessary accessory for anyone paddle boarding, especially if you plan on carrying extra clothes, food, or other items with you on the water. Choose a bag that is the appropriate size and capacity for your needs, is made from high-quality waterproof materials, and has strong zippers and closures.

Budget
HEETA Waterproof Dry Bag for Women Men (Upgraded Version), Roll Top Lightweight Dry Storage Bag Backpack with Emergency Whistle for Travel, Swimming, Boating, Kayaking, Camping, Beach (Black, 5L)
Our Favorite
Earth Pak Waterproof Dry Bag - Roll Top Waterproof Backpack Sack Keeps Gear Dry for Kayaking, Beach, Rafting, Boating, Hiking, Camping and Fishing with Waterproof Phone Case
Splurge
Rockagator Waterproof Backpacks - Hydric Series 40 Liter Hunting Camouflage Quick-Submersion Waterproof Backpack, River Dry Bag for Canoeing, Kayaking or Rafting, Covert
HEETA Waterproof Dry Bag for Women Men (Upgraded Version), Roll Top Lightweight Dry Storage Bag Backpack with Emergency Whistle for Travel, Swimming, Boating, Kayaking, Camping, Beach (Black, 5L)
Earth Pak Waterproof Dry Bag - Roll Top Waterproof Backpack Sack Keeps Gear Dry for Kayaking, Beach, Rafting, Boating, Hiking, Camping and Fishing with Waterproof Phone Case
Rockagator Waterproof Backpacks - Hydric Series 40 Liter Hunting Camouflage Quick-Submersion Waterproof Backpack, River Dry Bag for Canoeing, Kayaking or Rafting, Covert
$9.99
$18.55
$129.95
Budget
HEETA Waterproof Dry Bag for Women Men (Upgraded Version), Roll Top Lightweight Dry Storage Bag Backpack with Emergency Whistle for Travel, Swimming, Boating, Kayaking, Camping, Beach (Black, 5L)
$9.99
Our Favorite
Earth Pak Waterproof Dry Bag - Roll Top Waterproof Backpack Sack Keeps Gear Dry for Kayaking, Beach, Rafting, Boating, Hiking, Camping and Fishing with Waterproof Phone Case
$18.55
Splurge
Rockagator Waterproof Backpacks - Hydric Series 40 Liter Hunting Camouflage Quick-Submersion Waterproof Backpack, River Dry Bag for Canoeing, Kayaking or Rafting, Covert
$129.95

#5: Sun Protection

Not all paddle board gear is focused on fun, some gear is just plain smart. Paddle boarding is a fun way to enjoy the outdoors, but it’s important to protect yourself from the sun. The surface of the water can reflect and intensify the UV exposure, so don’t mess around with the sun while paddleboarding. Spending hours on the water can leave you exposed to the sun, so it’s important to think about sun protection while paddle boarding.

One essential accessory for sun protection is a hat. A wide-brimmed hat can provide shade for your face and neck, while also helping to keep you cool. Look for a hat made from lightweight, breathable materials like straw or cotton.

Protecting your eyes is also important while paddle boarding. A pair of sunglasses with polarized lenses will help reduce glare and protect your eyes from harmful UV rays. Look for sunglasses that float, in case they fall off your face while on the water. If your sunglasses don’t float, it’s a good idea to pick up some straps to make sure you don’t drop them in the drink.

Finally, consider wearing a lightweight, breathable long-sleeved shirt to protect your arms from the sun. Look for shirts made from moisture-wicking materials that will keep you cool and dry while on the water.

Overall, sun protection is an important part of paddle boarding. Wear a wide-brimmed hat, wear sunglasses with polarized lenses, and consider wearing a lightweight, long-sleeved shirt to protect your skin from UV rays that will otherwise leave you burnt and uncomfortable.

Budget
MALIDAK Floating Sunglasses, Polarized Sports Fan Sunglasses Equipped With 72-hour Sea Water Corrosion Resistance Lens
Our Favorite
MISSION Bucket
Splurge
O'Neill Men's Basic Skins Upf 30 + Long Sleeve Sun Shirt
MALIDAK Floating Sunglasses, Polarized Sports Fan Sunglasses Equipped With 72-hour Sea Water Corrosion Resistance Lens
MISSION Bucket
O'Neill Men's Basic Skins Upf 30 + Long Sleeve Sun Shirt
Price not available
Price not available
Price not available
Budget
MALIDAK Floating Sunglasses, Polarized Sports Fan Sunglasses Equipped With 72-hour Sea Water Corrosion Resistance Lens
Price not available
Our Favorite
MISSION Bucket
MISSION Bucket
Price not available
Splurge
O'Neill Men's Basic Skins Upf 30 + Long Sleeve Sun Shirt
Price not available

#7: Waterproof Bluetooth Speaker

You love your favorite music.  The right song can set the tone for whatever activity you embark on.  Like any other activity, music is great to have while paddleboarding.  Your favorite music is already in your phone (safely secured in your waterproof case), but to get it out into the world, you’ll need a Bluetooth speaker that you can bring along and secure on your board.

While you can dry pretty dry when you’re paddleboarding, you should always expect to get wet when you’re out on your SUP.  A Bluetooth speaker is no different.  A simple splash of water can ruin an otherwise perfect speaker.  If you’re going to take a Bluetooth speaker paddleboarding with you, make sure it’s waterproof.  Look for an IP6X rating for the best protection against the water.

Waterproof Bluetooth speakers are our favorite paddle board gear. Paddleboarding with your music cranked can make the experience that much more enjoyable.  If paddleboarding with a group, you may find them gravitating towards you on the water to enjoy the music.  But make sure you’re considerate of others out on the water.  No one likes overwhelmingly loud music invading their peaceful time outdoors. If you’re near others, be considerate and turn down the volume.

Budget
NOTABRICK Bluetooth Speakers,Portable Wireless Speaker
Our Favorite
JBL Clip 3, River Teal - Waterproof, Durable & Portable Bluetooth Speaker - Up to 10 Hours of Play - Includes Noise-Cancelling Speakerphone & Wireless Streaming
Splurge
JBL Flip 6 - Portable Bluetooth Speaker, powerful sound and deep bass, IPX7 waterproof, 12 hours of playtime, JBL PartyBoost for multiple speaker pairing for home, outdoor and travel (Blue)
NOTABRICK Bluetooth Speakers,Portable Wireless Speaker
JBL Clip 3, River Teal - Waterproof, Durable & Portable Bluetooth Speaker - Up to 10 Hours of Play - Includes Noise-Cancelling Speakerphone & Wireless Streaming
JBL Flip 6 - Portable Bluetooth Speaker, powerful sound and deep bass, IPX7 waterproof, 12 hours of playtime, JBL PartyBoost for multiple speaker pairing for home, outdoor and travel (Blue)
Price not available
$38.40
$99.95
Budget
NOTABRICK Bluetooth Speakers,Portable Wireless Speaker
Price not available
Our Favorite
JBL Clip 3, River Teal - Waterproof, Durable & Portable Bluetooth Speaker - Up to 10 Hours of Play - Includes Noise-Cancelling Speakerphone & Wireless Streaming
$38.40
Splurge
JBL Flip 6 - Portable Bluetooth Speaker, powerful sound and deep bass, IPX7 waterproof, 12 hours of playtime, JBL PartyBoost for multiple speaker pairing for home, outdoor and travel (Blue)
$99.95

#8: Waterproof Phone Case

In today’s world, most people don’t leave home without their smartphones. If you’re bringing your phone with you on a paddle boarding adventure, it’s important to protect it from water damage. A waterproof phone case can keep your phone safe and dry while still allowing you to use it for photos, navigation, or communication. A waterproof case is the piece of paddle board gear that keeps your most important piece of gear, your phone, safe.

When choosing a waterproof phone case, make sure it’s designed to fit your specific phone model. Look for a case that is fully waterproof, not just water-resistant, and has a good seal to keep water out. Some cases also come with added features like a lanyard or arm band for easy carrying.

It’s important to test your waterproof phone case before heading out on the water. Try submerging it in water for a few minutes with some non-electronic items inside to make sure it’s properly sealed and your phone will stay dry.

Overall, a waterproof phone case is an essential accessory for anyone paddle boarding with their phone. Choose a case that’s designed for your specific phone model, is fully waterproof with a good seal, and consider additional features like a lanyard or arm band for easy carrying.

Budget
Hiearcool Waterproof Phone Pouch, Waterproof Phone Case for iPhone 15 14 13 12 Pro Max, IPX8 Cellphone Dry Bag Beach Cruise Ship Essentials 2Pack-8.3"
Our Favorite
Pelican 2 Pack Marine - IP68 Waterproof Phone Pouch (Regular Size)-Floating Waterproof Phone Case For iPhone 15 Pro Max/ 14 Pro Max/ 13 Pro Max/ 12/ S24 - Detachable Lanyard - Black / Hi-Vis Yellow
Splurge
Professional Waterproof Underwater Snorkeling Phone Case for iPhone 11/8/7/6 Pro Max Mini Xr/X/Xs/Samsung Galaxy Note10/9/8/S10/9/8 Ultra Plus Professional screensizes Below 4.7inch Green
Hiearcool Waterproof Phone Pouch, Waterproof Phone Case for iPhone 15 14 13 12 Pro Max, IPX8 Cellphone Dry Bag Beach Cruise Ship Essentials 2Pack-8.3"
Pelican 2 Pack Marine - IP68 Waterproof Phone Pouch (Regular Size)-Floating Waterproof Phone Case For iPhone 15 Pro Max/ 14 Pro Max/ 13 Pro Max/ 12/ S24 - Detachable Lanyard - Black / Hi-Vis Yellow
Professional Waterproof Underwater Snorkeling Phone Case for iPhone 11/8/7/6 Pro Max Mini Xr/X/Xs/Samsung Galaxy Note10/9/8/S10/9/8 Ultra Plus Professional screensizes Below 4.7inch Green
$9.99
$25.00
$36.99
Budget
Hiearcool Waterproof Phone Pouch, Waterproof Phone Case for iPhone 15 14 13 12 Pro Max, IPX8 Cellphone Dry Bag Beach Cruise Ship Essentials 2Pack-8.3"
$9.99
Our Favorite
Pelican 2 Pack Marine - IP68 Waterproof Phone Pouch (Regular Size)-Floating Waterproof Phone Case For iPhone 15 Pro Max/ 14 Pro Max/ 13 Pro Max/ 12/ S24 - Detachable Lanyard - Black / Hi-Vis Yellow
$25.00
Splurge
Professional Waterproof Underwater Snorkeling Phone Case for iPhone 11/8/7/6 Pro Max Mini Xr/X/Xs/Samsung Galaxy Note10/9/8/S10/9/8 Ultra Plus Professional screensizes Below 4.7inch Green
$36.99

#9: Board Carrier

Transporting your paddle board to and from the water can be a challenge, especially if you’re carrying it a long distance or on uneven terrain. A board carrier can make the process much easier and protect your board from damage.

There are a few different types of board carriers available, including:

  1. Shoulder strap: A simple shoulder strap can be a lightweight and easy way to carry your board. Look for a strap that’s adjustable and padded for comfort.
  2. Wheeled carrier: A wheeled carrier can make it easy to transport your board across long distances or rough terrain. Look for a carrier with sturdy wheels and a padded strap or handle for comfort.
  3. Car roof rack: If you’re transporting your board by car, a roof rack can be a great option. Make sure your roof rack is designed to fit your specific car and can securely hold your board in place.

When choosing a board carrier, consider the weight and size of your board, as well as the distance you’ll need to carry it. Look for a carrier that’s sturdy and well-made, and consider additional features like adjustable straps or padded handles for comfort.

Overall, a board carrier is can make transporting your paddle board much easier and protect your board from damage. When purchasing this type of paddle board gear, consider which type (shoulder strap, wheeled carrier, or car roof rack) fits your needs best.

Budget
SUP-NOW Paddleboard Carrier SUP Carrying Strap to Carry Paddleboard Paddle Board Accessories for Women and Men
Our Favorite
MeeFar Universal Car Soft Roof Rack Pads Luggage Carrier System for Kayak Surfboard SUP Canoe Include 2 Heavy Duty Tie Down Straps, 2 Tie Down Rope, 2 Quick Loop Strap and Storage Bag
Splurge
Suspenz Double SUP Transport Cart with Airless Wheels, Carrier/Trolley for 2 Stand Up Paddle Boards & Surfboards, Yellow (22-9934)
SUP-NOW Paddleboard Carrier SUP Carrying Strap to Carry Paddleboard Paddle Board Accessories for Women and Men
MeeFar Universal Car Soft Roof Rack Pads Luggage Carrier System for Kayak Surfboard SUP Canoe Include 2 Heavy Duty Tie Down Straps, 2 Tie Down Rope, 2 Quick Loop Strap and Storage Bag
Suspenz Double SUP Transport Cart with Airless Wheels, Carrier/Trolley for 2 Stand Up Paddle Boards & Surfboards, Yellow (22-9934)
$21.99
$55.99
$169.95
Budget
SUP-NOW Paddleboard Carrier SUP Carrying Strap to Carry Paddleboard Paddle Board Accessories for Women and Men
$21.99
Our Favorite
MeeFar Universal Car Soft Roof Rack Pads Luggage Carrier System for Kayak Surfboard SUP Canoe Include 2 Heavy Duty Tie Down Straps, 2 Tie Down Rope, 2 Quick Loop Strap and Storage Bag
$55.99
Splurge
Suspenz Double SUP Transport Cart with Airless Wheels, Carrier/Trolley for 2 Stand Up Paddle Boards & Surfboards, Yellow (22-9934)
$169.95

#10: Action Camera & Mount

All outdoor activity lovers should have an action camera.  The quality and uniqueness of video that these little, packable cameras offer is truly amazing.  With each new year, better and better models are coming out.  Action cameras are a great way to grab some shots of your epic time out on the water or some video of you doing that headstand on your paddleboard.

The great part about paddleboarding with an action camera is that it’s simple to add a camera mount to your board.  Usually mounted on the front, these small mounts can be permanently adhered or temporarily attached via suction cup.  We recommend sticking a simple mount on the front of your board.  Action Cam mounts are small and won’t get in the way when your camera is not needed, but are great to have ready-to-go when needed.

Whether you prefer to show your audience your trip through your eyes (camera facing forward) or want them to see how cool your triceps look while paddling, action cameras offer an awesome way to capture your time on the water. Action cams also give you the chance to show the world how styling you are with your full paddle board gear.

Budget
HSU Surf Mounts and Accessories for Ski, Snorkeling, Surfing, Wakeboarding Fitting GoPro Hero 12,11,10,9,8,7,6,5 Black, Silver, AKASO Campark, and Other Action Cameras (Surfing Kit)
Our Favorite
GoPro Surfboard Mounts (All GoPro Cameras) - Official GoPro Mount
Splurge
GoPro HERO11 Black - Waterproof Action Camera with 5.3K60 Ultra HD Video, 27MP Photos, 1/1.9" Image Sensor, Live Streaming, Webcam, Stabilization
HSU Surf Mounts and Accessories for Ski, Snorkeling, Surfing, Wakeboarding Fitting GoPro Hero 12,11,10,9,8,7,6,5 Black, Silver, AKASO Campark, and Other Action Cameras (Surfing Kit)
GoPro Surfboard Mounts (All GoPro Cameras) - Official GoPro Mount
GoPro HERO11 Black - Waterproof Action Camera with 5.3K60 Ultra HD Video, 27MP Photos, 1/1.9" Image Sensor, Live Streaming, Webcam, Stabilization
$9.99
$19.99
$329.00
Budget
HSU Surf Mounts and Accessories for Ski, Snorkeling, Surfing, Wakeboarding Fitting GoPro Hero 12,11,10,9,8,7,6,5 Black, Silver, AKASO Campark, and Other Action Cameras (Surfing Kit)
$9.99
Our Favorite
GoPro Surfboard Mounts (All GoPro Cameras) - Official GoPro Mount
$19.99
Splurge
GoPro HERO11 Black - Waterproof Action Camera with 5.3K60 Ultra HD Video, 27MP Photos, 1/1.9" Image Sensor, Live Streaming, Webcam, Stabilization
$329.00

paddle board gear you should own

The Bottom Line

Paddle boarding can be a fun and rewarding adventure, but it’s important to have the right gear to stay safe and comfortable on the water. Whether you’re a beginner or an experienced paddler, investing in the right paddle board gear can make a big difference in your overall experience.

In this article, we’ve highlighted the top 10 paddle board gear accessories every adventurer should own. From a high-quality paddle and personal flotation device to sun protection and navigation tools, these accessories can help you stay safe, comfortable, and prepared on the water.

Of course, every paddler’s needs and preferences are different, so make sure to choose the accessories that are right for you and the type of paddle boarding you’ll be doing. Don’t forget to test your gear before heading out on the water and always follow safety guidelines and regulations.

With the paddle board gear and a sense of adventure, paddle boarding can be an exciting way to explore the great outdoors and enjoy the beauty of the water.


Not sure where the best places are to SUP?  Check out our Where to Go Standup Paddleboarding Guide.

Get Your Hook into More Trout: Tips and Techniques for Lake Fishing

how to fish trout in lake
How to fish trout in lakes presents unique challenges that make the sport all the more exciting.

If you’re a fishing enthusiast, then you know that catching trout is one of the most exciting fish to catch. When we think of trout fishing, we usually first think of fly fishing in rivers, streams, and creeks. But how to fish trout in lakes can be a different challenge altogether.  But how do you increase your chances of catching more trout in lakes? In this article, we’ll cover some tips and techniques to help you get your hook into more trout and bring them home for dinner.

Before we dive into the specifics, let’s first discuss why trout fishing in lakes is so popular. For starters, fishing in lakes provides a peaceful and serene environment that is a welcome escape from the hustle and bustle of daily life. Additionally, lakes are often stocked with a variety of trout species, which means that you have the opportunity to catch different types of fish throughout the year.

But perhaps the biggest reason why trout fishing in lakes is so popular is the challenge. Trout are notoriously difficult to catch, and fishing in lakes presents unique challenges that make the sport all the more exciting. By following the tips and techniques outlined in this article, you’ll be better equipped to face those challenges and increase your chances of catching more trout in lakes. So, let’s get started!

Understanding the Behavior of Lake Trout

Wading into a lake to fish for trout
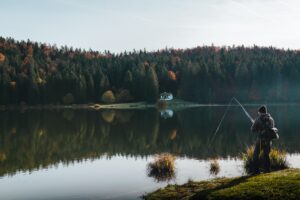
Before you can catch more trout in lakes, you need to understand their behavior. Trout are cold-water fish that prefer to stay in water temperatures between 50 and 60 degrees Fahrenheit. They also tend to stay in deeper waters during the warmer months and move to shallower waters in the cooler months. Knowing these behaviors can help you determine the best time of day, season, and weather for lake trout fishing.

When fishing in a lake, it’s important to consider water depth as well. Trout tend to stay in deeper waters during the day, so it’s best to fish for them early in the morning or late in the evening when they are more likely to come up to shallower waters. Additionally, you may want to focus on areas of the lake where the water is cooler, such as around springs or inlets.

Another important factor to consider is the weather. Trout tend to be more active on cloudy days or when there is a light drizzle. They are also more active during the spring and fall when the water temperature is cooler. Fishing during these times can increase your chances of catching more trout in lakes.

By understanding the behavior of lake trout, you can better plan your fishing trip and increase your chances of success. Keep these factors in mind when planning your next lake fishing trip, and you’ll be well on your way to catching more trout.

Choosing the Right Gear for Lake Trout Fishing

When it comes to lake trout fishing, having the right gear is essential for success. Here are some of the key pieces of gear you’ll need:

  1. Rod and reel: A medium to medium-heavy rod and reel combo is recommended for lake trout fishing. If you prefer a spinning setup, look for a spinning reel with a smooth drag system and a rod with enough backbone to handle the fight of a big trout. For fly setups, we recommend a 5/6 rod and reel combo that will get you enough strength to lander bigger fish but still allow you to feel the bite.
  2. Line: Use a braided or fluorocarbon line with a test weight of at least 6-8 pounds. This will give you the strength you need to reel in a big trout while also being sensitive enough to detect bites. For fly setups, choose a floating fly line if fishing from the shore and a sinking line if fishing in the middle of the lake with a boat or float tube.
  3. Lures, flies, and baits: The best lures for lake trout fishing include spoons, spinners, and jigs. For baits, try live or artificial bait such as worms, minnows, or power bait. Streamer flies such as woolly buggers and leeches work best in deeper water. Experiment with different colors and sizes to see what works best in your lake.
  4. Other equipment: Don’t forget to bring a landing net, pliers, and a stringer or live well to keep your catch fresh.

When choosing gear, it’s important to consider your experience level and budget. While high-end gear can be beneficial, it’s unnecessary for a successful lake trout fishing trip. With the right combination of gear and technique, even a beginner can catch a trophy-sized trout. For more ideas on the gear you’ll need to catch more trout in lakes, visit Fishing Lido Key.

By investing in quality gear and selecting the right equipment for the job, you’ll be well on your way to catching more trout in lakes.

Holding a lake trout catch

Techniques for Catching Trout in Lakes

Now that you have the right gear and an understanding of lake trout behavior, it’s time to focus on techniques for catching them. Here are some tried-and-true techniques to help you catch more trout in lakes:

  1. Trolling: Trolling is a popular technique for catching lake trout. It involves dragging a lure or bait behind a moving boat. Use a downrigger or lead core line to get your lure or bait deep enough in the water, and adjust the speed of your boat to match the activity level of the fish.
  2. Casting: Casting is another effective technique for catching lake trout. Look for structures such as weed beds or drop-offs, and cast your lure or bait near them. Retrieve your lure or bait slowly and steadily, and be ready for a strike at any moment.
  3. Drifting: Drifting is a technique that involves using the wind or current to move your boat along the water. Use a drift sock or anchor to slow your boat down, and cast your lure or bait out into the water. This technique is particularly effective in areas with a lot of underwater structure.
  4. Still fishing: Still fishing is a technique that involves baiting a hook with live or artificial bait and letting it sit in one spot. This technique is particularly effective in areas with a lot of underwater structure or when the water is calm.

Remember, different techniques work better in different situations. Experiment with different techniques and adjust your approach based on the behavior of the fish and the conditions of the lake. With practice and patience, you’ll be well on your way to learning how to fish trout in lakes.

Best Practices for Catching More Trout in Lakes

In addition to having the right gear and using effective techniques, there are some best practices you should follow to increase your chances of catching more trout in lakes. Here are a few tips:

  1. Fishing for trout on a lake shoreRespect catch limits: Make sure you know the catch limits for the lake you’re fishing in and stick to them. Overfishing can harm fish populations and reduce the quality of the fishery.
  2. Practice catch-and-release: We’re a big fan of catch-and-release practices to ensure there’s plenty of fish for all to catch. If you’re not planning on eating your catch, consider practicing catch-and-release. This involves carefully removing the hook and releasing the fish back into the water. This helps preserve fish populations and ensures that the lake remains a healthy fishery for years to come.
  3. Be patient: Trout can be finicky and may not bite immediately. Be patient and persistent, and don’t give up too quickly. Focus on the beauty of your surroundings and remember that you could be back home or in the office, but you’re fishing instead.
  4. Keep your gear organized: Keep your gear organized and readily accessible to avoid wasting time searching for equipment when you could be fishing.
  5. Stay safe: Wear a life jacket if you’re out on the water and use caution when operating a boat or wading in the water.

By following these best practices, you’ll not only increase your chances of catching more trout in lakes but also help preserve the fishery for future generations of anglers.

Conclusion

Learning how to fish trout in lakes can be a challenging but rewarding experience. With the right gear, an understanding of trout behavior, effective techniques, and best practices, you can increase your chances of catching more fish and having a great time on the water.

Remember, fishing is not just about catching fish, but also about enjoying the outdoors and spending time with friends and family. So take the time to appreciate the beauty of the lake, and don’t get too caught up in the number of fish you catch.

By following these tips and techniques, you’ll be well on your way to becoming a successful lake trout angler. So get out there, cast your line, and see what you can catch!

A Beginner’s Guide to Belly Boat Fishing

belly boat fishing
Belly Boat (also known as “float tube”) fishing is a great way to get out to where the fish are.

Belly boat fishing is a unique and exciting way to fish that has been growing in popularity in recent years. If you’re new to the world of fishing, a belly boat is a great option to consider. It’s affordable, versatile, and offers an up-close and personal experience with fish that can be difficult to achieve with other types of fishing.

In this beginner’s guide, we’ll cover everything you need to know to get started. We’ll explain what it is, the gear and equipment you’ll need, techniques for fishing, and the best places to fish. Whether you’re a seasoned angler or a newcomer to fishing, belly boat fishing is an experience you won’t want to miss. So let’s dive in!

What is Belly Boat Fishing?

belly boat fishing
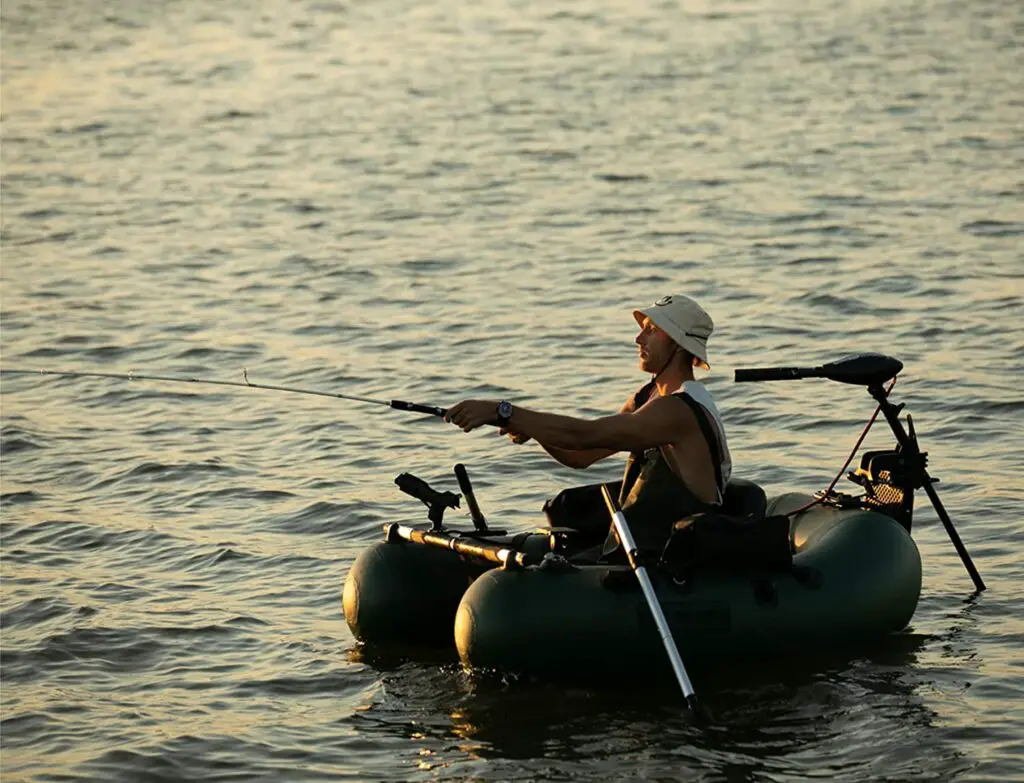
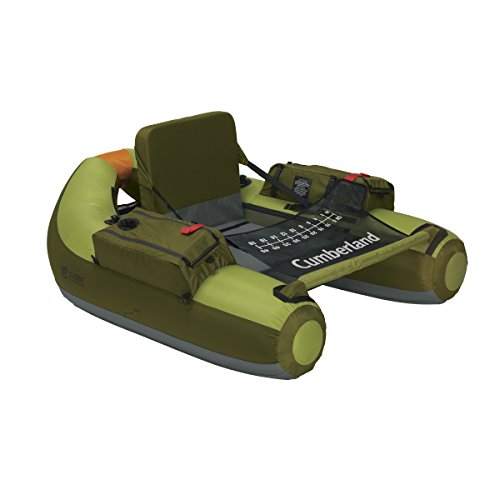
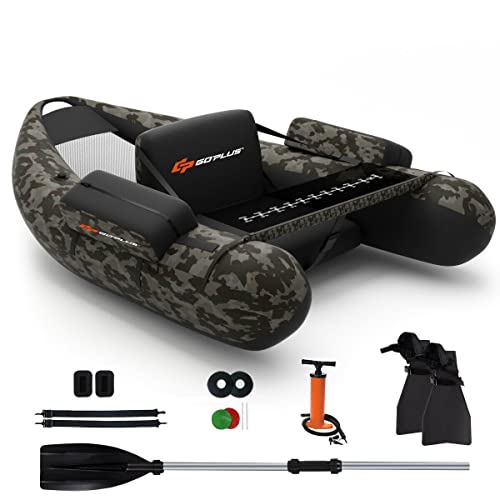
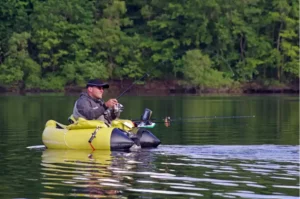
Belly boat fishing, also known as float tube fishing, is a type of fishing that involves using a small, inflatable watercraft to float on the surface of a body of water while fishing. Belly boats are typically made of durable materials like PVC, nylon, or rubber and are designed to be lightweight and easy to maneuver.

The main advantage is that it allows anglers to get much closer to fish than they would be able to from the shore. This is especially useful when fishing in areas where fish tend to congregate near the middle of a lake or pond.

There are a few different types of belly boats available, including U-shaped, V-shaped, and pontoon-style models. U-shaped belly boats are the most common type and are designed to be compact and easy to carry. V-shaped boats are larger and provide more stability, while pontoon-style boats are the most stable and offer the most space for gear and equipment.

No matter what type of belly boat you choose, it’s important to remember that safety should always be your top priority. Always wear appropriate safety equipment and make sure you’re familiar with the body of water you’re fishing in before you head out on your boat.

Preparing for Your Belly Boat Fishing Trip

Before you head out on your fishing trip, there are a few things you’ll need to prepare. Here are the key items and steps to keep in mind:

  1. Gear and Equipment: You’ll need a few key pieces of gear and equipment to get started, including a belly boat, a life jacket, a fishing rod and reel, a tackle box, waders, and fins. Make sure to invest in high-quality gear that’s comfortable and durable.
  2. Setting Up Your Boat: Once you have your gear and equipment, it’s time to set up your belly boat. Follow the manufacturer’s instructions to inflate your boat properly, and make sure all the valves are secured tightly. Then, attach any accessories like rod holders, cup holders, or gear bags.
  3. Safety First: Before you head out on the water, make sure you’re familiar with the body of water you’re fishing in. Check the weather forecast, and make sure to wear a life jacket. It’s also a good idea to let someone know where you’re going and when you plan to return.
  4. Technique: Belly boat fishing requires a few specific techniques to master. Practice casting and retrieving your line before you head out on the water, and make sure you’re comfortable using your fins to move around in the water.

By taking the time to prepare properly for your belly boat fishing trip, you’ll set yourself up for a fun and successful day on the water.

Techniques for Belly Boat Fishing

Belly boat fishing requires a slightly different set of techniques than other types of fishing. Here are a few key tips to keep in mind:

  1. Casting: One of the most important techniques to master when belly boat fishing is casting. Practice casting your line from a seated position in your boat before you head out on the water. Make sure to use a smooth motion and release the line at the right moment to avoid tangling.
  2. Retrieving: Once you’ve cast your line, it’s time to start retrieving. Use a slow, steady retrieve to avoid scaring fish away. You can also try using different retrieval speeds and techniques to see what works best in different conditions.
  3. Locating Fish: One of the benefits of belly boat fishing is that you can get up close and personal with fish. Look for signs of fish activity, such as jumping or splashing, and keep an eye on the water for any movement. You can also use a fish finder to locate fish more easily.
  4. Using Your Fins: Your fins are an important tool when fishing this way. Use them to maneuver around in the water and position yourself in the best spot for fishing. Try to be as quiet and subtle as possible, so as not to scare away fish. When using your fins, you’ll be moving backward through the water, so make you get familiar with navigating backward.

By practicing these techniques and experimenting with different methods, you’ll be well on your way to becoming a successful belly boat angler.

Common Fish Species to Target While Belly Boat Fishing

belly boat fishing
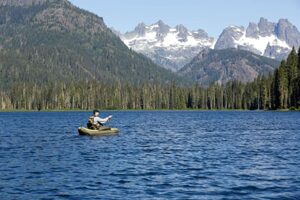
Belly boat fishing is a versatile technique that can be used to catch a wide variety of fish species. Here are a few of the most common fish species to target:

  1. Bass: Largemouth and smallmouth bass are two of the most popular fish species to target. Look for areas with plenty of vegetation and cover, and use lures like jigs or crankbaits to entice bass to bite.
  2. Trout: Rainbow, brown, and brook trout can all be caught while belly boat fishing. Look for surface action or areas with plenty of structure, and use small spinners or flies to catch these elusive fish. Fly fishing for trout from a belly boat is a great way to fish a lake.
  3. Panfish: Sunfish, crappie, and bluegill are all popular panfish species to target as well. Look for shallow areas near the shoreline, and use small jigs or live bait to catch these feisty fish.
  4. Catfish: Channel catfish and bullhead catfish can both be caught with this style of fishing. Look for deep holes or areas with plenty of cover, and use stink baits or cut bait to entice catfish to bite.

By targeting these common fish species, you’ll have plenty of opportunities to practice your techniques and catch some great fish. Just make sure to check the local fishing regulations before you head out, and always practice catch-and-release to help preserve these valuable fish populations.

Best Places to Belly Boat Fish

Belly boat fishing can be done in a variety of bodies of water, from small ponds to large lakes and rivers. Here are a few of the best places to try belly boat fishing:

  1. Small Ponds: Small ponds are a great place to try belly boat fishing, especially if you’re just getting started. Look for ponds with plenty of vegetation and structure, and try targeting panfish or bass.
  2. Lakes: Larger lakes can also be great places to belly boat fish. Look for areas with plenty of cover and structure, and try targeting bass, trout, or panfish. Just be aware of any boating restrictions or safety concerns.
  3. Rivers: Belly boat fishing in rivers can be a bit more challenging, but can also be very rewarding. Look for slower-moving sections of the river with plenty of cover and structure, and try targeting smallmouth bass or trout.
  4. Coastal Waters: For more experienced anglers, coastal waters can offer some great fishing opportunities. Look for areas with plenty of structure and current, and try targeting species like redfish or flounder.

Remember to always check the local fishing regulations before you head out, and be aware of any safety concerns in the area. By trying belly boat fishing in a variety of different bodies of water, you’ll be able to hone your skills and catch some great fish in the process.

belly boat fishing for trout
Fly fishing for trout from a belly boat is a great way to fish a lake.

The Bottom Line

Belly boat fishing can be a fun and exciting way to explore the great outdoors and catch some fish in the process. By following these tips and techniques, you’ll be well on your way to becoming a successful belly boat angler:

  • Start by choosing the right belly boat and equipment for your needs.
  • Always be aware of safety concerns and prepare for your trip accordingly.
  • Practice your casting and retrieving techniques, and experiment with different methods.
  • Target common fish species like bass, trout, panfish, and catfish.
  • Try fishing in a variety of different bodies of water to hone your skills.

Remember to always check the local fishing regulations and practice catch-and-release to help preserve these valuable fish populations. With a bit of practice and patience, you’ll soon be reeling in some great fish and enjoying all that belly boat fishing has to offer.


Ready to give it a try? Check out these Top-Selling Belly Boats:

Hands-On Review: Tobin Sports Inflatable Boat


tobin sports inflatable boat
The Tobin Sports Inflatable Boat is affordable, well-equipped, and roomy.

The Tobin Sports Inflatable Boat is a versatile inflatable watercraft that has become increasingly popular among outdoor enthusiasts in recent years. It’s designed to be lightweight and portable, making it an excellent option for people who want to enjoy water activities without the hassle of owning a full-sized boat. We picked one up to serve as a tender for our 46ft Sailboat. Our old dinghy was small and in rough shape.  The Tobin Sports Inflatable Boat has been a huge upgrade for us – and we saved quite a bit going with this less-known brand.

In our hands-on review, we’ll outline the features, benefits, and drawbacks of the Tobin Sports Inflatable Boat. We’ll examine the boat’s design and construction, ease of use, features and accessories, performance, and maneuverability to help you determine whether it’s the right choice for your water sports needs.

Whether you’re a seasoned boater or are just looking for an inexpensive way to explore nearby waters, hopefully, this review will provide you with valuable insights into the Tobin Sports Inflatable Boat and help you make an informed decision.

Buy Now at Costco.com

Tobin Sports Inflatable Boat

Tobin Sports Inflatable Boat

$739.99 $499.99
Buy Now at Costco.com


Boat Specs

Length: 11 ft.
Width: 64 in.
Height: 17 in.
Capacity: 5 people
Weight Capacity: 1,411 lbs
Max Motor Power: 15 HP

Tobin Sports Inflatable Boat

Design and Construction

The Tobin Sports Inflatable Boat is made with high-quality materials, designed to provide both durability and functionality. Tobin’s marketing calls the material the boat is made from, “Tritech”, which they claim has been tested against weight, strain, and movement offering superior strength. At the end of the day, Tritech is a PVC material, known for its strength and resistance to wear and tear, but not as durable against UV rays as Hypalon-built equivalents.  While it won’t hold up as long as a Hypalon boat against weather extremes, the PVC-based Tobin Boat is an ideal choice for those looking for a less-expensive option.

The boat features an inflatable floor and sides, which add to its buoyancy and stability. The floor of this boat is also inflatable making it not quite as stable to stand in as a wood or aluminum-bottomed boat, but the inflatable bottom is still surprisingly stable.  The lack of wood or aluminum slats also makes setup easier without having to worry about heavy and bulky solid slats. Overall, the boat sits really well in the water and feels sturdy underfoot.

In terms of design, the Tobin Sports Inflatable Boat has a sleek and modern look. We were unsure about the dark navy sections in the design and worried that it would be obvious to our marina neighbors that we went the cheap route. After we inflated it and took it for a test drive, our fears subsided.  This boat is unique in its color styling, but its roominess and performance on the water made us forget about the dark patches on the boat.

Overall, the boat’s design and construction provide a sturdy and reliable watercraft, capable of withstanding different water conditions and serving various purposes. We loved how it felt in the water and having 2 seats was a big plus for us as we could bring along 4 people in comfort.

Features and Accessories

Tobin Sports Inflatable Boat AccessoriesThe Tobin Sports Inflatable Boat comes with several features and accessories that enhance its functionality and make it a versatile boat.

First, the boat includes two aluminum paddles, which are lightweight and easy to use. The paddles are designed to be durable and provide a good grip, making it easier to maneuver the boat through the water. We pulled up the outboard and paddled around the marina to see how it performed under human power.  We were pleased with how the boat tracked and how easy and ergonomic the paddles and oarlocks were to use.  The paddles conveniently clip to the boat sides when not in use.  It’s realistic with this boat to keep them on the boat and still have them “out of the way”.

Second, the boat comes with two aluminum seats, which provide additional comfort and support. The seats lock into the boat well and are really nice to “sit above” the water when underway. The aluminum design ensures they will last and look great for years to come.

The Tobin Sports Inflatable Boat also includes a carry bag, inflation pump, and a repair kit. The bag is designed to be lightweight and compact, making it easy to transport the boat to different locations.

Overall, the features and accessories of the Tobin Sports Inflatable Boat provide additional convenience and comfort, making it a great choice for people who want to enjoy the water without the hassle of owning a full-sized boat. It’s affordably priced, yet still being a serious inflatable that is durable enough to last for years of use.

Performance and Maneuverability

Tobin Sports Inflatable Boat Aluminum Seats
The boat’s aluminum seats are a nice upgrade that should last longer than the boat itself.

The performance and maneuverability of the Tobin Sports Inflatable Boat are some of its most significant advantages. The boat is designed to be lightweight and easy to maneuver, making it an ideal option for different water activities.

In terms of performance, the boat’s inflatable floor and sides provide excellent buoyancy, making it easier to navigate through the water. The boat is also stable and well-balanced, which makes it possible to stand on without it tipping over.

The boat’s maneuverability is also noteworthy. Its streamlined shape and lightweight design make it easy to navigate through different water conditions, including calm lakes and rivers, as well as rougher ocean waves. The boat is also easy to turn and maneuver, making it an ideal option for fishing, sightseeing, and other activities.

Tobin Sports Inflatable Boat Transom
The transom of the boat fits up to 15HP motor and has convenient attachments for your fuel tank.

We were able to get the boat to plane with our 6HP motor, but this boat is a bit squirrely for our liking when it’s on a plane.  We found ourselves getting off the throttle quickly once we got up on plane as we were worried about dumping ourselves overboard.  For our use, getting between our boat and shore slow speeds are perfectly fine.  We were surprised that our 6HP could even get this boat on plane.  Our old West Marine dinghy had no chance, but the lightweight design of the Tobin Sports boat makes it possible for those with more bravery than us.

Overall, the performance and maneuverability of the Tobin Sports Inflatable Boat make it an excellent option for people who want a versatile watercraft that’s easy to use and navigate.

Pros and Cons

Like any product, the Tobin Sports Inflatable Boat has its advantages and drawbacks. Here are some of the most noteworthy pros and cons of the boat:

Tobin Sports Inflatable Boat Paddles
The paddles conveniently clip to the side of the boat to stay out of the way when not in use.
Pros:
  • Lightweight and portable design, making it easy to transport and store.
  • Durable and well-constructed with reinforced PVC material, providing excellent resistance to wear and tear.
  • Easy to inflate and deflate, with an efficient assembly and disassembly process.
  • Comes with several useful features and accessories, including aluminum paddles, aluminum seats, pump and a carry bag.
  • Excellent performance and maneuverability, making it an option for different water activities.
  • Affordable at under $1000
Cons:
  • May not be suitable for larger groups or families, as the boat is designed for up to five people.
  • Inflatable floor and sides may not provide as much support as a hard-shell boat, making it less suitable for activities that require standing or jumping.
  • Can be affected by wind and currents more than a heavier, traditional boat.
  • Requires regular maintenance, such as cleaning and proper storage, to ensure its longevity.
  • A bit sketchy when its up on plane.  We recommend sticking with slower speeds with this boat.

Overall, the pros of the Tobin Sports Inflatable Boat outweigh the cons, making it a great option for people who want an affordable, lightweight, and portable inflatable boat that provides excellent performance and maneuverability.

The Bottom Line

The Tobin Sports Inflatable Boat is a well-designed boat that performs well and is comfortable to use. We are really happy with our purchase of this boat.  For under $1000, it provides ample room and weight-carrying capacity.  It’s well-built and it looks great – despite its strange dark colors.

The boat’s accessories, such as aluminum paddles, inflatable seats, and carry bag, enhance its functionality and provide additional convenience and comfort. It’s streamlined shape and lightweight design make it easy to navigate through different water conditions, though like most inflatables, this boat is meant for calm waters.

While it’s not perfect, the Tobin Sports Inflatable Boat is an excellent option for those looking for a solid 4+ person inflatable boat that won’t break the bank. Whether you’re going fishing, sightseeing, or just enjoying a day on the water, the Tobin Sports Inflatable Boat is a great choice that won’t disappoint.

Update (7/5/23)

The Tobin Sports Inflatable Boat is hugely discounted right now (as of 7/5/23) and is listed for only $499.97 on Costco’s website. This is more than 30% off of Costco’s standard price for this boat of $739. This boat is a HUGE value at $739 compared to other inflatable boats on the market, but at $499, it’s a no-brainer. If you are in the market for an inexpensive fishing platform for your local lake, a new dinghy for your yacht, or just looking for a quality inflatable to explore local waters – pick one up now before the price changes.

We’ve also heard rumors that Costco may not be carrying the Tobin Sports Inflatable boat in the future and these big discounts are possible due to Costco trying to liquidate the remaining stock of these boats. You probably won’t find them in-store, so you’ll have to purchase one at Costco.com. Shipping and Handling are free and it’s more convenient to have a box of this size and weight shipped right to your door than lugging it through the warehouse anyway.

If you miss out on the Tobin Inflatable boat at Costco or don’t have a Costco membership, the Bestway Hydro-Force Mirovia Pro 130 is the same boat without the Costco-only “Tobin Sports” branding. Bestway relabels its inflatable boats and kayaks under the Tobin Sports brand for Costco. You can purchase the Bestway Hydro Froce version at Amazon here.


Other Inflatable Boats to Consider:

10 Must-Have Camping Gear Essentials for Your First Trip

camping gear beginners
Having the right gear can make all the difference for beginning campers.

Are you a beginner looking to embark on your first camping trip? Awesome! Camping is an amazing way to connect with nature, de-stress, and explore some new adventures. Whether you’re planning to explore the great outdoors solo or with friends and family, having the right camping gear is crucial for a successful and enjoyable experience.

In this blog post, we’ll discuss 10 must-have camping gear essentials for your first trip. From shelter and cooking gear to lighting, clothing, and safety equipment, we’ll cover everything you need to know to prepare for your adventure.

As camping gear beginners, investing in the right gear can make all the difference. With these essential items, you’ll be well-equipped to handle whatever nature throws your way.

So, let’s dive in and get prepped for that first trip sleeping under the stars! And once you’ve got all of your camping gear sorted, check out our Beginner’s Guide to Camping for tips on how to make your first trip a success.

Essential Gear #1: Tent

A tent is the most common form of shelter for campers. When choosing a tent, there are a few factors to consider, including size, weight, and ease of setup. If you’re camping with a partner or a group, make sure to select a tent that has enough space for everyone to sleep comfortably. Also, keep in mind that larger tents can be heavier and more challenging to set up than smaller ones.

Pro Tip: As a camping beginner, start with a simple simple and inexpensive tent. Prioritize size, weight, and ease of setup.  Stay away from complicated tents that will leave you frustrated in your first moments at the campground.

Our Recommended Tent for Beginning Campers:


Essential Gear #2: Sleeping bag

A sleeping bag is essential for keeping you warm and comfortable at night. When choosing a sleeping bag, consider the temperature rating, which indicates the lowest temperature at which the bag will keep you warm. You should also choose a sleeping bag made of appropriate material for the climate you’ll be camping in. Synthetic materials are typically less expensive and more durable, while down materials provide superior insulation but are more expensive and require more care.

By investing in a high-quality tent and sleeping bag, you’ll be able to rest comfortably and stay protected from the elements during your camping trip. Don’t forget to practice setting up your tent at home before your trip to ensure a stress-free setup experience at your campsite.

Pro Tip: Start with a sleeping bag that is inexpensive.  As camping gear beginners, you probably don’t need a bag rated to 20 degrees or that’s ultra-lightweight. You can always upgrade to a higher-end sleeping bag down the road as you determine how and where you like to camp.

Our Recommended Speeling Bag for Beginning Campers:


Essential Gear #3: Camp Stove

Cooking at camp is a highlight of any trip. As romantic as it sounds, you probably won’t be cooking over a campfire on your first trip. You’ll want a camp stove for cooking while camping. There are several types of camp stoves, including propane, butane, and liquid fuel stoves. When choosing a camp stove, consider the type of fuel available and the size of your camping group. It’s also important to practice safe stove use and never leave a stove unattended.

Pro Tip: Double burner stoves that use the small 1-gallon propane tanks are the way to go. Two burners will give you the cooking space to prepare a meal of any size. If you’re planning on keeping your meals simple, a single propane stove may be all you need.

Our Recommended Camp Stoves for Beginning Campers:


Essential Gear #4: Cookware

A few essential pieces of cookware can make meal preparation a breeze. A durable pot and frying pan with lids are great for cooking meals such as pasta, soup, and eggs. A good set of utensils, including a spatula, tongs, and a spoon, will also come in handy. When selecting cookware, choose materials that are durable, easy to clean, and suited to your cooking needs.

Pro Tip: Sporks are great for backpackers, mountaineers, and other specialized outdoorsmen, but bringing a set of silverware from home works just as well.  Avoid the spork if you have the space to bring your own silverware. Camping cook sets that are easily storable are really helpful when packing.  Look for a set that has the convenience of packing up into a small space.

Our Recommended Cookware Set for Beginning Campers:


Essential Gear #5: Cooler

A cooler is one of the few items you won’t do right on your first trip. You can start with inexpensive tents and sleeping bags, but a good cooler with prevent your ice from melting prematurely and will keep your food cold for the duration of your trip.  Look for a cooler with enough space for your food and beverages, and consider the size and weight of the cooler when making your selection. It’s also important to keep your cooler in the shade and replenish the ice regularly to ensure the contents stay cold.

Pro Tip: You don’t need to splurge on a Yeti, but make sure to get a cooler that is well-insulated.  Look for coolers that promise to keep your ice for 5 days in high heat.  You don’t want to be searching for more ice far away from the city. Oh… and wheels on a cooler are a special type of heaven.

Our Recommended Cooler for Beginning Campers:


Essential Gear #6: Headlamp or Flashlight

When camping, it can get dark at night.  After all, seeing the stars is one of the key reasons you decided to try camping, right? A headlamp or flashlight is a must-have for moving around your campsite in the dark. A headlamp is a hands-free option that allows you to keep your hands free while you navigate your campsite. A flashlight is also a great option and can be used for lighting up specific areas. When choosing a headlamp or flashlight, look for a model that is durable, waterproof, and has a long battery life.

Pro Tip: Go the headlamp route. Sure, you’ll look like a dork, but having your hands free while being able to see what’s out there is worth it.  And with a headlamp is a no-brainer for cooking meals at night. With a headlamp, people will think you are serious about your camping gear and not just camping gear beginners.

Our Recommended Headlamp for Beginning Campers:


Essential Gear #7: Lantern

A lantern is a great way to light up your entire campsite. There are several types of lanterns, including electric, battery-powered, and propane lanterns. Electric lanterns are convenient and easy to use, but they require a power source. Battery-powered lanterns are portable and can be recharged with solar panels or batteries. Propane lanterns are fuel-powered and provide bright, long-lasting light. When choosing a lantern, consider the size, weight, and brightness of the lantern, as well as its power source.

Pro Tip: Get a rechargeable LED lantern.  Some even have USB ports that you can use to charge your phone. Unless you’re dreaming of the nostalgic hiss of a propane lantern, avoid the hassle and go with an LED lantern.

Our Recommended Lantern for Beginning Campers:


Essential Gear #8: Sleeping Pad or Air Mattress

Camping is about keeping it simple and “roughing it” is a part of the romance of the experience, but don’t sacrifice good sleep if you don’t have to.  A sleeping pad or air mattress can go a long way in making your camping trip a successful and enjoyable experience.  Sleeping pads are typically made of foam or are self-inflating.  Air mattresses pack small when deflated, but are big in the comfort department when it’s time for bed.

Pro Tip: As a beginning camper, we recommend going with an air mattress for ease of use.  Sure there is some setup involved, but air mattresses take up very little packing room and the sleep comfort will be closer to your mattress at home than most sleeping pads. Make sure to pack a pump for easy air mattresses set up.

Bonus Tip: If romance is on your packing list for your first camping trip, consider a double or queen-sized air mattress that you and your partner can both “use”. This one tip will move you from camping gear beginners to camping gear experts in one swift move.

Our Recommended Air Mattresses for Beginning Campers:


Essential Gear #9: Camp Chairs

To round out your camping gear, you’ll want a place to sit and relax when camping. Whether it’s chilling by the campfire or sipping your morning coffee, camp chairs provide seating that’s lightweight and easily packable. Camp chairs can also come in handy back home from kids’ games to picnics to extra seating when having people over.

Pro Tip: Go cheap on camp chairs as camping gear beginners. Just about any camp chair will do the job and even inexpensive chairs should last a few years.  Once you decide what types of chairs you prefer (rocking, shock-supported, double, or insanely packable), you can upgrade down the line.

Our Recommended Camp Chair for Beginning Campers:


Essential Gear #10: First Aid Kit

Accidents can happen (and probably will), so it’s important to bring a first aid kit with you on your camping trip. A basic first aid kit should include items such as bandages, antiseptic wipes, and pain relievers. You’ll be glad you have a first aid kit on hand to deal with anything that may come up on your camping trip.

Pro Tip: If you pick up a decently equipped first aid kit for camping, you can also use it at home as well. Look for kits that come in a carry case for easy packing and storage.

Our Recommended First Aid Kit for Beginning Campers:


The Bottom Line

By packing these essential items, you’ll be well-prepared for your first camping trip. As camping gear beginners, don’t sweat not having the latest and greatest camping gear.  Prioritizing the essentials purchased at affordable prices allows you to upgrade your camping gear as you camp more. Don’t forget to check the weather forecast, plan your meals and activities, and familiarize yourself with any safety guidelines or rules specific to your campsite.

Camping can be a fun and rewarding experience, and having the right gear can make all the difference. Whether you’re camping for one night or several days, being well-prepared can help ensure a comfortable and enjoyable trip. So, gather your gear, grab some friends or family, and hit the great outdoors!

Good luck on your first trip to the outdoors!


Now that you’ve got all of your camping gear sorted, check out our Beginner’s Guide to Camping for tips on how to make your first trip an enjoyable one for all.

Why Swag Tents Are the Coolest Camping Gear You Haven’t Heard Of

swag tent
The swag tent was born in the Australian Outback, but their popularity is growing across the globe

Camping is one of the best ways to escape the hustle and bustle of everyday life and enjoy nature. However, choosing the right camping gear can make or break your experience. When it comes to camping gear, most people think of traditional tents, sleeping bags, and campfires. But have you heard of a swag tent? Swag tents are an innovative and convenient way to camp, providing a comfortable and protective sleeping space that’s easy to set up and take down.

In this article, we’ll introduce you to swag tents and explain why all the cool kids are getting them. We’ll dive into the history and evolution of swag tents, explore their advantages over traditional tents, and discuss the different types of swag tents available. We’ll also offer tips for choosing the right swag tent for you and your camping needs. Whether you’re an experienced camper or just starting out, this guide will show you why swag tents are a game-changer for your next outdoor adventure.

History of Swag Tents

swag tent in the Australian Outback
Swag Tents are portable shelters originally used by drovers in Australia.

Swag tents have a rich history that dates back to the early days of Australian colonization. Originally used by drovers (people who drive cattle or sheep to market), swag tents were portable shelters that could be easily transported on horseback or by foot as they moved livestock across the vast Australian outback. These early swag tents were typically made of canvas or other heavy-duty materials and provided a comfortable and protective sleeping space for drovers during their long journeys.

Over time, swag tents became a staple of Australian camping culture. They evolved to include more lightweight and portable materials, as well as additional features like built-in mattresses, storage pockets, and insect screens. Today, swag tents are used not only in Australia but also in other parts of the world as a convenient and comfortable alternative to traditional camping tents.

In the northern hemisphere, swag tents are sometimes known as bivy sacks, but there are differences between the two.  Bivy sacks are typically made of lighter-weight materials and designed for backpackers and mountaineers who prioritize lightweight gear. While both bivy sacks and swag tents are tubular in shape, swag tents include a sleeping pad while bivy sacks do not.

Despite their long history, many campers in other parts of the world have yet to discover the benefits of swag tents. But with their ease of use, comfortable sleeping space, and versatility, it’s no wonder that swag tents are gaining popularity among outdoor enthusiasts around the globe.

Advantages of Swag Tents

Swag tents offer a number of advantages over traditional camping tents. Here are some of the top benefits of using a swag tent on your next camping trip:

Kodiak Canvas Swag Tent
Swag Tents typically include a sleeping pad as a part of the tent.
Convenience and ease of use

Swag tents are designed to be easy to set up and take down, making them ideal for campers who want a quick and hassle-free camping experience. Most swag tents come with built-in poles and can be set up in minutes, without the need for any additional tools or equipment. Swag tents are perfect for solo campers who don’t need the large size, weight, and hassle of a typically sized tent that sleeps multiple campers.

Comfort and protection from the elements

Swag tents are typically made of durable and waterproof materials that provide excellent protection from the elements. They also often come with built-in mattresses and other features that make for a comfortable sleeping space, even in rugged outdoor environments. Swag tents are more comfortable than bivy sacks due to their heavier-weight materials and included sleeping pad.

Versatility and adaptability

Swag tents come in various shapes and sizes, and can be used in a wide range of camping situations. Whether you’re camping in a tent, on the ground, or in the back of your car, there’s a swag tent that’s right for you. Small in size, swag tents can be easily thrown in the back of a vehicle when you’re looking to get outdoors in a hurry.

Comparison to traditional camping tents

Compared to traditional camping tents, swag tents are often more portable, easier to set up and take down, and offer greater protection from the elements. They also provide a unique and comfortable camping experience that can’t be replicated with a traditional tent. Sleeping in a swag tent allows you to experience the outdoors just like the Australian drovers did back in the day – a unique experience that can’t be replicated by a traditional tent.

Swag tents offer a convenient, comfortable, and adaptable camping solution that’s perfect for anyone looking to explore the great outdoors. Whether you’re a seasoned camper or just starting out, a swag tent might be just what you need to take your camping experience to the next level.

How to Choose the Right Swag Tent for You

Choosing the right swag tent is an important decision that can have a big impact on your camping experience. Here are some factors to consider when selecting a swag tent:

Size

Swag tents come in a range of sizes, from single-person tents to larger models that can accommodate two or more people. Consider how many people you’ll be camping with and how much space you’ll need to feel comfortable.

Material

Swag tents are typically made from materials like canvas, nylon, or polyester. Consider the durability, water resistance, and breathability of each material when making your choice. Canvas swag tents are the most durable and have excellent water-resistant qualities, but are heavier than nylon swags.

swag tent
Swag tents offer a unique camping experience – especially for solo campers.
Features

Swag tents come with various features, including built-in mattresses, storage pockets, insect screens, and more. Think about which features are important to you and your camping needs. A swag tent that is easy to deploy is a feature to look for. Be sure to consider how quickly your swag can be set up when choosing the right swag tent for you.

Weight

Swag tents can vary in weight, with some models weighing as little as a few pounds and others weighing more than 50 pounds. Consider how much you’ll need to carry your tent and whether weight is a significant factor for you. If a lightweight tent is a priority, make sure to also consider lighter and more portable bivy sacks that are very similar to swag tents.

Price

Swag tents can range in price from under $100 to several hundred dollars. Consider your budget and look for a tent that offers the features and quality you need at a price you can afford. If you’re looking to spend the money on a more expensive swag tent, expect that it will be more robustly built from durable materials.  A more expensive swag tent should last longer, making it an investment to seriously consider.

Overall, the right swag tent for you will depend on your specific camping needs and preferences. Take the time to research different models and consider your priorities before making your purchase. With the right swag tent, you’ll be able to enjoy a comfortable and convenient camping experience that you won’t soon forget.

The Bottom Line

Swag tents may not be as well-known as traditional camping gear like tents and sleeping bags, but they offer a unique and convenient option for campers looking for a comfortable and easy-to-use shelter. With their built-in mattresses, durable materials, and a range of sizes and features, swag tents are a great choice for solo campers and couples looking for a unique camping experience.

When selecting a swag tent, it’s important to consider factors like size, material, features, weight, and price to find the right model for your camping needs. With a little research and careful consideration, you can find a swag tent that provides the comfort and convenience you need for your next camping adventure.

Whether you’re a seasoned camper or a beginner looking to try something new, a swag tent is a cool and unique option that’s definitely worth considering. So why not give it a try and see for yourself why swag tents are quickly becoming one of the coolest camping gear options out there?


Our Favorite Swag Tent Available in North America

We love Kodiak Canvas tents and we’ve featured their Flex-Bow Tent here at Outward Spaces previously. Kodiak Canvas’ swag tent looks to be just as well built as their larger tents.  We have experienced first hand the durability and weather protection that Kodiak Canvas tents are know for.

Preparing for the Worst: Essential Tips for Surviving in the Wilderness

survival tips for wilderness

When you’re out in the wilderness, anything can happen. A wrong turn, an unexpected storm, or a sudden injury can quickly turn a fun adventure into a life-threatening situation. That’s why it’s crucial to be prepared with the right knowledge, skills, and gear for survival. We all could brush up on survival tips for wilderness trips gone wrong.

In this article, we’ll provide essential survival tips for wilderness emergencies. Whether you’re an experienced hiker or a novice camper, these tips will help you be better prepared for the unexpected. We’ll cover everything from basic navigation techniques and essential survival gear to finding food and water and building shelter. We’ll also discuss first aid and emergency response, so you can be ready to handle common wilderness emergencies.

Remember, when it comes to wilderness survival, preparation is key. By taking the time to learn and practice these essential skills, you can increase your chances of staying safe and coming home from your wilderness adventure. So let’s dive in and explore the world of wilderness survival together.

Tip #1: Understand the Environment

The first of our survival tips for wilderness emergency situations is understanding the environment you’ll be navigating. Different types of wilderness environments present unique challenges and hazards that require specific skills and gear.

For example, a desert environment requires special attention to hydration and sun protection, while a mountain environment requires preparation for rapidly changing weather and altitude sickness. Before you head out on your adventure, take the time to research and understand the environment you’ll be navigating. This includes studying maps, reading guidebooks, and checking weather forecasts.

Another important consideration is the time of year. Different seasons present different challenges, such as extreme heat or cold, heavy precipitation, or dangerous wildlife activity. It’s important to plan your trip accordingly and prepare for the specific challenges of the season.

In addition to researching the environment, it’s also important to be aware of your surroundings while you’re out in the wilderness. Pay attention to changes in the weather, terrain, and wildlife activity. This can help you anticipate and avoid potential hazards before they become a problem.

By understanding the environment and being aware of your surroundings, you can better prepare for the challenges of wilderness survival and stay safe on your adventure.

Tip #2: Pack Essential Survival Gear

When it comes to wilderness survival, having the right gear can mean the difference between life and death. Here are some essential items to consider when packing for your wilderness adventure:

  1. survival tips for wilderness
    A good knife is a must-have in your emergency survival kit.

    Knife – A good quality knife is a versatile tool that can be used for everything from cutting rope to preparing food. The Mini Praxis Folding Pocket Knife from CIVIVI is a highly-rated knife that is easy to carry and can be a lifesaver when disaster strikes.

  2. Water filter – Clean drinking water is essential for survival, but it’s not always readily available in the wilderness. A water filter can help remove harmful bacteria and other contaminants from natural water sources. The LifeStraw Personal Water Filter is the gold standard for small, portable water filters that should be a vital part of your survival gear.
  3. Firestarter – Fire provides warmth, light, and a way to cook food, so it’s essential to have a reliable way to start a fire. Options include matches, lighters, and fire starters. We recommend carrying a Flint Fire Starter as a part of your emergency kit.
  4. Map and compass – Knowing where you are and where you’re going is crucial for wilderness navigation. A map and compass can help you stay on track and avoid getting lost. The Sportneer Survival Compass is a handy piece of kit to have on hand in case of survival situations.
  5. First aid kit – Injuries and accidents can happen in the wilderness, so it’s important to have a well-stocked first aid kit. Make sure it includes items like bandages, gauze, antiseptic wipes, and tweezers. We’ve highlighted first aid kits from Adventure Medical Kits in the past at Outward Spaces.  We love their wide selection of activity-based medical kits. We recommend their Explorer Medical Kit to keep you covered for most outdoor activities.
  6. Shelter – Protection from the elements is crucial for survival, so it’s important to have a way to create shelter. Options include tents, tarps, and emergency blankets. When you find yourself in a dangerous situation, you’ll be glad you have a Life Bivy from Go Time Gear on hand. The Life Bivy is an emergency bivy sack that will protect you from the extreme elements in an emergency.

These are just a few examples of essential survival gear. Depending on the environment and the length of your trip, you may need additional items like extra clothing, a water bottle, or a signaling device. Remember to pack only what you need and make sure your gear is high quality and reliable.

Prefer to have a bunch of great survival tools on hand in a complete kit? Check out this highly-rated emergency survival kit that includes 142 pieces of gear that could help save your life.

By having the right gear on hand, you’ll be better equipped to handle the challenges of wilderness survival and increase your chances of making it back home safely.

When considering survival gear, we prefer to carry an item that can avoid survival experiences altogether – a satellite communicator. The Zoleo Satellite Communicator is an affordable device that allows you to contact emergency services (or friends back home) in the case of an outdoors emergency.  It utilizes satellite technology to work even far from cell phone coverage areas.

Tip #3:Become Well-Versed in Navigation Techniques

Getting lost in the wilderness can be a terrifying experience, but with the right navigation techniques, you can stay on course and avoid getting lost. Here are some essential navigation techniques to consider:

  1. Map and compass – As mentioned in the previous section, a map and compass are essential navigation tools. Make sure you know how to read a map and use a compass before heading out on your adventure.
  2. Landmarks – Use natural landmarks like mountains, rivers, and rock formations to orient yourself and stay on track. Take note of these landmarks on your map so you can easily recognize them while navigating.
  3. Sun and stars – If you don’t have a compass, you can still navigate using the sun and stars. Learn how to use them to determine direction and time of day.
  4. GPS – While not a replacement for map and compass skills, a GPS can be a helpful navigation tool. Just be sure to bring extra batteries or a solar charger to keep it powered up. The Garmin GPSMAP 67i is a handheld GPS built for the outdoors and includes Garmin’s inReach satellite technology to stay connected with emergency services when far off-grid.
  5. Leave a trail – As you navigate, leave markers like flagging tape, cairns, or rocks to help you find your way back or to guide rescuers if necessary.

By mastering these navigation techniques, you’ll be better equipped to stay on course and avoid getting lost in the wilderness. Remember to always stay aware of your surroundings and make adjustments to your plan as needed.

Tip #4: Prioritize Finding Food and Water

In the wilderness, finding food and water can be a major challenge. Here are some tips for finding these essential resources:

  1. finding water in a survival situation
    You can find water via natural sources like streams, rivers, and lakes, but be sure to filter or purify the water before drinking to avoid waterborne illnesses.

    Water – Your body can only survive for a few days without water, so finding a clean water source is a top priority. Look for natural sources like streams, rivers, and lakes, but be sure to filter or purify the water before drinking to avoid waterborne illnesses.

  2. Food – While it’s possible to survive for weeks without food, finding a source of sustenance can greatly increase your chances of survival. Look for edible plants and berries, fish, small game, and insects. Make sure you’re familiar with the local flora and fauna and avoid any plants or animals that are poisonous or could make you sick.
  3. Fishing and trapping – If you’re near a body of water, fishing can be an excellent way to get protein. Make sure you have the right gear and know the local fishing regulations. Trapping small game can also be an effective way to get food.
  4. Survival skills – Knowing basic survival skills like fire starting, shelter building, and navigation can greatly increase your chances of finding food and water. For example, learning how to identify animal tracks and signs can help you track and hunt game.

Remember to conserve your energy and resources when searching for food and water. Don’t expend more energy than necessary and make sure to rest and hydrate regularly. By following these survival tips for wilderness emergencies, you’ll be better equipped to find the resources you need to survive in the wilderness.

Tip #5: Learn in Advance How to Build A Shelter

Having a shelter can provide protection from the elements, help regulate body temperature, and increase your chances of survival. Here are some tips for building a shelter in the wilderness:

  1. Location – Look for a shelter location that’s protected from the elements, such as under a rock overhang or near a natural windbreak. Avoid areas that are prone to flooding or that are in the path of potential hazards like falling rocks or trees.
  2. Materials – Use natural materials like branches, leaves, and bark to build your shelter. Look for materials that are dry and sturdy, and avoid using anything that’s rotten or diseased.
  3. Type of shelter – There are many types of shelters you can build in the wilderness, depending on your location and resources. Some common types include lean-tos, debris huts, and A-frame shelters. Research and practice building different types of shelters to determine what works best for you.
  4. Insulation – Adding insulation to your shelter can help regulate body temperature and keep you warm at night. Use materials like leaves, grass, or pine needles to create a thick layer of insulation between you and the ground.
  5. Fire – If possible, build your shelter near a source of fuel for a fire. This can provide warmth, light, and a way to cook food.

By following these tips and building a sturdy shelter, you’ll be better equipped to handle the challenges of wilderness survival. Remember to practice building shelters in different environments and weather conditions to increase your skills and confidence.

Tip #6: First Aid and Emergency Response

Accidents can happen even to the most experienced wilderness adventurer. It’s essential to have basic first aid skills and knowledge of emergency response protocols to handle unexpected situations. Here are some tips for first aid and emergency response in the wilderness:

starting a fire - survival tips for wilderness
When in survival situations, it’s essential to have a reliable way to start a fire.
  1. First aid kit – Always bring a well-stocked first aid kit with you. Make sure it includes items like bandages, gauze, antiseptic, pain relievers, and a first aid manual.
  2. Basic first aid skills – Learn basic first aid skills like wound care, splinting, and CPR. Take a wilderness first aid course to learn how to handle common injuries and emergencies.
  3. Emergency signaling – In case of an emergency, you need a way to signal for help. Bring signaling devices like a whistle, signal mirror, or flare gun, and know how to use them.
  4. Emergency response protocol – Have a plan in case of an emergency. Make sure someone knows where you’re going and when you’re expected to return. If someone gets injured, decide whether to stay put or seek help, and know how to contact emergency services.
  5. Mental preparation – Accidents and emergencies can be stressful and traumatic. Prepare yourself mentally by staying calm, practicing mindfulness, and visualizing potential scenarios.

By being prepared and knowing basic first aid and emergency response protocols, you’ll be better equipped to handle unexpected situations in the wilderness. Remember to stay calm, assess the situation, and prioritize your actions to increase your chances of survival.

The Bottom Line

Surviving in the wilderness requires preparation, knowledge, and skills. By understanding the environment, having essential survival gear, knowing navigation techniques, finding food and water sources, building a shelter, and having basic first aid and emergency response skills, you’ll be better equipped to handle unexpected situations and increase your chances of survival.

Remember, the wilderness can be both beautiful and dangerous, so always prioritize safety and take necessary precautions. Don’t hesitate to turn back or change your plans if conditions become too difficult or risky.

We hope you’ve found these survival tips for wilderness emergencies helpful. By following the tips and techniques outlined in this article and practicing your skills, you can experience the thrill of wilderness adventure while staying safe and prepared for whatever challenges come your way.


Have additional survival tips for wilderness emergencies? We want to hear them, let us know below in the comments.

Pitching a Tent in Sedona: The Best Free Camping Spots

camping sedona free

Nestled in the heart of Arizona, Sedona boasts stunning red rock formations, breathtaking canyons, and a vibrant arts community. It’s no wonder that Sedona is a popular destination for outdoor enthusiasts and adventurers seeking a natural escape from the hustle and bustle of everyday life. While there are plenty of accommodations available in Sedona, many visitors prefer to immerse themselves in the natural beauty of the area through camping.

Camping in Sedona is an experience like no other. The desert landscape offers a unique and striking backdrop, with plenty of opportunities for hiking, stargazing, and other outdoor activities. However, finding the right campsite can be a challenge, especially for travelers on a budget. That’s why in this article, we’ll be discussing the best free camping spots in Sedona, so you can make the most of your adventure in the desert. Whether you’re a seasoned camper or a first-time visitor, we’ve got you covered.

Benefits of Free Camping in Sedona

camping sedona free
By camping for free, youcan save money on accommodation and instead invest in other experiences, such as hiking, rock climbing, or exploring Sedona’s arts and culture scene.

Camping in Sedona can be a budget-friendly alternative to staying in a hotel or resort. Free camping options are available throughout the area, including in the Coconino National Forest and on Bureau of Land Management (BLM) land. By choosing to camp for free, travelers can save money on accommodation and instead invest in other experiences, such as hiking, rock climbing, or exploring Sedona’s arts and culture scene.

In addition to being budget-friendly, free camping in Sedona offers a unique experience for travelers. Camping in the desert can be a peaceful and rejuvenating experience, with the opportunity to connect with nature in a way that’s impossible in the city. The expansive night skies are perfect for stargazing, and the natural quiet of the desert can be a refreshing break from the noise of urban life.

Finally, camping in Sedona provides visitors with the opportunity to explore the beauty and diversity of the area at their own pace. With so many free camping options available, travelers can choose a campsite that’s close to their preferred hiking trails or other activities. This allows visitors to fully immerse themselves in the natural beauty of Sedona, without the constraints of a traditional vacation itinerary.

Choosing the Right Campsite

Choosing the right campsite is key to a successful and enjoyable camping experience in Sedona. With a variety of campsites available, it’s important to do your research before arriving in the area. Here are some tips to help you choose the right campsite for your needs:

  1. Consider the type of campsite: There are several types of campsites available in Sedona, including established campgrounds, BLM land, and dispersed camping. Established campgrounds offer amenities such as picnic tables, fire pits, and restrooms, but may require reservations and have fees. BLM land and dispersed camping are free, but may have fewer amenities and require a permit.
  2. Check regulations: It’s important to check the regulations for your chosen campsite before arriving. Some campsites may have restrictions on campfires or camping equipment, while others may have restrictions on the length of stay.
  3. Location: Consider the location of your campsite in relation to your planned activities. If you’re planning on hiking, look for a campsite that’s close to your preferred trailheads. If you’re interested in stargazing, look for a campsite that’s far from the city lights.
  4. Amenities: If you’re looking for amenities such as restrooms, picnic tables, or fire pits, make sure to choose a campsite that offers those amenities. Some campsites may also offer access to potable water or RV hookups.

By taking the time to research and choose the right campsite for your needs, you can ensure a comfortable and enjoyable camping experience in Sedona. Campendium is a great resource for finding camping spots that specifically fit your needs – including free campsites.

Top Free Camping Spots in Sedona

Pumphouse Wash (FR 237)

Pumphouse Wash is a dispersed camping area located halfway between Flagstaff and Sedona off Highway 89A. The campsites at Pumphouse Wash are designated sites, but no amenities are available – so bring everything you’ll need for your trip along. To get to the Pumphouse Wash area, take Highway 89A north from Sedona and turn east on FR 237. Since these are designated sites, camping outside of these areas can result in a ticket.

YouTube player
Forest Service Road 535

Forest Service Road 535 offers dispersed camping north of Sedona on Highway 89A. Camping is permitted along the road once off the highway for several miles. Unfortunately, this area is known for having a lot of trash and some loud campers. For more peace and quiet head a bit further back before setting up camp. There are no amenities.

Loy Butte Road

Loy Butte Road is another BLM camping spot that offers stunning views of Sedona’s red rocks. The campsite is accessible by a dirt road and offers dispersed camping opportunities. Located southwest of town, camping is permitted for several miles along this beautiful dirt road as it winds its way through the Red Rocks. There are no amenities, but the views make up for it.

YouTube player
Edge of the World/East Pocket

One of the best dispersed (free) camping spots near Sedona is the Edge of the World, also known as East Pocket. With large cliff dropoffs with views of Sedona’s statuesque red rocks, The Edge of the World is one of the top dispersed camping spots in Arizona. It can get busy when the weather is good, so plan accordingly. Located in the Coconino National Forest of Flagstaff, Arizona, it is most commonly accessed by a 26-mile-long dirt road called Woody Mountain Road, but can also be accessed by taking FR535 to FR231. View the Edge of the World in Google Maps.

YouTube player

These are just a few of the top free camping spots in Sedona. With so many options available, there’s sure to be a campsite that meets your needs and allows you to fully immerse yourself in the beauty of Sedona.

Looking for more dispersed campsites in Sedona?  Check out Campendium to find other free campsites nearby.

Camping Tips and Safety Guidelines

Camping in Sedona can be a fun and rewarding experience, but it’s important to follow some basic camping tips and safety guidelines to ensure a safe and enjoyable trip. Here are some tips to keep in mind:

  1. camping sedona free
    Many of the forest roads around Sedona are closed for the winter, so late Spring, Summer, and early Fall are the best times for dispersed camping.

    Pack appropriately: Make sure to pack appropriate clothing and gear for the weather and your planned activities. This may include warm layers, rain gear, and sturdy hiking boots. Also, make sure to bring enough food and water for your entire trip.

  2. Respect the environment: When camping in Sedona, it’s important to respect the environment and leave no trace. This means packing out all trash and minimizing your impact on the land. Avoid using soap or other toiletries in natural water sources, and be mindful of any fire restrictions or regulations.
  3. Be aware of wildlife: Sedona is home to a variety of wildlife, including snakes, spiders, and coyotes. Make sure to keep your campsite clean and store food in bear-resistant containers to avoid attracting wildlife. Also, be mindful of any potential hazards, such as poisonous plants or rocky terrain.
  4. Practice fire safety: If campfires are allowed in your chosen campsite, make sure to practice fire safety. Clear the area around the fire pit of any debris or flammable materials, and never leave a fire unattended. Make sure to fully extinguish your fire before leaving your campsite.
  5. Be prepared for emergencies: It’s always a good idea to be prepared for emergencies when camping. Make sure to bring a first aid kit and know how to use it. Also, make sure to have a map and compass or GPS device to navigate in case of an emergency.

By following these basic camping tips and safety guidelines, you can ensure a safe and enjoyable camping experience in Sedona.

Conclusion

Camping in Sedona offers a unique opportunity to immerse yourself in the natural beauty of the area. Whether you’re looking for a backcountry adventure or a more established campground experience, Sedona has plenty of options to choose from.

By following the camping tips and safety guidelines outlined in this article, you can ensure a safe and enjoyable trip. Remember to pack appropriately, respect the environment, be aware of wildlife, practice fire safety, and be prepared for emergencies.

So pack your tent, sleeping bag, and other gear and head out to one of Sedona’s top free camping spots. With stunning views, access to hiking trails and waterways, and plenty of opportunities for outdoor adventure, Sedona is the perfect destination for a camping trip.


Wanna learn more about dispersed camping, also known as “boondocking”? Check out our article, “Why Boondocking is the Ultimate Adventure for Nature Lovers”.

  • 1
  • 2